Cloudera Data Science Workbench Administration Guide
- Go to the Cloudera Data Science Workbench web application (http://cdsw.company.com) and log in as a site administrator.
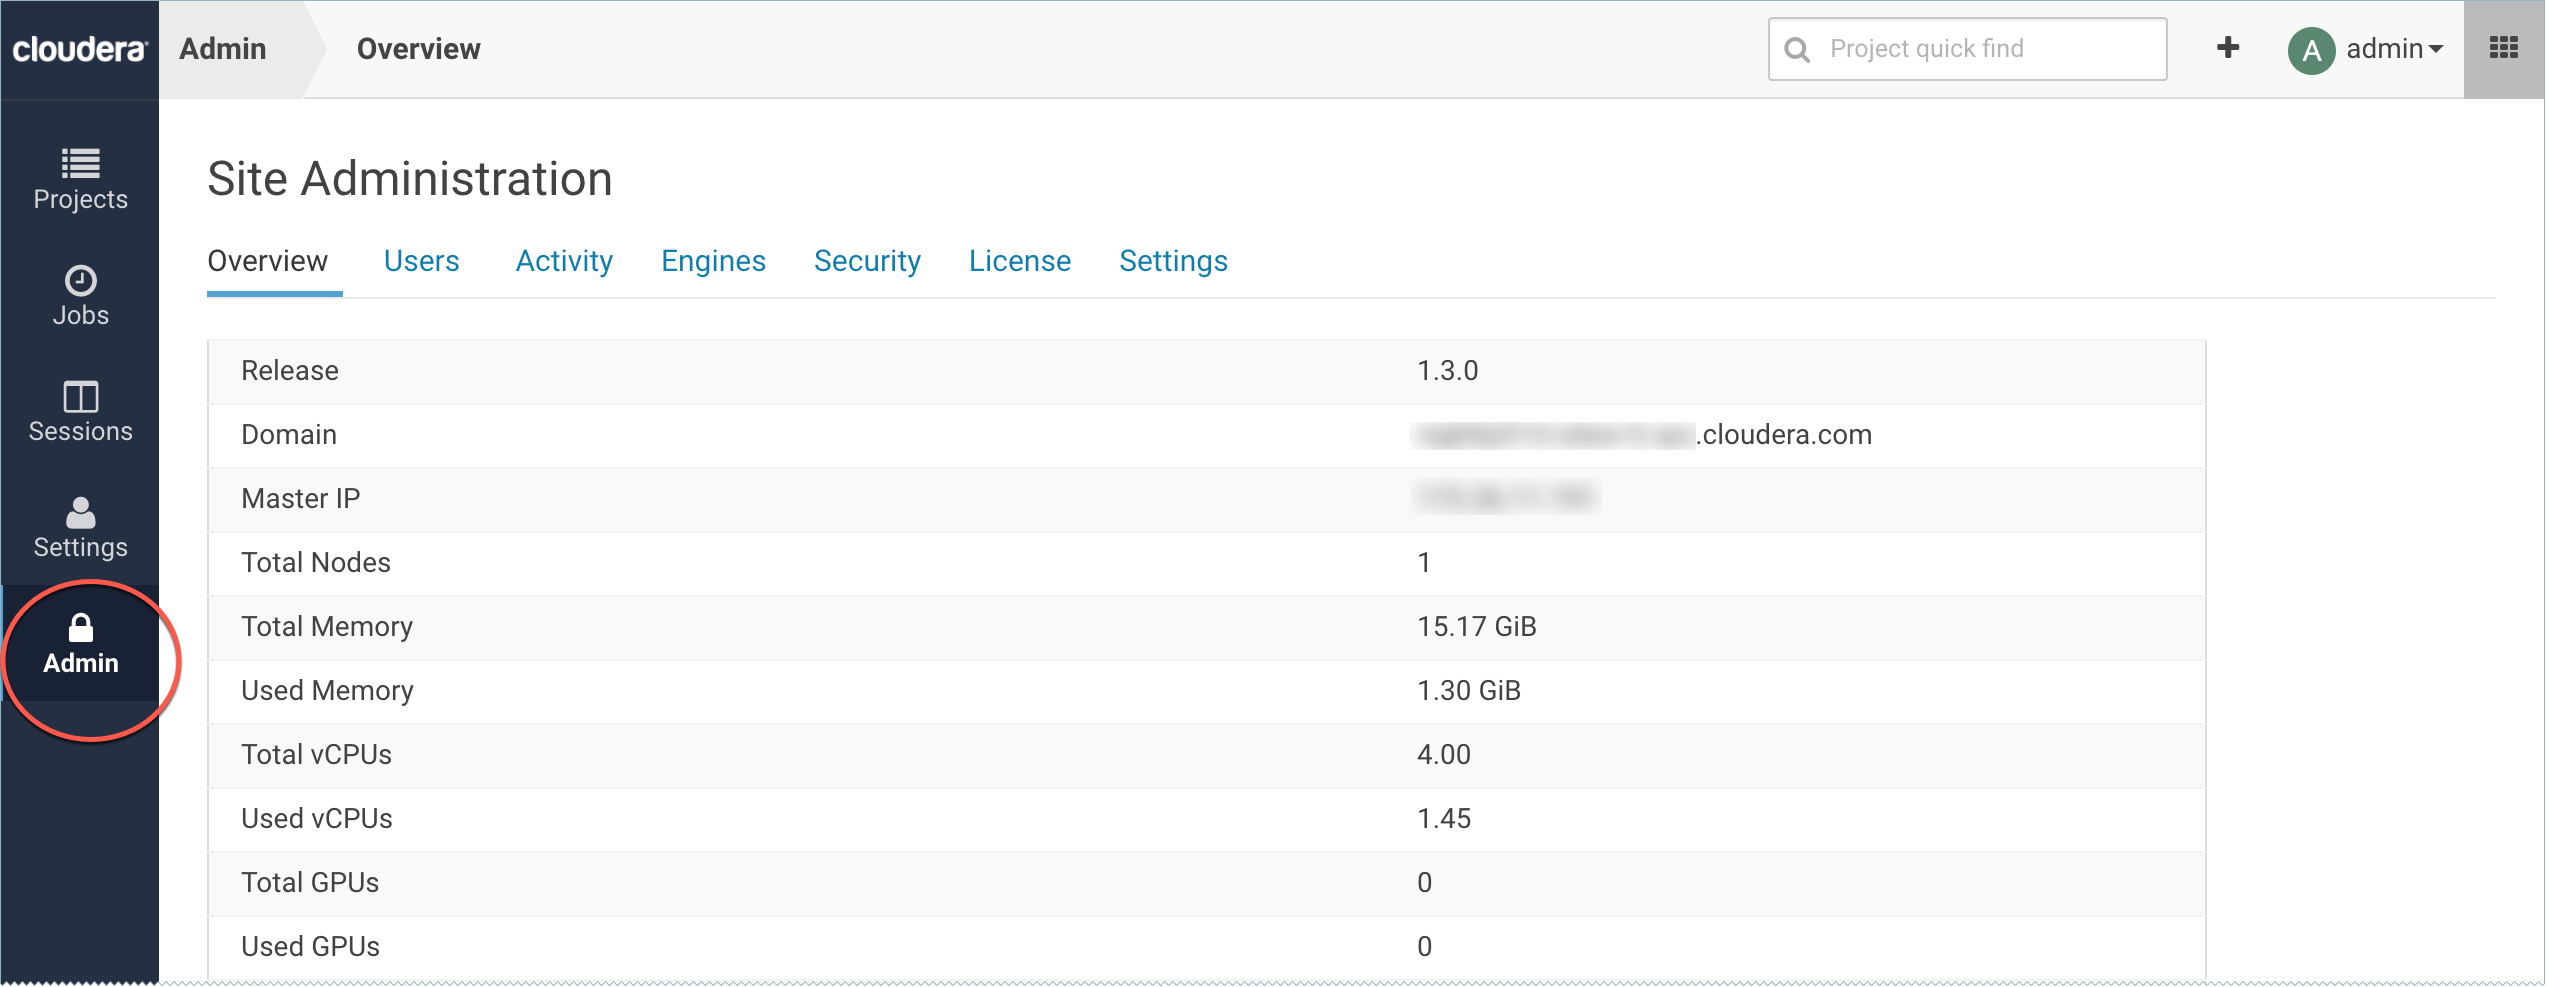
- On the left sidebar, click Admin. You will see an array of tabs for all the tasks you can perform as a site administrator.
The rest of this topic describes some common tasks for a Cloudera Data Science Workbench site administrator.
Managing Users
As a site administrator you can add new users, assign or modify privileges for existing users, and monitor user activity on the Cloudera Data Science Workbench deployment.
Adding New Users
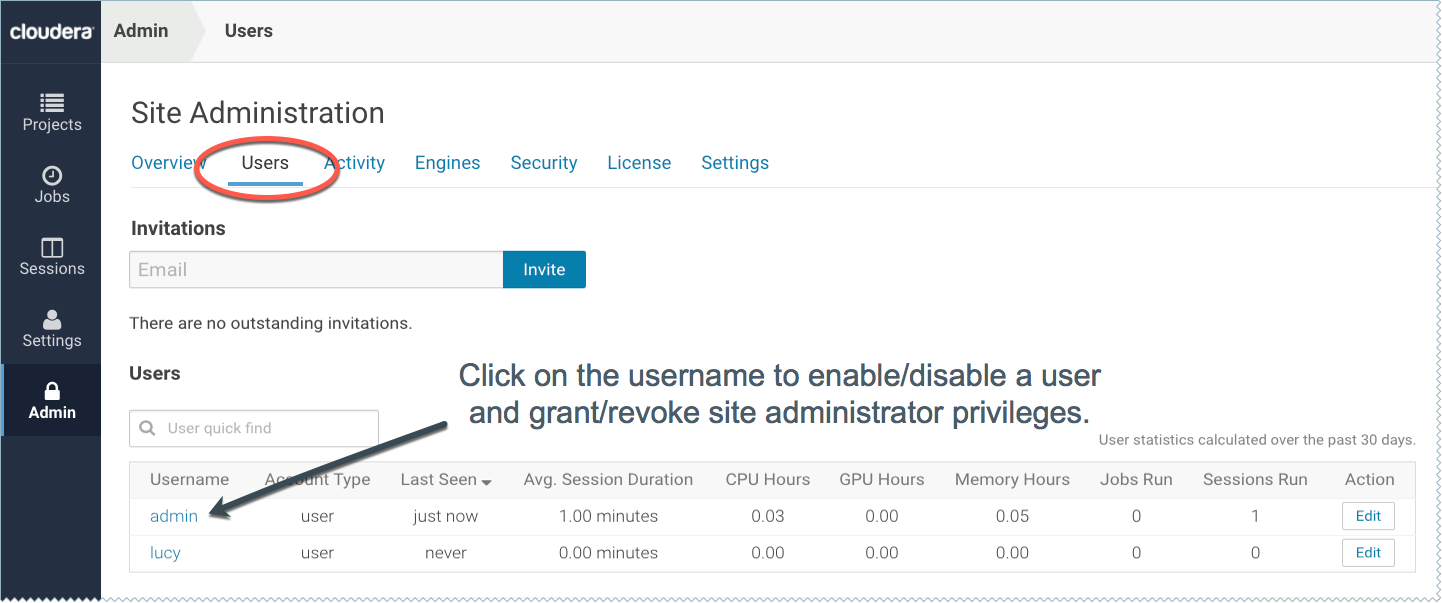
To invite new users, navigate to the tab. Under Invitations, enter the name or email ID of the person you want to invite and click Invite. This tab will show you a list of all outstanding invitations. Once an invitation has been accepted, the record will no longer show up on this page. The Users tab also displays a list of users of the application. Click on a username to see more details about the user.
If you want new users to join by invitation only, go to the tab and check the Require invitation to sign up checkbox to require invitation tokens for account creation. By default, invitations are sent from noreply@your-cdsw-domain. To modify this default, see Setting up Email Notifications.
Assigning the Site Administrator role to an Existing User
- Sign in to Cloudera Data Science Workbench as a site administrator.
- Click Admin.
- Click the Users tab.
- Click on the username of the user who you want to make a site administrator.
- Select the Site Administrator checkbox.
- Click Update.
Disabling User Accounts
Use the following instructions to disable user accounts. Note that disabled users cannot login and do not count towards named users for licensing.
- Sign in to Cloudera Data Science Workbench as a site administrator.
- Click Admin.
- Click the Users tab.
- Click on the username of the user who you want to disable.
- Select the Disabled checkbox.
- Click Update.
Monitoring Users
The Users tab on the admin dashboard displays the complete list of users. You can see which users are currently active, and when a user last logged in to the Cloudera Data Science Workbench. To modify a user's username, email or permissions, click the Edit button under the Action column.
Monitoring Site Activity
The tab displays basic information about your deployment, such as the number of users signed up, the number of teams and projects created, memory used, and some average job scheduling and run times. You can also see the version of Cloudera Data Science Workbench you are currently running.
The tab of the dashboard displays the following time series charts. These graphs should help site administrators identify basic usage patterns, understand how cluster resources are being utilized over time, and how they are being distributed among teams and users.
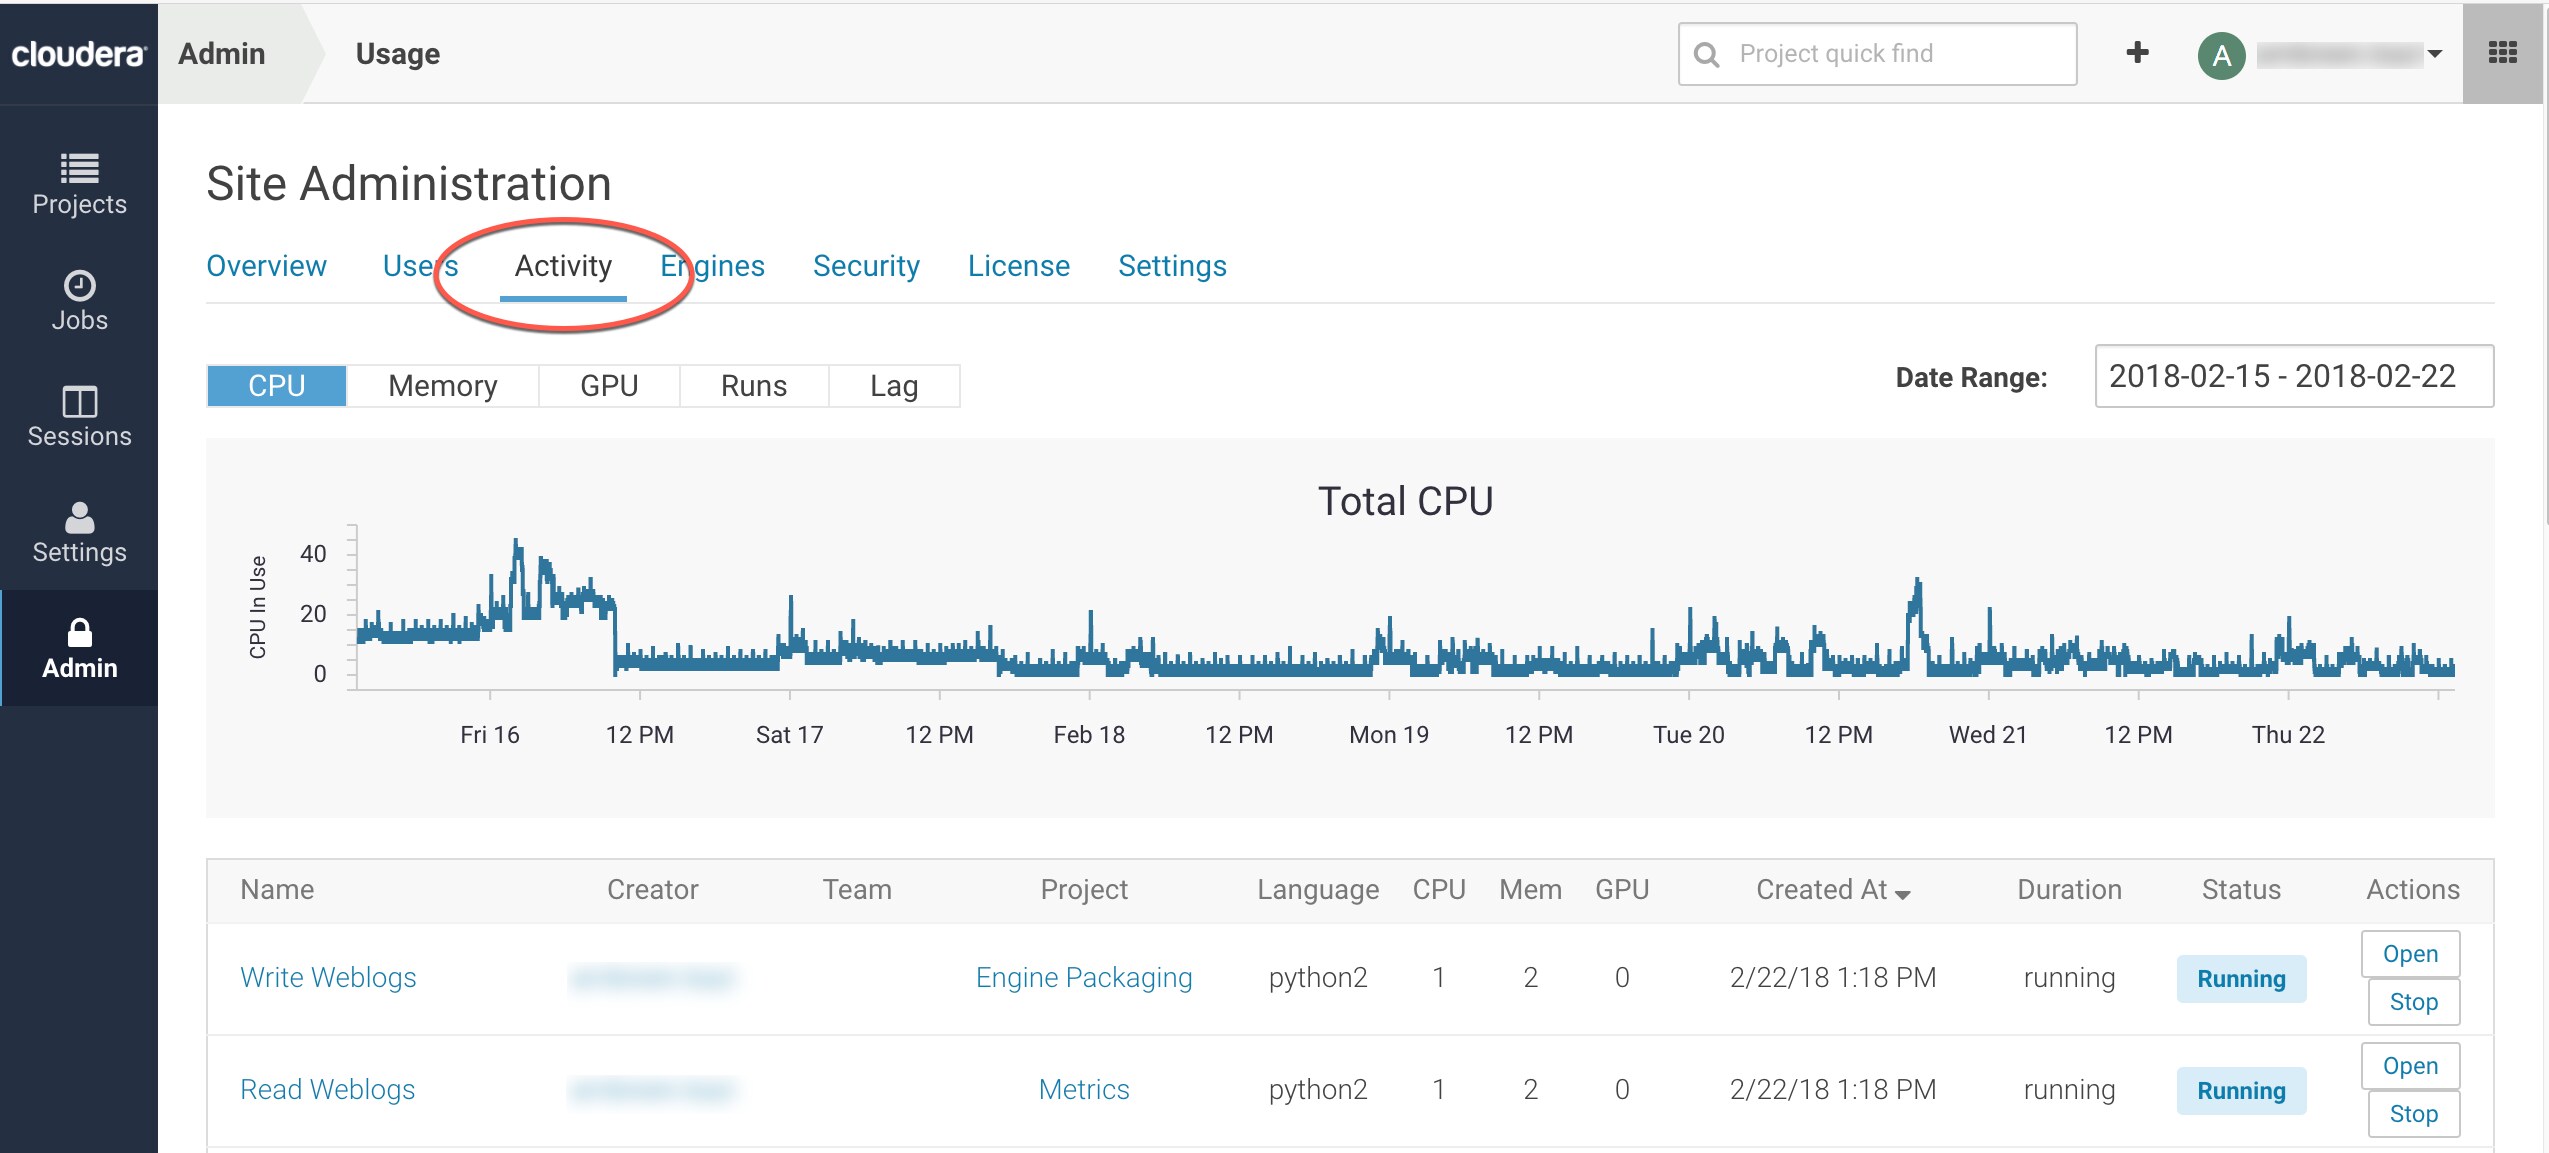
- CPU - Total number of CPUs requested by sessions running at this time.
- Memory - Total memory (in GiB) requested by sessions running at this time.
- GPU - Total number of GPUs requested by sessions running at this time.
- Runs - Total number of sessions and jobs running at this time.
- Lag - Depicts session scheduling and startup times.
- Scheduling Duration: The amount of time it took for a session pod to be scheduled on the cluster.
- Starting Duration: The amount of time it took for a session to be ready for user input. This is the amount of time since a pod was scheduled on the cluster until code could be executed.
Managing Engines
Cloudera Data Science Workbench engines are responsible for running R, Python, and Scala code written by users and mediating access to the CDH cluster. Engines can be thought of as virtual machines, customized to have all the necessary dependencies to access the CDH cluster while keeping each project’s environment entirely isolated.
As a site administrator you are responsible for creating engine profiles, determining the default engine version to be used across the deployment, and white-listing any custom engines that teams require. You can also customize the engine environment as needed by setting global environmental variables and configuring any files/folders that need to be mounted into project environments on run time.
Managing Engine Profiles
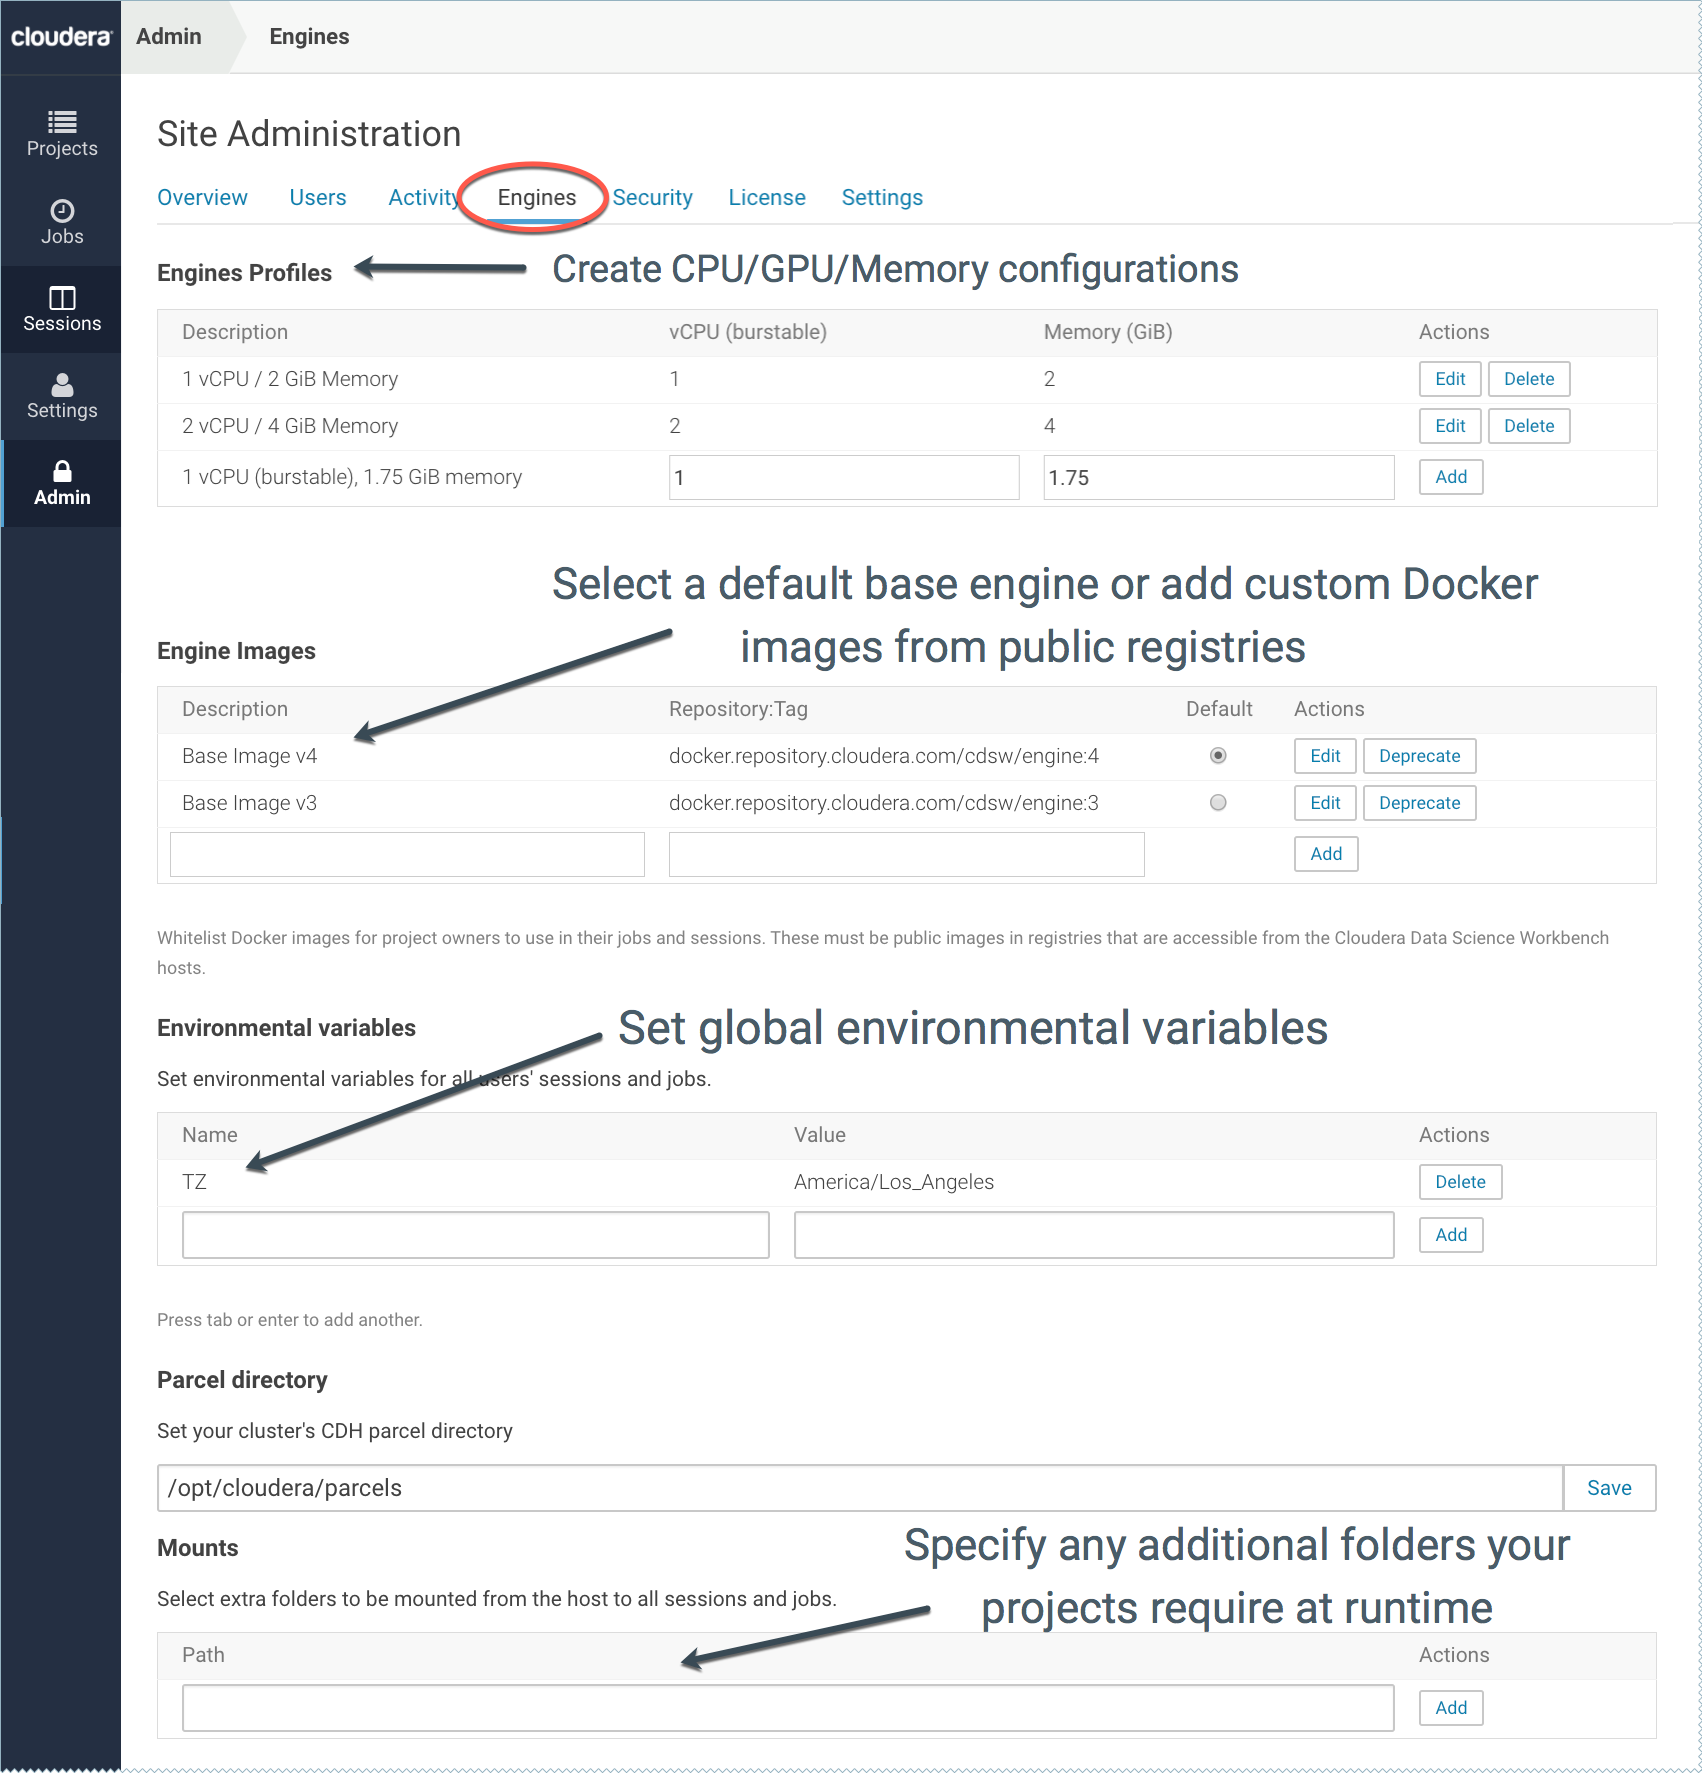
On the page, under Engines Profiles, you can provide default engine profiles to users. These engine profiles define the default vCPU, GPU, and memory configurations for sessions and jobs. Cloudera recommends that all profiles include at least 2 GB of RAM to avoid out of memory errors for common user operations.
You will see the option to add GPUs to the engine profiles only if your Cloudera Data Science Workbench nodes are equipped with GPUs, and you have enabled them for use by setting the relevant properties either in Cloudera Manager (for CSD) or in cdsw.conf (for RPM).
Adding Custom Engine Images
Cloudera Data Science Workbench site administrators can add libraries and other dependencies to the Docker image in which their engines run. You can whitelist images for use in projects on the page, under the Engine Images section. Currently, Cloudera Data Science Workbench only supports public Docker images in registries accessible to the Cloudera Data Science Workbench nodes.
Project administrators will need to explicitly select which of these white-listed images is installed for their projects. For an example on how to add more libraries and dependencies to your Docker image, see Creating Extended Engine Images.
Customizing the Engine Environment
On the page, go to the Environmental Variables section to provide values for global environment variables that must be injected into all engines across the deployment. Environmental variables set here at the global level by site administrators can be overridden by per-project values set by project administrators. For a list of environmental variables that can be set in every engine, see Project Environment Variables.
Non-standard CDH Parcel Location
By default, Cloudera Data Science Workbench looks for the CDH parcel at /opt/cloudera/parcels. If your CDH parcel is at another location, add that path to the Parcel directory section.
Mounts
You can use this section to specify folders that should be mounted through to all the engines. Cloudera Data Science Workbench will automatically mount CDH parcels and client configuration.
Note that all Cloudera Data Science Workbench projects run inside a Docker container. If your project is referencing any files/folders on the host, you must use this option to explicitly load them into the container.
Setting Time Zones for Sessions
The default time zone for Cloudera Data Science Workbench sessions is UTC. This is the default regardless of the time zone setting on the Master node.
To change to your preferred time zone, for example, Pacific Standard Time (PST), navigate to . Under the Environmental Variables section, add a new variable with the name set to TZ and value set to America/Los_Angeles, and click Add.
Adding Custom Template Projects
Starting with Cloudera Data Science Workbench 1.3, site administrators can add template projects that are customized for their organization's use-cases. Cloudera Data Science Workbench supports adding custom project templates in the form of a Git repository. To add a new template project, go to . Under the Project Templates section, provide a template name, the URL to the project's Git repository, and click Add.
The added templates will become available in the Template tab on the Create Project page. Site administrators can add, edit, or delete custom templates, but not the built-in ones.
Setting up Email Notifications
Go to the tab to specify an email address for outbound invitations and job notifications.
By default, all emails are sent from noreply@your-cdsw-domain. However, if your SMTP domain is different from the Cloudera Data Science Workbench domain, or it does not allow spoofing, you will need to explicitly specify the email address at the No Reply Email field.
Currently, Cloudera Data Science Workbench only sends email notifications when you add teammates to a project, not when you create a new project. Email preferences cannot currently be configured at an individual user level.
Managing License Keys
Cloudera Data Science Workbench is subject to the same license and subscription model as Cloudera Enterprise. To upload a license key, go to the tab. For details on the types of licenses and detailed instructions for how to upload a new license key, see Managing License Keys for Cloudera Data Science Workbench.
Disabling Analytics Tracking
To help improve the product, Cloudera Data Science Workbench by default collects aggregate usage data by sending limited tracking events to Google Analytics and Cloudera servers. No customer data or personal information is sent as part of these bundles. To disable analytics tracking, go to and uncheck the Send usage data to Cloudera checkbox.
For more details on the usage and diagnostic data collected by Cloudera Data Science Workbench, see Data Collection in Cloudera Data Science Workbench.