Best Practices for Using Hive with Erasure Coding
Find out how to plan, evaluate, and activate Erasure Coding on your Hive tables or partitions.
Continue reading:
- Benefits of Using Erasure Coding with Hive
- Performance Expectations of Erasure Coding
- When to Use Erasure Coding with Hive
- Using Erasure Coding Policies with Hive
- Prerequisites for Using Erasure Coding with Hive
- Limitations of Erasure Coding
- Activating Erasure Coding on a New Hive Table
- Activating Erasure Coding on an Existing Hive Table
- Tools Related to Erasure Coding in Hive
Benefits of Using Erasure Coding with Hive
By using Erasure Coding (EC) with Hive, you can considerably enhance your HDFS storage efficiency while continuing to provide the data stability of replication-based HDFS data deployments.
Traditional three-times replication offers redundancy of your data at a high storage overhead of approximately 200%; whereas, the storage overhead of using EC with Hive is no more than 67%.
Enhanced storage efficiency is achieved through Reed-Solomon encoding. In a traditional replicated file system, a file with six blocks replicates each block three times, using a total of (6*3) 18 blocks of disk space. However, with EC, using its default policy (RS-6-3-1024k), the file splits into six data cells and three parity cells taking up a total of nine blocks of disk space. As a result, EC has a comparable level of fault tolerance to replicated file systems but with twice the capacity.
Learn more about Erasure Coding in the Data Durability documentation.
Performance Expectations of Erasure Coding
Erasure coding (EC) gives you robust data resilience and highly efficient storage, but this comes at a slight cost in performance.
EC data divides into cells that spread across multiple DataNodes. Due to this distribution, reading EC data requires heavy network usage which directly affects overall performance speed compared to a replicated setup.
In the event of lost or corrupt data blocks, HDFS uses the remaining data and parity cells to decode and reconstruct any lost data. Not only is this CPU intensive, for both the HDFS clients and DataNodes, but it also adds latency which affects your response time.
- Keep your Hive scratch directory in replicated mode.
- Keep frequently accessed data in replicated mode.
- Make sure your cluster network has high enough bandwidth for EC, which is recommended for networks bisected into partitions.
- The small file problem is more significant with EC files. To counteract this, always convert using the method (a) described later in this topic.
When to Use Erasure Coding with Hive
It's best to activate Erasure Coding (EC) on Hive tables that are infrequently accessed—that’s data used less than once a month. EC reduces your storage overhead but comes at the expense of reduced performance speed. Creating a balance of replicated and EC file storage is the smartest way to go.
In partitioned Hive tables, with both frequently accessed (hot) and infrequently accessed (cold) partitions, convert your cold partitions to EC and keep the hot partitions in replicated mode.
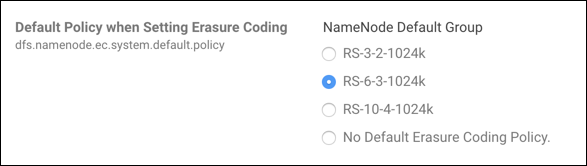
Using Erasure Coding Policies with Hive
Erasure Coding (EC) policies determine how your data is encoded and decoded—it defines how your data is sliced. The default policy of EC is RS-6-3-1024k, let's look at this in more detail:
- RS — The Codec
Specifies the codec used for encoding and decoding. RS represents Reed Solomon. This is the only supported codec type at this time.
- 6 — Number of data cells
Sets how many pieces (data cells) your data is sliced into. In this example, there are six data cells in each stripe.
- 3 — Number of parity cells
Sets how many parity cells are calculated and stored. Parity cells are used for data resilience. When data loss or corruption occurs, the parity cells are used to decode and reconstruct the lost data. In this example, there are three parity cells in each stripe.
- 1024k — Size of each cell
The size of one unit of striped data.
Learn more about Erasure Coding policies in Understanding Erasure Coding Policies.
Prerequisites for Using Erasure Coding with Hive
Before you enable Erasure Coding (EC), you must perform the following tasks:
- Be aware of the limitations for EC
- Verify that the clusters run CDH 6.1.0 or higher
- Decide which EC policy you want to use
- Decide if you want to use EC for existing data or new data
- Verify that your cluster setup meets the rack and node requirements described in Best Practices for Rack and Node Setup for EC
Limitations of Erasure Coding
Erasure Coding (EC) does not support the following:
- XOR codecs
- Several HDFS functions: hflush, hsync, concat, setReplication, truncate, and append.
Learn more about EC limitations, at Erasure Coding Limitations.
Activating Erasure Coding on a New Hive Table
Erasure Coding activates when you set an EC policy on your Hive table. After you set the policy, all the data you input from then on is erasure-coded. Use this method on new Hive tables (empty of data), or tables where you want existing data to remain replicated and new data to be erasure-coded.
Use the command line to activate EC on a new Hive table:
bash> hdfs ec -setPolicy -policy RS-3-2-1024k -path <table_location>
To use a different policy, replace RS-3-2-1024k with the policy you want to use.
If you want to activate EC on existing content, see Activating Erasure Coding on an Existing Hive Table.
Activating Erasure Coding on an Existing Hive Table
You can activate Erasure Coding (EC) on existing Hive tables based on two use cases: on a whole Hive table or on selected partitions of a Hive table. Each use case has two unique methods (A and B) for converting existing data. The following table compares the advantages and disadvantages of each method.
| Method A (using Hive) | Method B (using DistCp) |
|---|---|
|
This process will merge your small files and improve overall performance. If your table has a lot of small files, it is advisable to use method A. |
This method only copies the data once, therefore it is considerably quicker to convert than Method A. |
|
By merging your small files, the NameNode has less to process and the overall cluster performance increases. |
If you have a lot of small files, this could be problematic. |
|
If conversion speed (to EC) is the most important factor, this is not the best option. |
This is particularly true if your table has a lot of small files. Individual EC files have a larger overhead than replicated files because they put more weight on the NameNode (NN). With conversion method B, your files do not merge. |
 Merge Small Files
 Longer conversion time
Erasure Coding activates when you set an EC policy on a Hive table. Setting a policy alone does not convert your files to EC—only new files are erasure-coded, and existing files remain unchanged. To convert any existing data to EC, you must rewrite the data out of and back into the directory. Learn to activate EC on an existing whole Hive table or on partitions of an existing Hive table in the following tasks.
Activating EC on an Existing Whole Hive Table
Use this topic to learn how to activate Erasure Coding (EC) on an existing whole Hive table and convert its contents from replicated to EC.
For optimal performance, only activate Erasure Coding on a whole table that is infrequently accessed—for example, used less than once a month.
If you’re unsure about which method to choose, the pros and cons of each method are described in Comparison of Methods A and B.
Method A: Converting an existing whole table to EC using Hive
Before you start, open two terminal windows: one each for the Beeline Shell and the Bash Shell.
- Prevent any user from inserting data into your table.
- Log in to Beeline, and create a temporary table with a copy of the original table content:
beeline> create table temp as select * from <table_name>;
- In Bash, set an EC policy on the original table:
bash> hdfs ec -setPolicy -policy RS-3-2-1024k -path <table_location>
- Return to Beeline, and choose either 4A or 4B depending on your table structure:
- a. For non-partitioned tables,
- copy the content back into the original table
beeline> insert overwrite table <table_name> select * from temp;
- copy the content back into the original table
- b. For partitioned tables,
- i. enable dynamic partitioning:
beeline> set hive.exec.dynamic.partition=true;
beeline> set hive.exec.dynamic.partition.mode=nonstrict;
- ii. copy the content back into the original table:
beeline> insert overwrite table <table_name> partition (p1, p2, ...) select * from temp;
- i. enable dynamic partitioning:
- a. For non-partitioned tables,
- Remove the temporary table:
beeline> drop table temp;
Method B: Converting an existing whole table to EC using distCp on HDFS
Before you start, open two terminal windows: one each for the Beeline Shell and the Bash Shell.
- Prevent any user from inserting data into your table.
If you’re using ZooKeeper, lock it from Beeline:
beeline> lock table <table_name> exclusive;
- In Bash, move your table directory to a temporary location:
bash> hadoop fs -mv <table_location> <temp_location>/<table_name>
- Restore the original table directory:
bash> hadoop fs -mkdir <table_location>
- Set an EC policy to the original table directory:
bash> hdfs ec -setPolicy -policy RS-3-2-1024k -path <table_location>
- Rewrite the contents of the temporary directory back into the original table directory.
As the data copies, it is converted to your previously defined EC policy:
bash> hadoop distcp -overwrite -pb -skipcrccheck <temp_location>/<table_name> <table_location>
- Return to Beeline, and unlock the table:
beeline> unlock table <table_name>
- Update the statistics for the table:
Choose either A or B depending on your table structure.
- a. For non-partitioned tables,
beeline> analyze table <table_name> compute statistics;
- b. For partitioned tables,
beeline> analyze table <table_name> partition (p1 , p2 ...) compute statistics;
- a. For non-partitioned tables,
- Return to the Bash, and remove the temporary table:
bash> hadoop fs -rm -r -skipTrash <temp_location>/<table_name>
Activating EC on Selected Partitions of an Existing Hive Table
Activate Erasure Coding on your infrequently accessed partitions (used less than once a month) and keep the frequently accessed partitions as replicated data.
- Frees up valuable HDFS space
- Merges small files in EC partitions
- Creates no performance impact on hot data that is accessed frequently
If you’re unsure about which method to choose, the pros and cons of each method are described in Comparison of Methods A and B.
Method A: Converting selected partitions of an Existing Hive Table to EC using Hive
Before you start, open two terminal windows: one each for the Beeline Shell and the Bash Shell.
- Prevent any user from inserting data into your table.
- Log in to Beeline, and set up dynamic partitioning:
beeline> set hive.exec.dynamic.partition=true;
beeline> set hive.exec.dynamic.partition.mode=nonstrict;
- Create a temporary table with a copy of the original table content:
beeline> create table temp as select * from <table_name> where <partition_spec>;
- In Bash, set an EC policy on the original table path. Do not set the policy on the partition directories:
bash> hdfs ec -setPolicy -policy RS-3-2-1024k -path <table_location>
- Return to Beeline, and copy the content back into the original table:
beeline> insert overwrite table <table_name> partition (p1, p2, ..) select * from temp;
- Remove the temporary table:
beeline> drop table temp;
- Return to Bash, and unset the EC policy on the table.
This ensures that post-conversion, any new data is in replicated mode:
bash> hdfs ec -unsetPolicy -path <table_location>
Method B: Converting selected partitions of an Existing Hive Table to EC using distCp on HDFS
Before you start, open two terminal windows: one each for the Beeline Shell and the Bash Shell.
- Prevent any user from inserting data into your table.
If you’re using ZooKeeper, lock it from Beeline:
beeline> lock table <table_name> exclusive;
- In the Bash terminal, follow instructions a to e for each partition you want to convert to EC:
- Move your partition directory to a temporary location.
Perform this individually for each affected partition:
bash> hadoop fs -mv <partition_location> <temp_location>/<partition_dir>
- Restore the original partition directory:
bash> hadoop fs -mkdir <partition_location>
- Set an EC policy to the original table directory:
bash> hdfs ec -setPolicy -policy RS-3-2-1024k -path <partition_location>
- Rewrite the contents of the temporary directory back into the original table directory:
As the data copies, it converts to the defined EC policy. Perform this individually for each affected partition.
bash> hadoop distcp -overwrite -pb -skipcrccheck <temp_location>/<partition_dir> <partition_location>
- Remove the temporary directory:
bash> hadoop fs -rm -r -skipTrash <temp_location>/<partition_dir>
- Move your partition directory to a temporary location.
- Return to Beeline, and unlock the table:
beeline> unlock table <table_name>
- Regenerate the table statistics:
beeline> analyze table <table_name> partition (p1 , p2 ...) compute statistics;
- Return to Bash, and unset the EC policy on the table:
bash> hdfs ec -unsetPolicy -path <table_location>
Tools Related to Erasure Coding in Hive
View statistics about Erasure Coded (EC) files in your Hive tables with the following tools.
- If information about Erasure Coded files is present, it is returned with the response to the following commands:
- Describing a table:
beeline> describe formatted <table_name>
- Viewing a query:
beeline> explain <query>
- Describing a table:
- A counter for Erasure Coded bytes read is included in the job statistics of completed MapReduce and Spark jobs.
- For MapReduce jobs—find these at the end of a query
- For Hive on Spark jobs—find these in the HS2 logs