How To Enable Sentry High Availability
This article walks you through the steps to enable high availability for Sentry in Cloudera Manager using a rolling restart. With high availability enabled, if one of the Sentry hosts becomes unavailable, the client can connect to the other host. To enable high availability, you will perform the following tasks:
- Verify the prerequisites.
- Choose an additional Sentry host.
- Perform a rolling restart on the cluster.
Using a rolling restart instead of manually shutting down the cluster minimises downtime. Note that even with a rolling restart, the Sentry service stops and restarts. For more information about using Cloudera Manager to perform a rolling restart, see Rolling Restart.
For more information about Sentry high availability, see Sentry High Availability.
Verify the Prerequisites
Verify the following prerequisites before you enable high availability for Sentry:
- You must have CDH version 5.13.0 or higher installed.
- You must have Cloudera Manager version 5.13.0 or higher installed.
- The Sentry service must be installed and running. See Before You Install Sentry and Installing and Upgrading the Sentry Service for information about how to install the Sentry service.
- The ZooKeeper service must be enabled. To view the ZooKeeper service that the Sentry service depends on, open the Sentry service in Cloudera Manager, click the Configuration tab and enter ZooKeeper in the Search box. The ZooKeeper Service property is displayed.
- The Sentry service must be backed by a relational database, not a flat file.
- You must have HDFS high availability enabled. For information about configuring HDFS high availability, see HDFS High Availability.
Enable High Availability
Complete the following steps to enable Sentry high availability with a rolling restart:
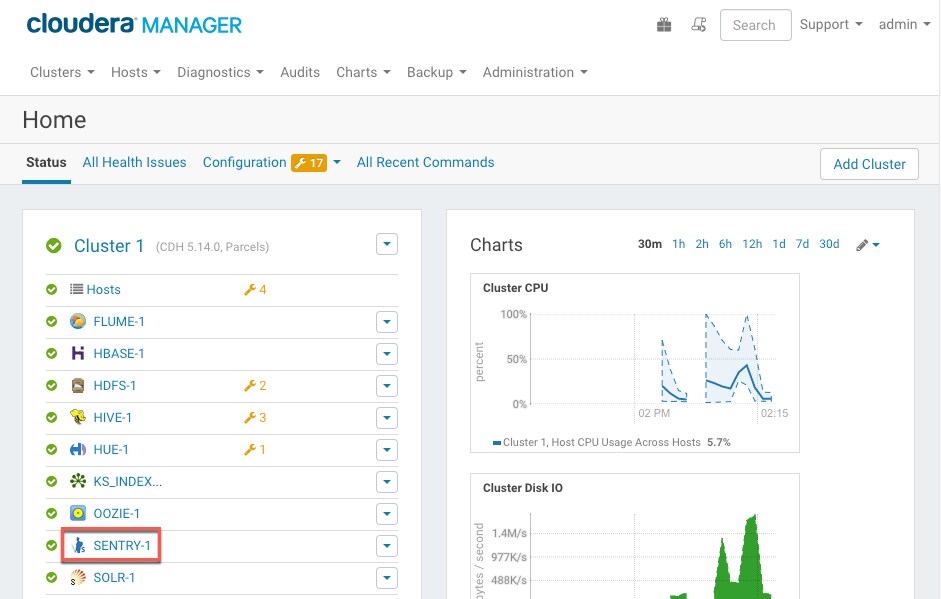
- In Cloudera Manager, open the Sentry service. The following image shows the location of the Sentry service on an example cluster. Click the Sentry service name to open the service.
-
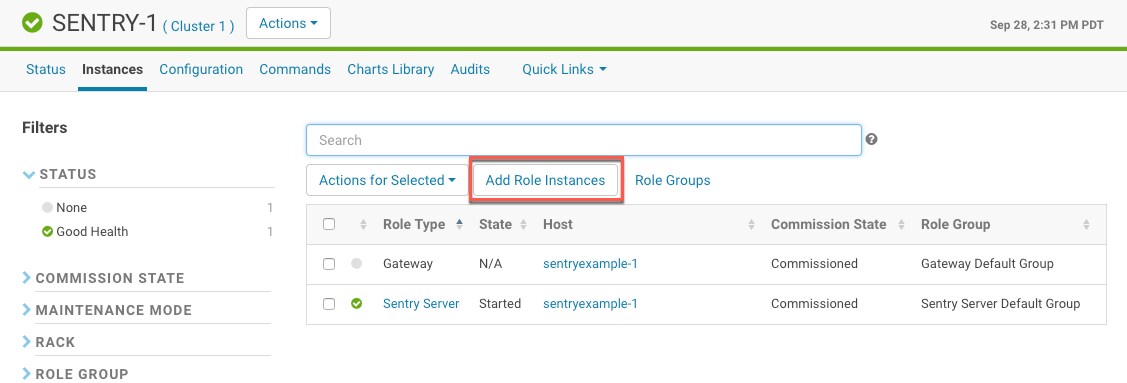
Open the Instances tab and click Add Role Instances.
The following image shows the location of the Add Role Instances button:
- In the Add Role Instances wizard, click the Select a host button for the Sentry Server. You do not have to edit the Gateway host.
-
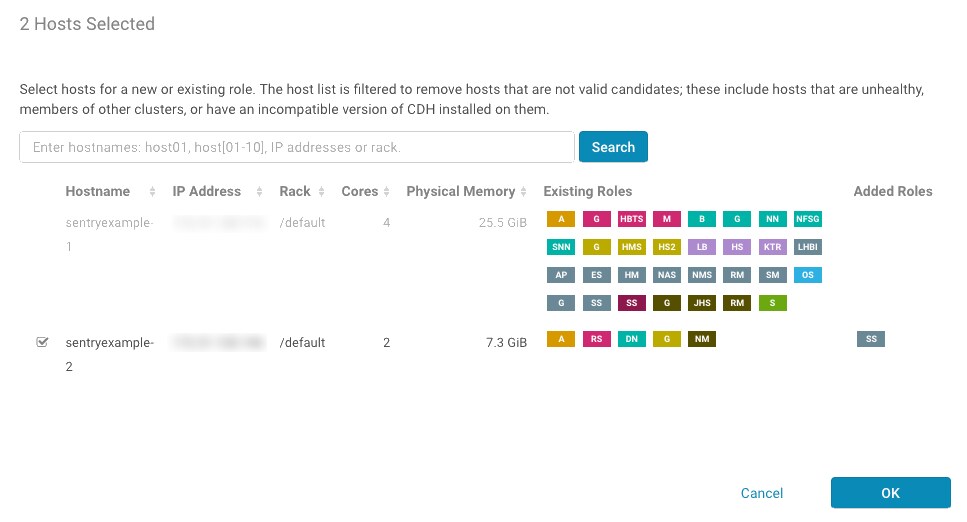
A pop-up window opens that allows you to pick an alternate host for the Sentry service. Click the hostname of the host that you want to use for high availability. The host that the Sentry service is currently running on is already selected and grayed out. You can select one alternate host for the Sentry service.
You can search for a host or you can filter the list by entering a range of hosts in the Search field. You can search for hosts with the following information:
- Range of hostnames. Use the following range definitions:
Range Definition Matching Hosts 10.1.1.[1-4] 10.1.1.1, 10.1.1.2, 10.1.1.3, 10.1.1.4 host[1-3].company.com host1.company.com, host2.company.com, host3.company.com host[07-10].company.com host07.company.com, host08.company.com, host09.company.com, host10.company.com - IP addresses
- Rack name
The following image shows the host options. In this example, sentryexample-1 is the current host and we are adding sentryexample-2 as the alternate host.
- Range of hostnames. Use the following range definitions:
- After you have selected the alternate host, click OK to close the window. The hostname appears below the Sentry Server.
- Click Continue. The wizard closes and the Sentry hosts are listed.
-
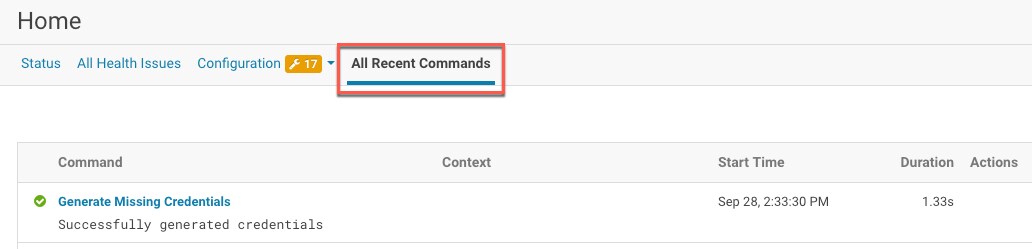
Go to the Cloudera Manager home page and click the All Recent Commands tab. Verify that the Generate Missing Credentials command has successfully completed before you proceed with the rolling restart.
The following image shows the All Recent Commands tab with and the Generate Missing Credentials command successfully completed:
- Click the Status tab to return to the Cloudera Manager home page.
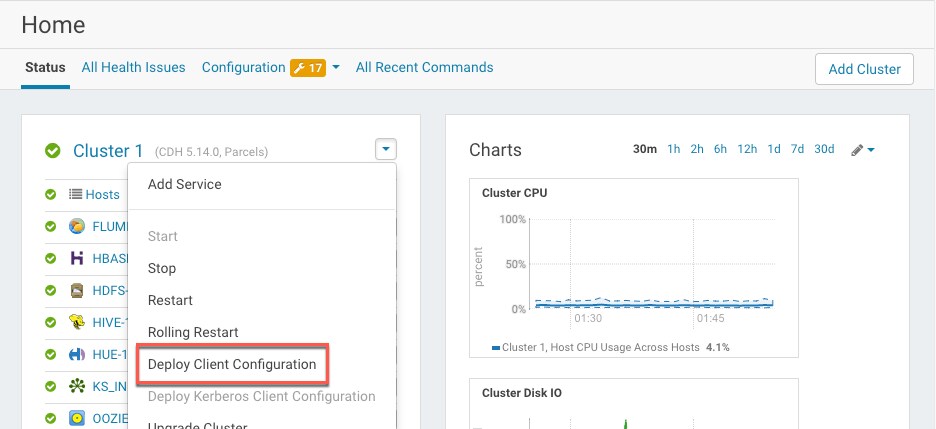
- Click the down arrow next to the cluster name to open the menu and click Deploy Client Configuration.
The following image shows the location of Deploy Client Configuration in the menu:
- A window opens asking if you are sure you want to run the Deploy Client Configuration command. Click Deploy Client Configuration.
- When the steps are successfully completed, click Close to close the window.
-
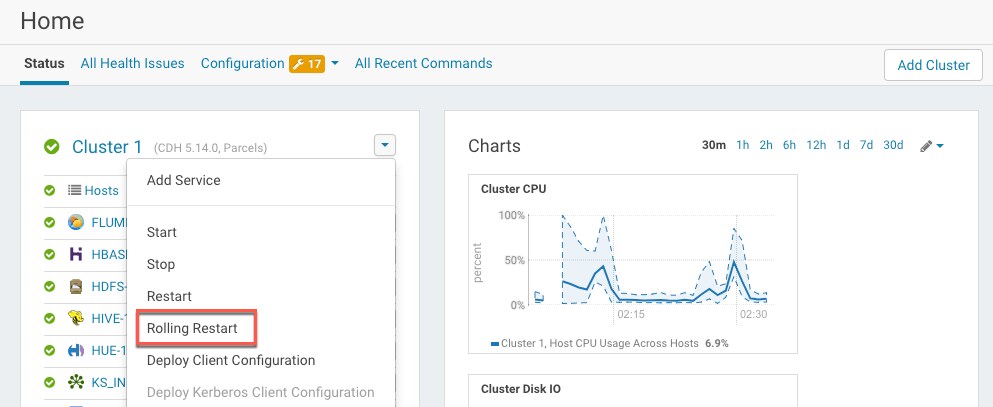
Click the down arrow next to the cluster name again to open the menu and click Rolling Restart. For detailed information about the rolling restart, see Rolling Restart.
The following image shows the location of Rolling Restart in the menu:
-
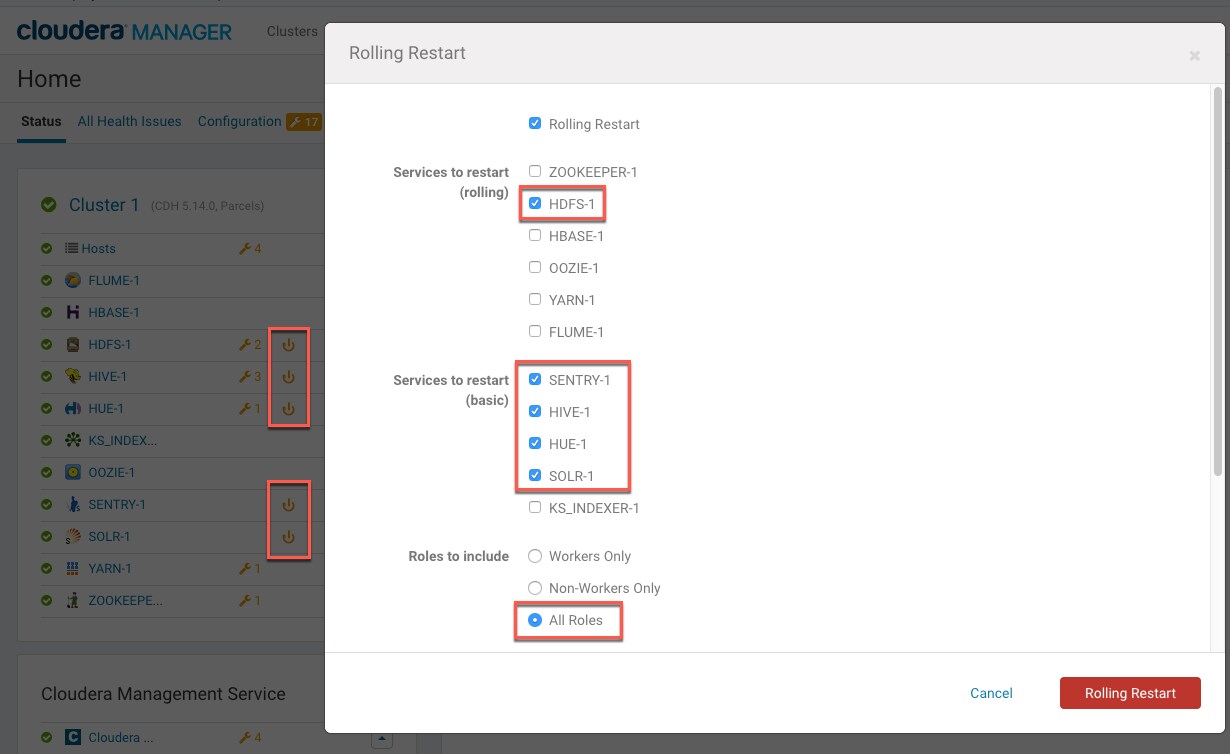
In the Rolling Restart window that opens, select the services that have stale configurations, including the Sentry service. Every service that is dependent on Sentry will have a stale configuration. In the Roles to Include parameter, select All Roles.
Note that the services that do not support rolling restart will simply be restarted and will be unavailable during their restart, including the Sentry service.
The following image shows the example cluster with the services that have stale configurations selected, as well as the All Roles option. The red boxes also show the location of the stale configuration markers in Cloudera Manager.
- Click Rolling Restart to begin the restart.
- A pop-up window opens that lists the rolling restart steps and the status of each step. When the rolling restart is complete, click Close to close the pop-up.
- Verify that none of the services have stale configurations. If one or more services has a stale configuration after the rolling restart, Sentry high availability might not be configured properly.
-
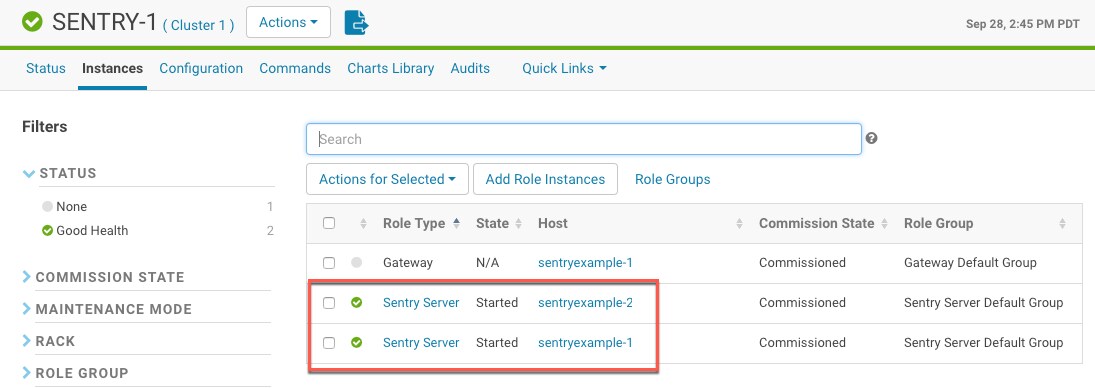
To verify the statuses of the Sentry hosts, open the Sentry service and click the Instances tab.
The following image shows the example cluster with Sentry high availability enabled. There are two Sentry hosts running.