Configuring a SOCKS Proxy for Amazon EC2
To set up a SOCKS proxy for your web browser, follow the steps below.
Step 1: Set Up a SOCKS Proxy Server with SSH
Set up a SOCKS proxy server with SSH to access the EC2 instance running Cloudera Director. For example, run the following command (with your instance information):
nohup ssh -i "your-key-file.pem" -CND 8157 ec2-user@instance_running_director_server &
where
- nohup (optional) is a POSIX command to ignore the HUP (hangup) signal so that the proxy process is not terminated automatically if the command process is later terminated.
- C sets up compression.
- N suppresses any command execution once established.
- D 8157 sets up the SOCKS 5 proxy on the port. (The port number 8157 in this example is arbitrary, but must match the port number you specify in your browser configuration in the next step.)
- & (optional) causes the SSH connection to run as an operating system backup process, independent of the command shell. (Without the &, you would leave your terminal open while the proxy server is running and use another terminal window to issue other commands.)
You are now ready to deploy Cloudera Manager and CDH.
Step 2: Configure Your Browser to Use the Proxy
Next, configure your browser settings to use the SOCKS proxy.
On Google Chrome
- The SOCKS proxy port to use (this must be the same value used above)
- The profile to use (this example will create a new profile)
This will create a new profile and launch a new instance of Chrome that won’t interfere with your current running instance of Chrome.
/usr/bin/google-chrome \
--user-data-dir="$HOME/chrome-with-proxy" \
--proxy-server="socks5://localhost:8157"
"/Applications/Google Chrome.app/Contents/MacOS/Google Chrome" \
--user-data-dir="$HOME/chrome-with-proxy" \
--proxy-server="socks5://localhost:8157"
"C:\Program Files (x86)\Google\Chrome\Application\chrome.exe" ^
--user-data-dir="%USERPROFILE%\chrome-with-proxy" ^
--proxy-server="socks5://localhost:8157"
Now in this Chrome session you can connect to any Cloudera Director accessible host using the private IP address or internal FQDN. For example, if you proxy to the Cloudera Director server, you can connect to Cloudera Director as if it were local by putting localhost:7189 in Chrome’s URL bar.
Setting Up SwitchyOmega on the Google Chrome Browser
If you are using Google Chrome, and especially if you use multiple proxies, the SwitchyOmega browser extension is a convenient tool for configuring and managing all of your proxies in one place and for switching from one proxy to another.
- Open Google Chrome and go to Chrome Extensions.
- Search for Proxy SwitchyOmega and add to it Chrome.
- In the Profiles menu of the SwitchyOmega Options screen, click New profile and do
the following:
- In the Profile Name field, enter AWS-Cloudera.
- Select the type PAC Profile.
- The proxy autoconfig (PAC) script contains the rules required for Cloudera Director. Enter or
copy the following into the PAC Script field:
function regExpMatch(url, pattern) {
  try { return new RegExp(pattern).test(url); } catch(ex) { return false; }
}

function FindProxyForURL(url, host) {
    // Important: replace 172.31 below with the proper prefix for your VPC subnet

    if (shExpMatch(url, "*172.31.*")) return "SOCKS5 localhost:8157";
    if (shExpMatch(url, "*ec2*.amazonaws.com*")) return 'SOCKS5 localhost:8157';
    if (shExpMatch(url, "*.compute.internal*") || shExpMatch(url, "*://compute.internal*")) return 'SOCKS5 localhost:8157';
    if (shExpMatch(url, "*ec2.internal*")) return 'SOCKS5 localhost:8157';
    return 'DIRECT';
}
- In the Actions menu, click Apply Changes.
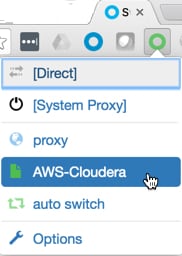
- On the Chrome toolbar, select the AWS-Cloudera profile for SwitchyOmega.