Configuring the Server for Policy Messages
Cloudera Navigator can send notifications to a JMS message queue whenever entities change as a result of policies set for that class of entity. To use this capability, an administrator must setup a JMS server with a queue for the messages and then configure the JMS server using the Cloudera Manager Admin Console, as detailed below.
In addition to setting up and configuring the server side components, the policies (that include notifications about changes) are defined using the Cloudera Navigator console. See Using Policies to Automate Metadata Tagging for details about defining policies.
Configuring a JMS Server for Policy Messages
Cloudera Manager Required Role: Navigator Administrator (or Full Administrator)
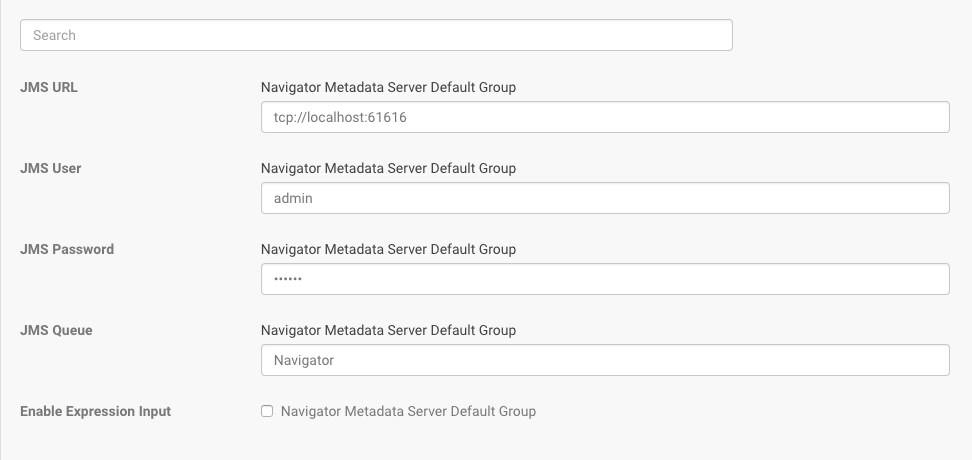
Only the JMS URL, JMS User, and JMS Password settings are required to set up the JMS Server. Enable Expression Input only if you want to use Java expressions to define your policies. See Metadata Policy Expressions for details about using Java expressions in your policy definitions.
These steps begin from the Cloudera Manager Admin Console home page.
- Select .
- Click the Configuration tab.
- For choice of Filters, select . The configurable properties display:
- Set the following properties for each role group
Property Default Description JMS URL tcp://localhost:61616 The URL of the JMS server. Notifications of changes to entities affected by policies you define are sent to this URL. JMS User admin The JMS user to which notifications of changes to entities affected by policies are sent. JMS Password admin The password of the JMS user to which notifications of changes to entities affected by policies are sent. JMS Queue Navigator The JMS queue to which notifications of changes to entities affected by policies are sent. Enable Expression Input Disabled. Click the box to enable if you want to use Java expressions to define policies. See Metadata Policy Expressions for details. When enabled, feature applies to the Navigator Metadata Server Default Group. If this configuration should apply to another role group (or groups), edit the value for the appropriate role group. See Modifying Configuration Properties Using Cloudera Manager. - Click Save Changes.
- Restart the Navigator Metadata Server role instance.