External PostgreSQL Database
To use an external PostgreSQL database, follow these procedures. For information on compatible versions of the PostgreSQL database, see CDH and Cloudera Manager Supported Databases.
- Installing the External PostgreSQL Server
- Configuring and Starting the PostgreSQL Server
- Creating Databases for Activity Monitor, Reports Manager, Hive Metastore Server, Sentry Server, Cloudera Navigator Audit Server, and Cloudera Navigator Metadata Server
- Configuring the Hue Server to Store Data in PostgreSQL
- Configuring PostgreSQL for Oozie
Installing the External PostgreSQL Server
- Use one or more of the following commands to set the locale:
export LANGUAGE=en_US.UTF-8
export LANG=en_US.UTF-8
export LC_ALL=en_US.UTF-8
locale-gen en_US.UTF-8
dpkg-reconfigure locales
- Install PostgreSQL packages:
- RHEL
$ sudo yum install postgresql-server
- SLES
$ sudo zypper install postgresql91-server
- Debian/Ubuntu
$ sudo apt-get install postgresql
- RHEL
Configuring and Starting the PostgreSQL Server
By default, PostgreSQL only accepts connections on the loopback interface. You must reconfigure PostgreSQL to accept connections from the Fully Qualified Domain Name (FQDN) of the hosts hosting the management roles. If you do not make these changes, the management processes cannot connect to and use the database on which they depend.
- Initialize the external PostgreSQL database. For some versions of PostgreSQL, this occurs automatically the first time that you start the PostgreSQL server. In this case, issue the
command:
$ sudo service postgresql start
In other versions, you must explicitly initialize the database using one of the following commands:- If the PostgreSQL database uses the SLES 12 operating system:
$ sudo service postgresql initdb --pgdata=/var/lib/pgsql/data --encoding=UTF-8
- All other operating systems:
$ sudo service postgresql initdb
- If the PostgreSQL database uses the SLES 12 operating system:
- Enable MD5 authentication. Edit pg_hba.conf, which is usually found in /var/lib/pgsql/data or /etc/postgresql/8.4/main. Add the following line:
host all all 127.0.0.1/32 md5
If the default pg_hba.conf file contains the following line:host all all 127.0.0.1/32 ident
then the host line specifying md5 authentication shown above must be inserted before this ident line. Failure to do so may cause an authentication error when running the scm_prepare_database.sh script. You can modify the contents of the md5 line shown above to support different configurations. For example, if you want to access PostgreSQL from a different host, replace 127.0.0.1 with your IP address and update postgresql.conf, which is typically found in the same place as pg_hba.conf, to include:listen_addresses = '*'
- Configure settings to ensure your system performs as expected. Update these settings in the /var/lib/pgsql/data/postgresql.conf or /var/lib/postgresql/data/postgresql.conf file. Settings vary based on cluster size and resources as follows:
- Small to mid-sized clusters - Consider the following settings as starting points. If resources are limited, consider reducing the buffer sizes and checkpoint segments further. Ongoing
tuning may be required based on each host's resource utilization. For example, if the Cloudera Manager Server is running on the same host as other roles, the following values may be acceptable:
- shared_buffers - 256MB
- wal_buffers - 8MB
- checkpoint_segments - 16
- checkpoint_completion_target - 0.9
- Large clusters - Can contain up to 1000 hosts. Consider the following settings as starting points.
- max_connection - For large clusters, each database is typically hosted on a different host. In general, allow each database on a host 100 maximum connections and then add 50 extra connections. You may have to increase the system resources available to PostgreSQL, as described at Connection Settings.
- shared_buffers - 1024 MB. This requires that the operating system can allocate sufficient shared memory. See PostgreSQL information on Managing Kernel Resources for more information on setting kernel resources.
- wal_buffers - 16 MB. This value is derived from the shared_buffers value. Setting wal_buffers to be approximately 3% of shared_buffers up to a maximum of approximately 16 MB is sufficient in most cases.
- checkpoint_segments - 128. The PostgreSQL Tuning Guide recommends values between 32 and 256 for write-intensive systems, such as this one.
- checkpoint_completion_target - 0.9. This setting is only available in PostgreSQL versions 8.3 and higher, which are highly recommended.
- Small to mid-sized clusters - Consider the following settings as starting points. If resources are limited, consider reducing the buffer sizes and checkpoint segments further. Ongoing
tuning may be required based on each host's resource utilization. For example, if the Cloudera Manager Server is running on the same host as other roles, the following values may be acceptable:
- Configure the PostgreSQL server to start at boot.
- RHEL
$ sudo /sbin/chkconfig postgresql on
$ sudo /sbin/chkconfig --list postgresql
postgresql          0:off   1:off   2:on    3:on    4:on    5:on    6:off
- SLES
$ sudo chkconfig --add postgresql
- Debian/Ubuntu
$ sudo chkconfig postgresql on
- RHEL
- Start or restart the PostgreSQL database:
$ sudo service postgresql restart
Creating Databases for Activity Monitor, Reports Manager, Hive Metastore Server, Sentry Server, Cloudera Navigator Audit Server, and Cloudera Navigator Metadata Server
- If you are not using the Cloudera Manager installer, the Cloudera Manager Server.
- Cloudera Management Service roles:
- Activity Monitor (if using the MapReduce service)
- Reports Manager
- Each Hive metastore
- Sentry Server
- Cloudera Navigator Audit Server
- Cloudera Navigator Metadata Server
You can create these databases on the host where the Cloudera Manager Server will run, or on any other hosts in the cluster. For performance reasons, you should install each database on the host on which the service runs, as determined by the roles you assign during installation or upgrade. In larger deployments or in cases where database administrators are managing the databases the services use, you can separate databases from services, but use caution.
The database must be configured to support UTF-8 character set encoding.
Record the values you enter for database names, usernames, and passwords. The Cloudera Manager installation wizard requires this information to correctly connect to these databases.
- Connect to PostgreSQL:
$ sudo -u postgres psql
- If you are not using the Cloudera Manager installer, create a database for the Cloudera Manager Server. The database name, username, and password can be any value. Record the names
chosen because you will need them later when running the scm_prepare_database.sh script.
postgres=# CREATE ROLE scm LOGIN PASSWORD 'scm';
postgres=# CREATE DATABASE scm OWNER scm ENCODING 'UTF8';
- Create databases for Activity Monitor, Reports Manager, Hive Metastore Server, Sentry Server, Cloudera Navigator Audit Server, and Cloudera Navigator Metadata
Server:
postgres=# CREATE ROLE user LOGIN PASSWORD 'password';
postgres=# CREATE DATABASE databaseName OWNER user ENCODING 'UTF8';
where user, password, and databaseName can be any value. The examples shown match the default names provided in the Cloudera Manager configuration settings:For PostgreSQL 8.2.23 or higher, also run:Role Database User Password Activity Monitor amon amon amon_password Reports Manager rman rman rman_password Hive Metastore Server metastore hive hive_password Sentry Server sentry sentry sentry_password Cloudera Navigator Audit Server nav nav nav_password Cloudera Navigator Metadata Server navms navms navms_password postgres=# ALTER DATABASE Metastore SET standard_conforming_strings = off;
Return to Establish Your Cloudera Manager Repository Strategy.
Configuring the Hue Server to Store Data in PostgreSQL
To install and configure PostgreSQL for Hue, see Connect Hue to PostgreSQL.
Connect Hue Service to PostgreSQL
- Stop Hue Service
- In Cloudera Manager, navigate to .
- Select .
- [migration only] Dump Current Database
- Select .
- Click Dump Database. The file is written to /tmp/hue_database_dump.json on the host of the Hue server.
- Log on to the host of the Hue server in a command-line terminal.
- Edit /tmp/hue_database_dump.json by removing all objects with useradmin.userprofile in the
model field. For example:
# Count number of objects
grep -c useradmin.userprofile /tmp/hue_database_dump.json
vi /tmp/hue_database_dump.json
{
  "pk": 1,
  "model": "useradmin.userprofile",
  "fields": {
    "last_activity": "2016-10-03T10:06:13",
    "creation_method": "HUE",
    "first_login": false,
    "user": 1,
    "home_directory": "/user/admin"
  }
},
{
  "pk": 2,
  "model": "useradmin.userprofile",
  "fields": {
    "last_activity": "2016-10-03T10:27:10",
    "creation_method": "HUE",
    "first_login": false,
    "user": 2,
    "home_directory": "/user/alice"
  }
},
- Connect to New Database
- Go to .
- Filter by category, Database.
- Set the following database parameters :
DB Hostname  = <fqdn of host with postgres server>:5432
DB Type      = <PostgreSQL>
DB Name      = hue_d
Username     = hue_u
Password     = <hue database password set when granting hue permissions>
- Click Save Changes.
- [migration only] Synchronize New Database
- Select
- Click Synchronize Database.
- [migration only] Load Data from Old Database
- Log on to the host of the PostgreSQL server in a command-line terminal.
psql -h localhost -U hue_u -d hue_d
Password for user hue_u: <hue user password>
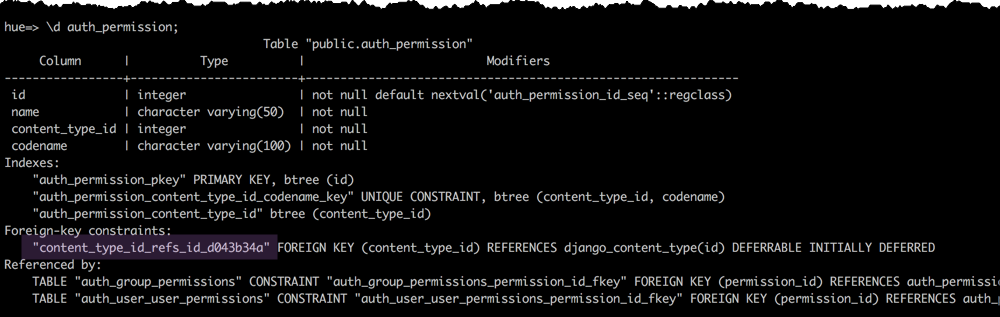
- Drop the foreign key constraint (replace the ID value).
hue=# \d auth_permission;
hue=# ALTER TABLE auth_permission DROP CONSTRAINT content_type_id_refs_id_id value;
- Clean the table, django_content_type.
hue=# TRUNCATE django_content_type CASCADE;
- In Cloudera Manager, load the JSON file: select and click Load Database.
- Add the foreign key back (still logged on to the Hue database):
ALTER TABLE auth_permission ADD FOREIGN KEY (content_type_id) REFERENCES django_content_type (id);
- Log on to the host of the PostgreSQL server in a command-line terminal.
- Start Hue service
- Navigate to , if not already there.
- Select .
- Click Start.
- Click Hue Web UI to log on to Hue with a custom PostgreSQL database.
Configuring PostgreSQL for Oozie
Create the Oozie User and Oozie Database
For example, using the PostgreSQL psql command-line tool:
$ psql -U postgres
Password for user postgres: *****

postgres=# CREATE ROLE oozie LOGIN ENCRYPTED PASSWORD 'oozie'
 NOSUPERUSER INHERIT CREATEDB NOCREATEROLE;
CREATE ROLE

postgres=# CREATE DATABASE "oozie" WITH OWNER = oozie
 ENCODING = 'UTF8'
 TABLESPACE = pg_default
 LC_COLLATE = 'en_US.UTF-8'
 LC_CTYPE = 'en_US.UTF-8'
 CONNECTION LIMIT = -1;
CREATE DATABASE

postgres=# \q
Configure PostgreSQL to Accept Network Connections for the Oozie User
- Edit the postgresql.conf file and set the listen_addresses property to *, to make sure that the PostgreSQL server starts listening on all your network interfaces. Also make sure that the standard_conforming_strings property is set to off.
- Edit the PostgreSQL data/pg_hba.conf file as follows:
host oozie oozie 0.0.0.0/0 md5