Accessing Data Stored in Amazon S3 through Spark
To access data stored in Amazon S3 from Spark applications, you use Hadoop file APIs (SparkContext.hadoopFile, JavaHadoopRDD.saveAsHadoopFile, SparkContext.newAPIHadoopRDD, and JavaHadoopRDD.saveAsNewAPIHadoopFile) for reading and writing RDDs, providing URLs of the form s3a://bucket_name/path/to/file. You can read and write Spark SQL DataFrames using the Data Source API.
Specifying Credentials to Access S3 from Spark
You can access Amazon S3 from Spark by the following methods:
- Without credentials:
-
This mode of operation associates the authorization with individual EC2 instances instead of with each Spark app or the entire cluster.
Run EC2 instances with instance profiles associated with IAM roles that have the permissions you want. Requests from a machine with such a profile authenticate without credentials.
- With credentials:
- You can use one of the following methods described below to set up AWS credentials.
- Set up AWS Credentials Using the Hadoop Credential Provider - Cloudera recommends
you use this method to set up AWS access because it provides system-wide AWS access to a single predefined bucket, without exposing the secret key in a configuration file or having to specify it at
runtime.
- Create the Hadoop credential provider file with the necessary access and secret keys:
hadoop credential create fs.s3a.access.key -provider jceks://hdfs/path_to_hdfs_file -value aws_access_id
For example:
hadoop credential create fs.s3a.access.key -provider jceks://hdfs/user/root/awskeyfile.jceks -value AKI***********************
Add the AWS secret key to the .jceks credential file.hadoop credential create fs.s3a.secret.key -provider jceks://hdfs/path_to_hdfs_file -value aws_secret_key
For example:
hadoop credential create fs.s3a.secret.key -provider jceks://hdfs/user/root/awskeyfile.jceks -value +pla**************************************************
- AWS access for users can be set up in two ways. You can either provide a global credential provider file that will allow all Spark users to submit S3 jobs, or
have each user submit their own credentials every time they submit a job.
- For Per-User Access - Provide the path to your specific credential store on the command line when submitting a Spark job. This means you do not need to
modify the global settings for core-site.xml. Each user submitting a job can provide their own credentials at runtime as follows:
spark-submit --conf spark.hadoop.hadoop.security.credential.provider.path=PATH_TO_JCEKS_FILE ...
- For System-Wide Access - Point to the Hadoop credential file created in the previous step using the Cloudera Manager Server:
- Login to the Cloudera Manager server.
- On the main page under Cluster, click on HDFS. Then click on Configuration. In the search box, enter core-site.
- Click on the + sign next to Cluster-wide Advanced Configuration Snippet (Safety Valve) for core-site.xml. For Name, put spark.hadoop.security.credential.provider.path and for Value put jceks://hdfs/path_to_hdfs_file. For example, jceks://hdfs/user/root/awskeyfile.jceks.
- Click Save Changes and deploy the client configuration to all nodes of the cluster.
After the services restart, you can use AWS filesystem with credentials supplied automatically through a secure mechanism.
- For Per-User Access - Provide the path to your specific credential store on the command line when submitting a Spark job. This means you do not need to
modify the global settings for core-site.xml. Each user submitting a job can provide their own credentials at runtime as follows:
- (Optional) Configure Oozie to Run Spark S3 Jobs - Set spark.hadoop.security.credential.provider.path to the path of the .jceks file in Oozie's workflow.xml file under the
Spark Action's spark-opts section. This allows Spark to load AWS credentials from the .jceks file in HDFS.
<action name="sparkS3job">
    <spark>
        ....
        <spark-opts>--conf spark.hadoop.hadoop.security.credential.provider.path=PATH_TO_JCEKS_FILE</spark-opts>
        ....
</action>
You can use the Oozie notation ${wf:user()} in the path to let Oozie use different AWS credentials for each user. For example:--conf spark.hadoop.hadoop.security.credential.provider.path=jceks://hdfs/user/${wf:user()}/aws.jceks
- Create the Hadoop credential provider file with the necessary access and secret keys:
-
(Not Recommended) Specify the credentials at run time. For example:
sc.hadoopConfiguration.set("fs.s3a.access.key", "...")
  sc.hadoopConfiguration.set("fs.s3a.secret.key", "...")
This mode of operation is the most flexible, with each application able to access different S3 buckets. It might require extra work on your part to avoid making the secret key visible in source code. (For example, you might use a function call to retrieve the secret key from a secure location.) -
(Not Recommended) Specify the credentials in a configuration file, such as core-site.xml:
<property>
    <name>fs.s3a.access.key</name>
    <value>...</value>
</property>
<property>
    <name>fs.s3a.secret.key</name>
    <value>...</value>
</property>
This mode of operation is convenient if all, or most, apps on a cluster access the same S3 bucket. Any apps that need different S3 credentials can use one of the other S3 authorization techniques.
- Set up AWS Credentials Using the Hadoop Credential Provider - Cloudera recommends
you use this method to set up AWS access because it provides system-wide AWS access to a single predefined bucket, without exposing the secret key in a configuration file or having to specify it at
runtime.
Accessing S3 Through a Proxy
To access S3 through a proxy, set the following proxy configuration parameters:
<property>
  <name>fs.s3a.proxy.host</name>
  <description>Hostname of the (optional) proxy server for S3 connections.</description>
</property>

<property>
  <name>fs.s3a.proxy.port</name>
  <description>Proxy server port. If this property is not set
    but fs.s3a.proxy.host is, port 80 or 443 is assumed (consistent with
    the value of fs.s3a.connection.ssl.enabled).</description>
</property>

<property>
  <name>fs.s3a.proxy.username</name>
  <description>Username for authenticating with proxy server.</description>
</property>

<property>
  <name>fs.s3a.proxy.password</name>
  <description>Password for authenticating with proxy server.</description>
</property>

<property>
  <name>fs.s3a.proxy.domain</name>
  <description>Domain for authenticating with proxy server.</description>
</property>

<property>
  <name>fs.s3a.proxy.workstation</name>
  <description>Workstation for authenticating with proxy server.</description>
</property>
Performance Considerations for Spark with S3
The FileOutputCommitter algorithm version 1 uses a final rename operation as the mechanism for committing finished work at the end of a job. Because S3 renames are actually two operations (copy and delete), performance can be significantly impacted.
To improve the performance of Spark with S3, use version 2 of the output committer algorithm and disable speculative execution:
- Add the following parameter to the YARN advanced configuration snippet (safety valve) to take effect:
<property>
  <name>spark.hadoop.mapreduce.fileoutputcommitter.algorithm.version</name>
  <value>2</value>
</property>
- Disable speculative execution in the Spark configuration as usual:
spark.speculation=false
Examples of Accessing S3 Data from Spark
The following examples demonstrate basic patterns of accessing data in S3 using Spark. The examples show the setup steps, application code, and input and output files located in S3.
Reading and Writing Text Files From and To Amazon S3
- Specify Amazon S3 credentials.
- Perform the word count application on a sonnets.txt file stored in Amazon S3:
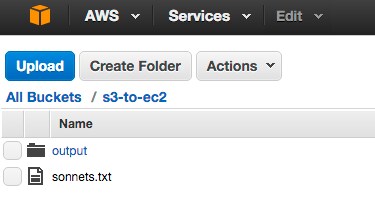
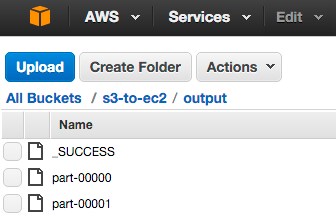
scala> val sonnets = sc.textFile("s3a://s3-to-ec2/sonnets.txt")
scala> val counts = sonnets.flatMap(line => line.split(" ")).map(word => (word, 1)).reduceByKey(_ + _)
scala> counts.saveAsTextFile("s3a://s3-to-ec2/output")
Yielding the output:
Reading and Writing Data Sources From and To Amazon S3
The following example illustrates how to read a text file from Amazon S3 into an RDD, convert the RDD to a DataFrame, and then use the Data Source API to write the DataFrame into a Parquet file on Amazon S3:
- Specify Amazon S3 credentials.
- Read a text file in Amazon S3:
scala> val sample_07 = sc.textFile("s3a://s3-to-ec2/sample_07.csv") - Map lines into columns:
scala> import org.apache.spark.sql.Row scala> val rdd_07 = sample_07.map(_.split('\t')).map(e ⇒ Row(e(0), e(1), e(2).trim.toInt, e(3).trim.toInt)) - Create a schema and apply to the RDD to create a DataFrame:
scala> import org.apache.spark.sql.types.{StructType, StructField, StringType, IntegerType}; scala> val schema = StructType(Array( StructField("code",StringType,false), StructField("description",StringType,false), StructField("total_emp",IntegerType,false), StructField("salary",IntegerType,false))) scala> val df_07 = sqlContext.createDataFrame(rdd_07,schema) - Write DataFrame to a Parquet file:
scala> df_07.write.parquet("s3a://s3-to-ec2/sample_07.parquet")
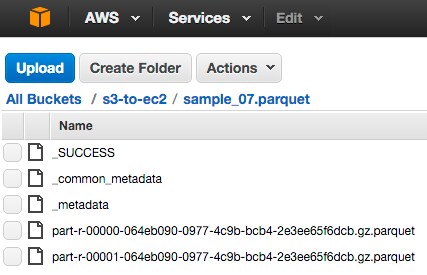
The files are compressed with the default gzip compression.