Cloudera Navigator Audit Server
Adding the Navigator Audit Server Role
Minimum Required Role: Navigator Administrator (also provided by Full Administrator)
Before adding the Navigator Audit Server role, configure the database where audit events are stored.- Do one of the following:
- Select .
- On the Status tab of the Home page, in Cloudera Management Service table, click the Cloudera Management Service link.
- Click the Instances tab.
- Click the Add Role Instances button. The Customize Role Assignments page displays.
- Assign the Navigator role to a host.
- Customize the assignment of role instances to hosts. The wizard evaluates the hardware configurations of the hosts to determine the best hosts for each role. The wizard assigns all
worker roles to the same set of hosts to which the HDFS DataNode role is assigned. These assignments are typically acceptable, but you can reassign them if necessary.
Click a field below a role to display a dialog containing a list of hosts. If you click a field containing multiple hosts, you can also select All Hosts to assign the role to all hosts or Custom to display the pageable hosts dialog.
The following shortcuts for specifying hostname patterns are supported:- Range of hostnames (without the domain portion)
Range Definition Matching Hosts 10.1.1.[1-4] 10.1.1.1, 10.1.1.2, 10.1.1.3, 10.1.1.4 host[1-3].company.com host1.company.com, host2.company.com, host3.company.com host[07-10].company.com host07.company.com, host08.company.com, host09.company.com, host10.company.com - IP addresses
- Rack name
Click the View By Host button for an overview of the role assignment by hostname ranges.
- Range of hostnames (without the domain portion)
- Customize the assignment of role instances to hosts. The wizard evaluates the hardware configurations of the hosts to determine the best hosts for each role. The wizard assigns all
worker roles to the same set of hosts to which the HDFS DataNode role is assigned. These assignments are typically acceptable, but you can reassign them if necessary.
- When you are satisfied with the assignments, click Continue. The Database Setup screen displays.
- Configure database settings:
- Choose the database type:
- Leave the default setting of Use Embedded Database to have Cloudera Manager create and configure required databases. Make a note of the auto-generated
passwords.
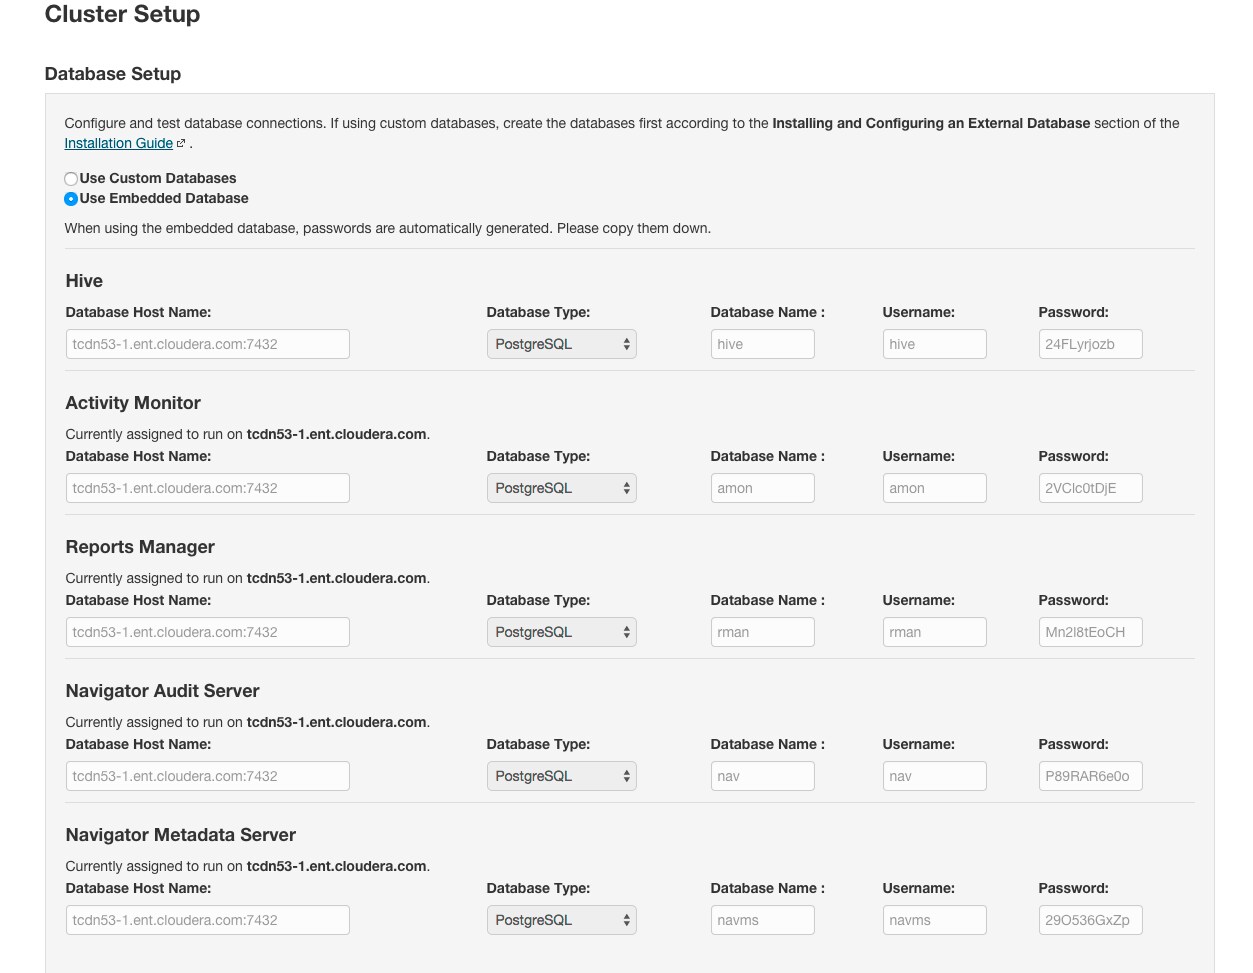
- Select Use Custom Databases to specify external databases.
- Enter the database host, database type, database name, username, and password for the database that you created when you set up the database.
- Leave the default setting of Use Embedded Database to have Cloudera Manager create and configure required databases. Make a note of the auto-generated
passwords.
- Click Test Connection to confirm that Cloudera Manager can communicate with the database using the information you have supplied. If the test succeeds in all cases, click Continue; otherwise check and correct the information you have provided for the database and then try the test again. (For some servers, if you are using the embedded database, you will see a message saying the database will be created at a later step in the installation process.) The Review Changes screen displays.
- Choose the database type:
- Click Finish.
Starting, Stopping, and Restarting the Navigator Audit Server
- Do one of the following:
- Select .
- On the Status tab of the Home page, in Cloudera Management Service table, click the Cloudera Management Service link.
- Click the Instances tab.
- Do one of the following depending on your role:
-
Minimum Required Role: Full Administrator
- Check the checkbox next to the Navigator Audit Server role.
- Select . Click Action to confirm the action, where Action is Start, Stop, or Restart.
-
Minimum Required Role: Navigator Administrator (also provided by Full Administrator)
- Click the Navigator Audit Server role link.
- Select . Click Action this Navigator Audit Server, where Action is Start, Stop, or Restart, to confirm the action.
-
Configuring the Navigator Audit Server Log Directory
Minimum Required Role: Navigator Administrator (also provided by Full Administrator)
- Do one of the following:
- Select .
- On the Status tab of the Home page, in Cloudera Management Service table, click the Cloudera Management Service link.
- Click the Configuration tab.
- Expand the Navigator Audit Server Default Group category.
- Set the Navigator Audit Server Log Directory property.
- Click Save Changes.
- Click the Instances tab.
- Check the checkbox next to the Navigator Audit Server role.
- Select .
Configuring the Navigator Audit Server Data Expiration Period
Minimum Required Role: Navigator Administrator (also provided by Full Administrator)
You can configure the number of hours of audit events to keep in the Navigator Audit Server database as follows:- Do one of the following:
- Select .
- On the Status tab of the Home page, in Cloudera Management Service table, click the Cloudera Management Service link.
- Click the Configuration tab.
- Expand the Navigator Audit Server Default Group category.
- Set the Navigator Audit Server Data Expiration Period property.
- Click Save Changes.
- Click the Instances tab.
- Check the checkbox next to the Navigator Audit Server role.
- Select .
Configuring the Audit Server to Mask Personally Identifiable Information
Minimum Required Role: Navigator Administrator (also provided by Full Administrator)
- Do one of the following:
- Select .
- On the Status tab of the Home page, in Cloudera Management Service table, click the Cloudera Management Service link.
- Click the Configuration tab.
- Expand the Navigator Audit Server Default Group category.
- Click the Advanced category.
- Configure the PII Masking Regular Expression property with a regular expression that matches the credit card number formats
to be masked. The default expression is:
(4[0-9]{12}(?:[0-9]{3})?)|(5[1-5][0-9]{14})|(3[47][0-9]{13})
|(3(?:0[0-5]|[68][0-9])[0-9]{11})|(6(?:011|5[0-9]{2})[0-9]{12})|((?:2131|1800|35\\d{3})\\d{11})
which is constructed from the following subexpressions:- Visa - (4[0-9]{12}(?:[0-9]{3})?)
- MasterCard - (5[1-5][0-9]{14})
- American Express - (3[47][0-9]{13})
- Diners Club - (3(?:0[0-5]|[68][0-9])[0-9]{11})
- Discover - (6(?:011|5[0-9]{2})[0-9]{12})
- JCB - ((?:2131|1800|35\\d{3})\\d{11})
- Click Save Changes to commit the changes.