Cloudera Navigator Audit Server
The Navigator Audit Server is one of the two roles (daemons) that supports Cloudera Navigator data management functionality. The Navigator Audit Server tracks and coalesces events from Cloudera Manager and stores them in the Navigator Audit database. See Cloudera Navigator Auditing Architecture in Cloudera Data Management for more background. This section covers common administration tasks for the Navigator Audit Server.
Adding the Navigator Audit Server Role
Minimum Required Role: Navigator Administrator (also provided by Full Administrator)
The steps below assume that an external database is running and available to be used with the Navigator Audit Server role. Before adding this role, gather the configuration details about the external database instance so you can enter them when needed during this process.
- Log in to the Cloudera Manager Admin Console.
- From the menu, select .
- Click theInstances tab.
- Click Add Role Instances. The Customize Role Assignments page displays and lists the nodes available to support additional roles, assuming the cluster has available resources. Reassign and customize role instances as needed.
- Select the Navigator Audit Server role and assign it to appropriate host for your cluster.
- When finished, click Continue. The Database Setup page displays.
- Click Use Custom Database.
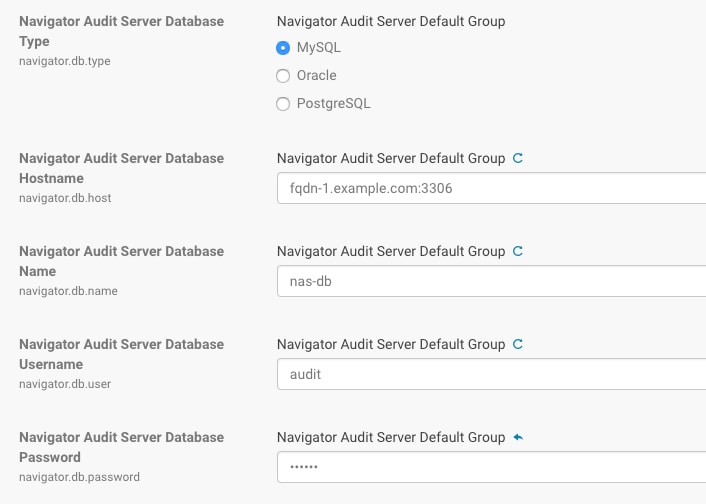
- In the Navigator Audit Server section, enter the details of your database instance:
- Database host name
- Database type
- Database name
- Username
- Password
- Click Test Connection to verify the communication between the cluster and the external database. If the test fails, check the database settings and try again. If you selected embedded database, a message displays regarding database creation.
- Click Continue.
- The Cluster Setup Review Changes page displays.
- Click Finish.
Starting, Stopping, and Restarting the Navigator Audit Server
Minimum Required Role: Navigator Administrator (also provided by Full Administrator)
- Log in to the Cloudera Manager Admin Console.
- From the menu, select .
- Click the Instances tab.
- Click the link for the Navigator Audit Server from the Role Type list. The Actions for Selected button activates and displays (1) for the selected role.
- From the Actions for Selected (1) menu, select the Action you want to perform on
this role instance:
- Start
- Stop
- Restart
- Enter Maintenance Mode
- Exit Maintenance Mode
- Delete
- Click Cancel to abandon the process, or click Action to execute the action.
Configuring the Navigator Audit Server Data Expiration Period
Minimum Required Role: Navigator Administrator (also provided by Full Administrator)
You can configure the number of hours of audit events to keep in the Navigator Audit Server database as follows:- Log in to the Cloudera Manager Admin Console.
- From the menu, select .
- Click the Configuration tab.
- Select .
- Set the Navigator Audit Server Data Expiration Period property.
To apply this configuration property to other role groups as needed, edit the value for the appropriate role group. See Modifying Configuration Properties Using Cloudera Manager.
- Restart the Navigator Audit Server role.
Configuring the Navigator Audit Server Log Directory
Minimum Required Role: Navigator Administrator (also provided by Full Administrator)
You can configure the location of the Navigator Audit Server logs (by default, /var/log/cloudera-scm-navigator) as follows:- Log in to the Cloudera Manager Admin Console.
- From the menu, select .
- Click the Configuration tab.
- Select .
- Set the Navigator Audit Server Log Directory property.
To apply this configuration property to other role groups as needed, edit the value for the appropriate role group. See Modifying Configuration Properties Using Cloudera Manager.
- Restart the Navigator Audit Server role.