Introduction
This tutorial is inspired by the Kaggle competition RSNA-MICCAI Brain Tumor Radiogenomic Classification. We will use Cloudera Data Engineering on Cloudera to transform the DICOM files produced by an MRI into PNG images.
In a future tutorial, we will use the PNG images to train a machine learning model to detect the presence of a protein found in certain brain cancers.
Prerequisites
- Have access to Cloudera on cloud
- Have created a Cloudera workload User
- Ensure proper Data Engineering role access
- DEAdmin: enable Data Engineering and create virtual clusters
- DEUser: access virtual cluster and run jobs
- Have Data Engineering CLI configured. Take a look at Using CLI-API to Automate Access to Cloudera Data Engineering to learn how.
- Basic AWS CLI skills
Download Assets
There are two (2) options in getting assets for this tutorial:
It only contains the necessary files for this tutorial. Unzip tutorial-files.zip and remember its location.
It provides assets used in this and other tutorials; organized by tutorial title.
In addition to the files above, you will also need to download the test and train datasets from the Kaggle competition, RSNA-MICCAI Brain Tumor Radiogenomic Classification.
NOTE: The datasets use approximately 137 GB of storage. It will take some time to download and unzip the file.
Using AWS CLI, copy the train directory to your S3 bucket, defined by your environment’s storage.location.base attribute.
For example, the property storage.location.base has the value s3a://usermarketing-cdp-demo; copy the train folder using the command:
aws s3 cp train s3://usermarketing-cdp-demo/train --recursive

There are two (2) variables in file spark-etl.py that need to be updated. The values are based on the S3 location you stored the data:
- S3_BUCKET = set to S3 bucket name. For example, usermarketing-cdp-demo
- S3_INPUT_KEY_PREFIX = set to folder(s) location. For example, train

Enable data engineering service
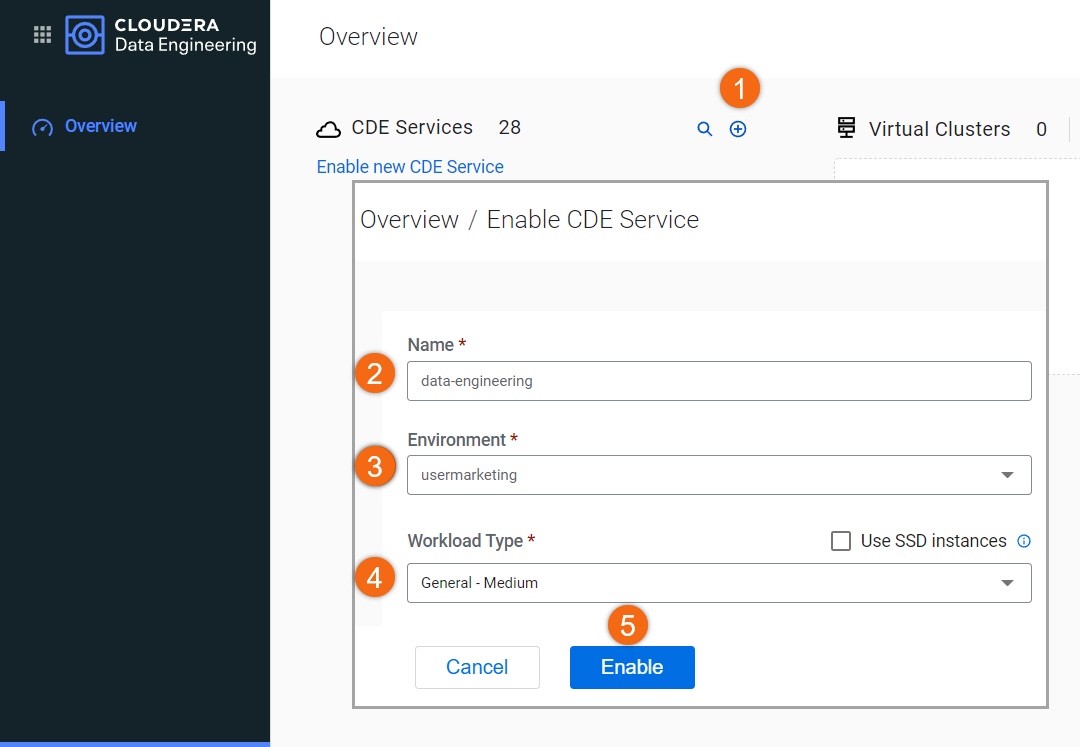
If your environment doesn’t already have a Data Engineering Service enabled, let’s enable it.
- Click on
 to enable new Cloudera Data Engineering service
 - Name:
data-engineering - Environment: <your environment name>
- Workload Type: General - Medium
Make other configuration changes (optional)
- Select Enable
Create virtual cluster
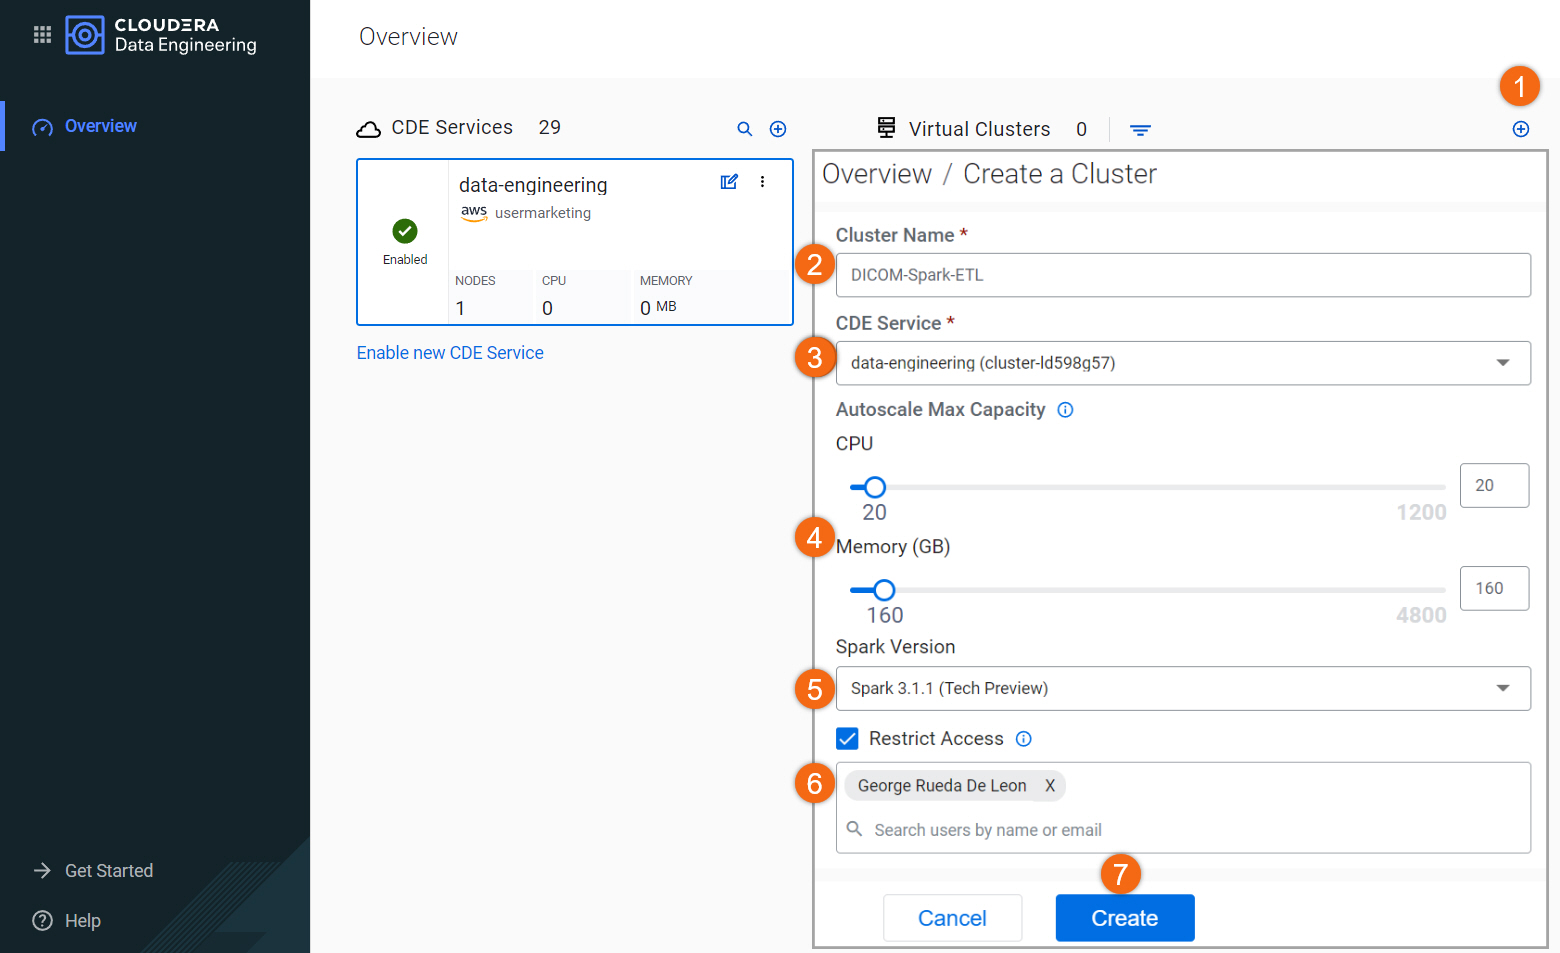
If you don’t already have a Data Engineering virtual cluster created, let’s create it.
- Click on
 to create cluster
 - Cluster Name:
DICOM-Spark-ETL - Data Engineering Service: data-engineering
- Autoscale Max Capacity: CPU:
20, Memory160GB - Spark Version: Spark 3.1.1
- Select Restrict Access and provide at least one (1) user to the access list. Only provide access to users who will running the job as they will be able to see the AWS credentials.
- Select Create
Submit a Spark job
The prerequisites for this tutorial requires you to already have Data Engineering CLI configured. If you need help configuring, take a look at Using CLI-API to Automate Access to Cloudera Data Engineering.
Create data engineering resource
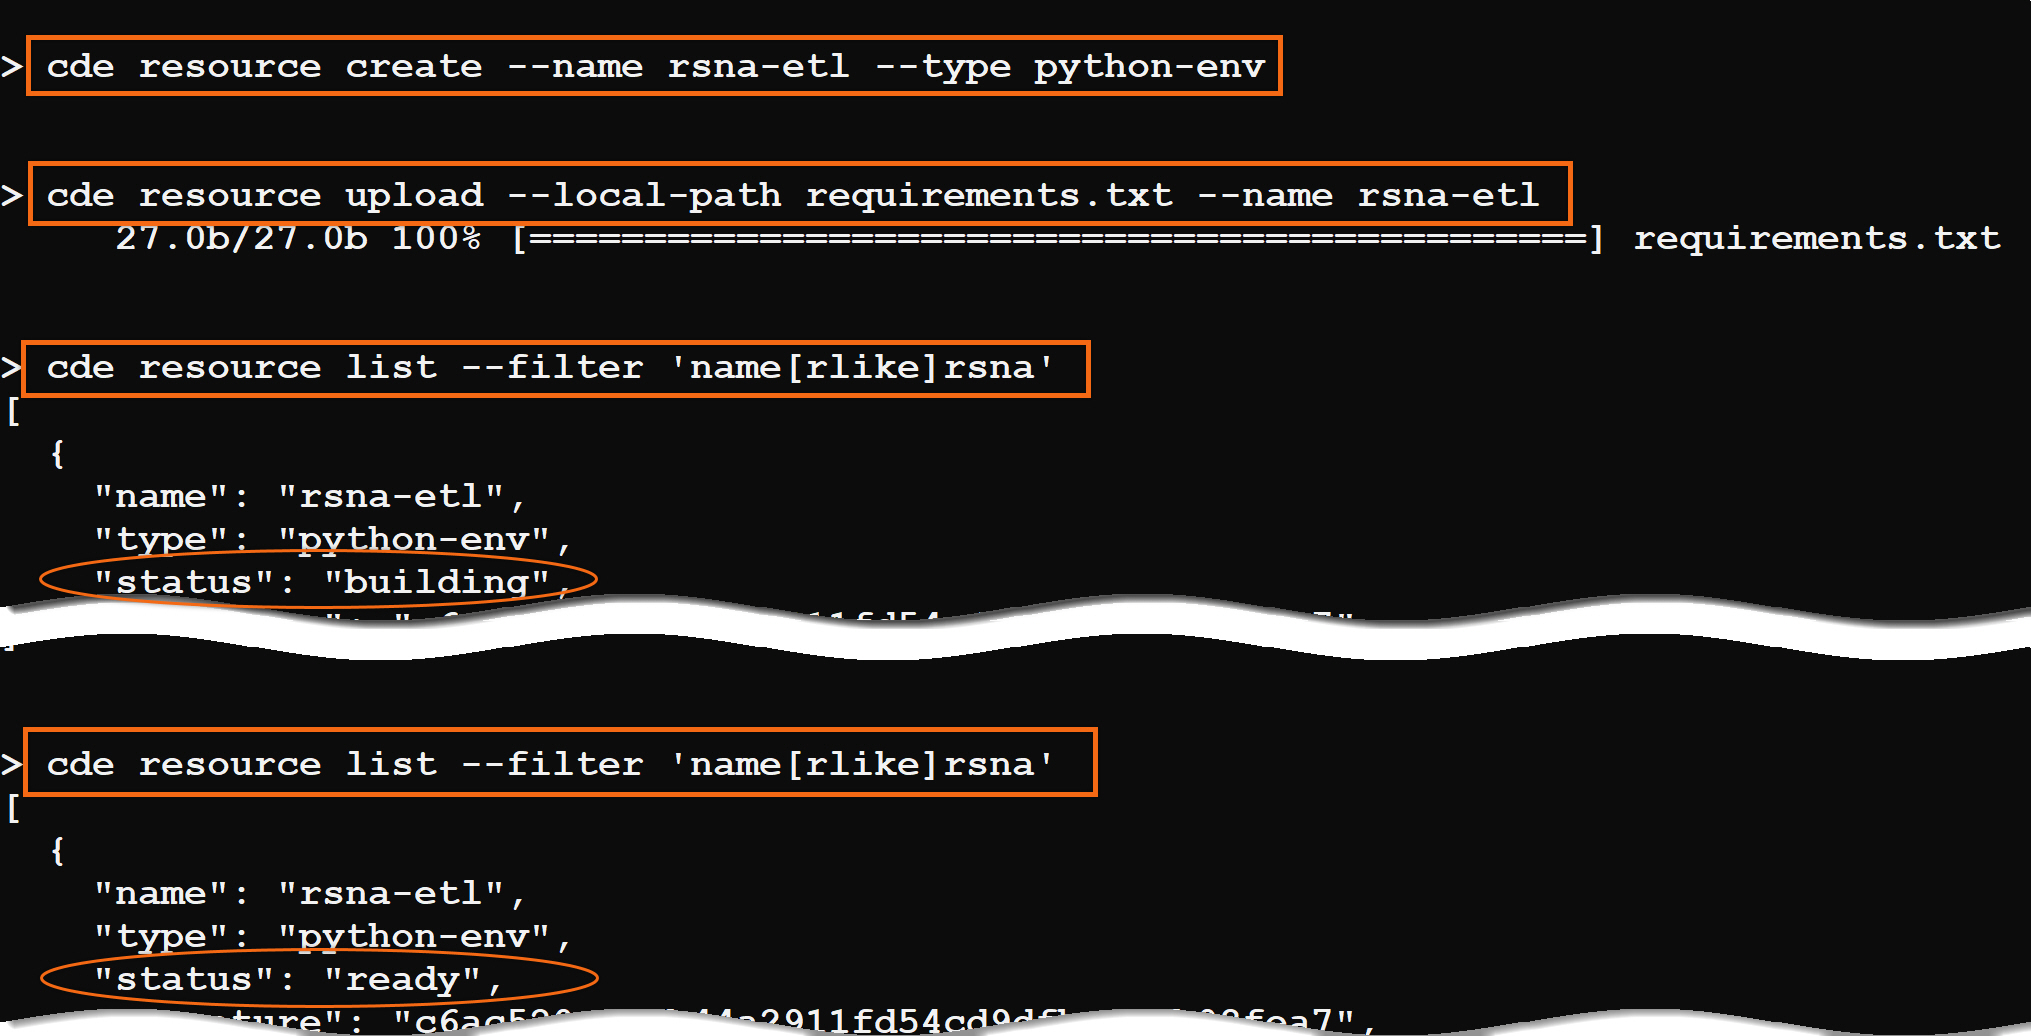
On the command line, issue the following commands to create a Data Engineering resource and upload the requirements.txt file to install required libraries in a new Python environment:
cde resource create --name rsna-etl --type python-env
cde resource upload --local-path requirements.txt --name rsna-etl
The Python environment will take a few minutes to build. You can issue this command to see the status. When the status becomes ready, it is ready to be used, and you can submit jobs.
cde resource list --filter 'name[rlike]rsna'
Run Spark job
Now that we have our Python environment setup, let’s run the Spark job, spark-etl.py, to transform the DICOM files produced by the MRI into PNG images.
IMPORTANT: Restrict access to the virtual cluster only to users that are allowed to access the AWS credentials used in the job.
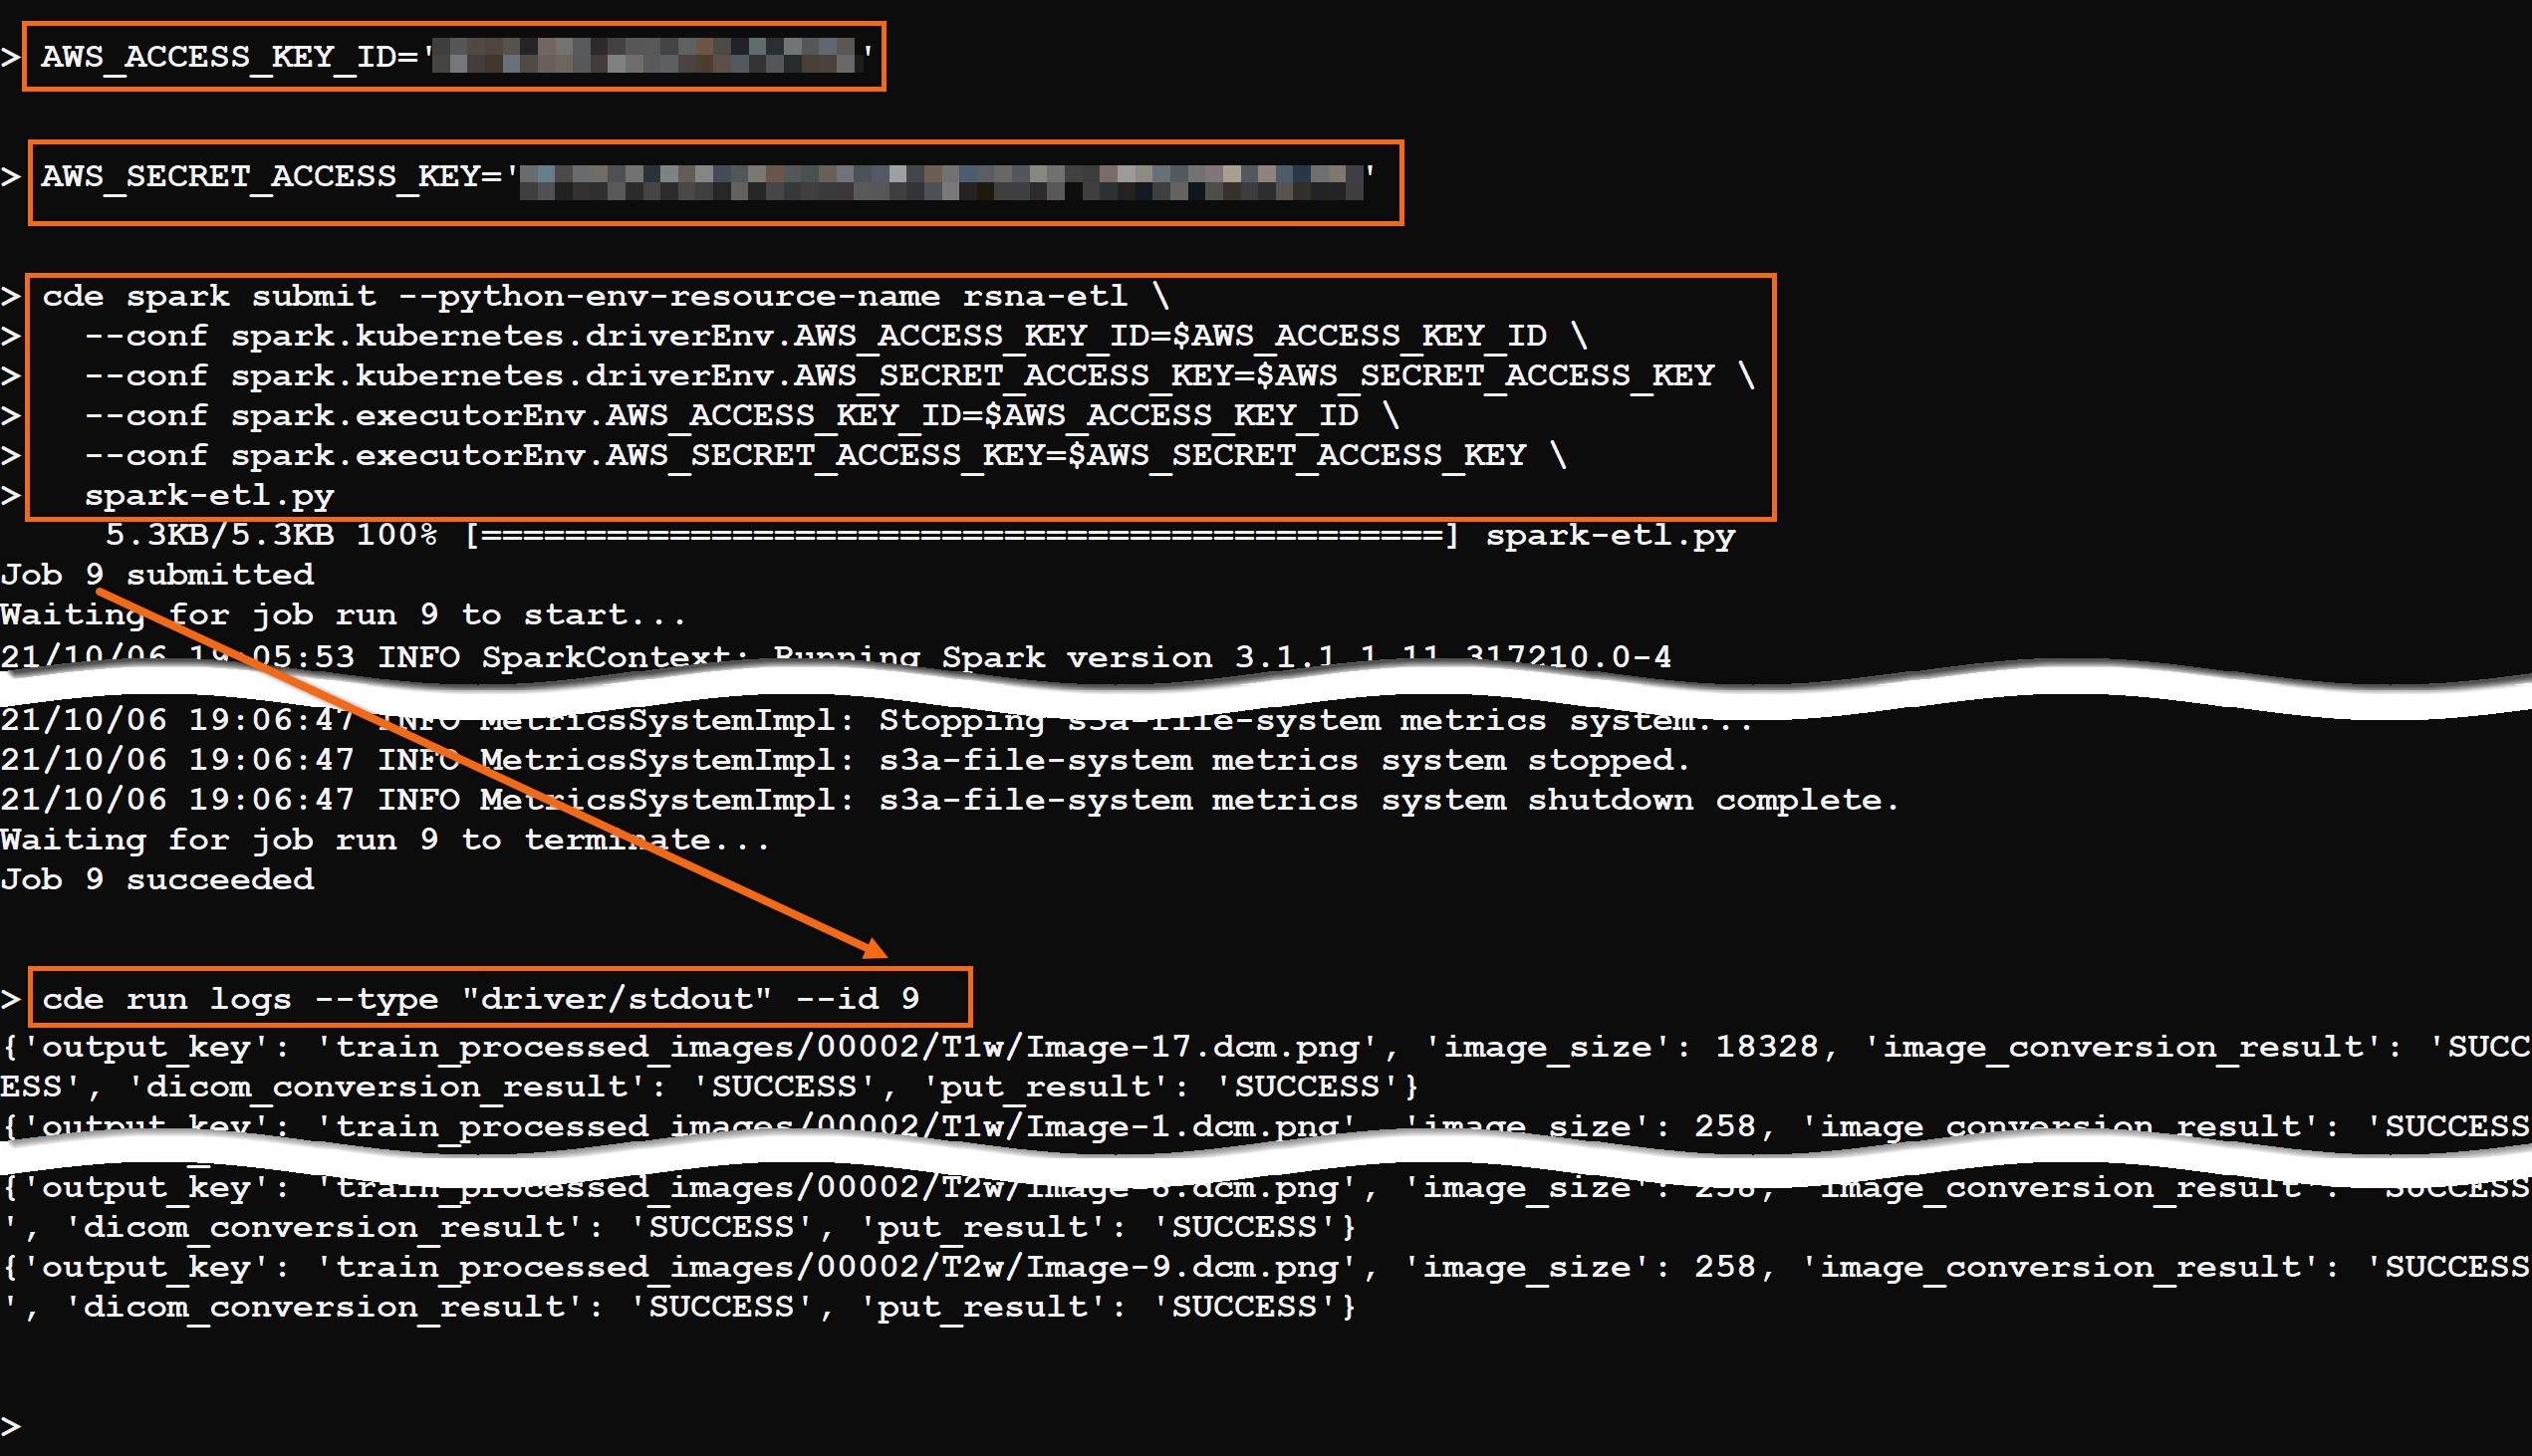
In the command prompt, create two (2) environment variables to hold your AWS credentials, which are needed to write the PNG images into S3.
AWS_ACCESS_KEY_ID='<your-AWS-access-key>'
AWS_SECRET_ACCESS_KEY='<your-AWS-secret-access-key>'
Run the job using the command:
cde spark submit --python-env-resource-name rsna-etl \
  --conf spark.kubernetes.driverEnv.AWS_ACCESS_KEY_ID=$AWS_ACCESS_KEY_ID \
  --conf spark.kubernetes.driverEnv.AWS_SECRET_ACCESS_KEY=$AWS_SECRET_ACCESS_KEY \
  --conf spark.executorEnv.AWS_ACCESS_KEY_ID=$AWS_ACCESS_KEY_ID \
  --conf spark.executorEnv.AWS_SECRET_ACCESS_KEY=$AWS_SECRET_ACCESS_KEY \
  spark-etl.py
When the job completes, you can review the output using the command:
cde run logs --type "driver/stdout" --id #, where # is the job ID
Finally, you can verify that the DICOM images have been transformed into PNG images using the following command. The files are located in the same S3 folder you specified, with _processed_images appended to the folder name.
aws s3 ls s3://usermarketing-cdp-demo/train_processed_images --recursive
Further reading
Other
- Have a question? Join Cloudera Community
- Cloudera Data Engineering documentation

