Introduction
Experience the benefits of having access to a hybrid cloud solution, which provides us to access many resources, including NVIDIA GPUs. Explore how you can leverage NVIDIA's RAPIDS framework using Cloudera AI on Cloudera platform. Harness the GPU power and see significant speed improvements compared to commonly used machine learning libraries such as pandas, NumPy and Sklearn in both data preprocessing and model training.
Prerequisites
- Have access to Cloudera on cloud
- Have created a Cloudera workload User
- Ensure proper Cloudera AI role access
- MLUser: ability to run workloads
- MLAdmin: ability to create and delete workspaces
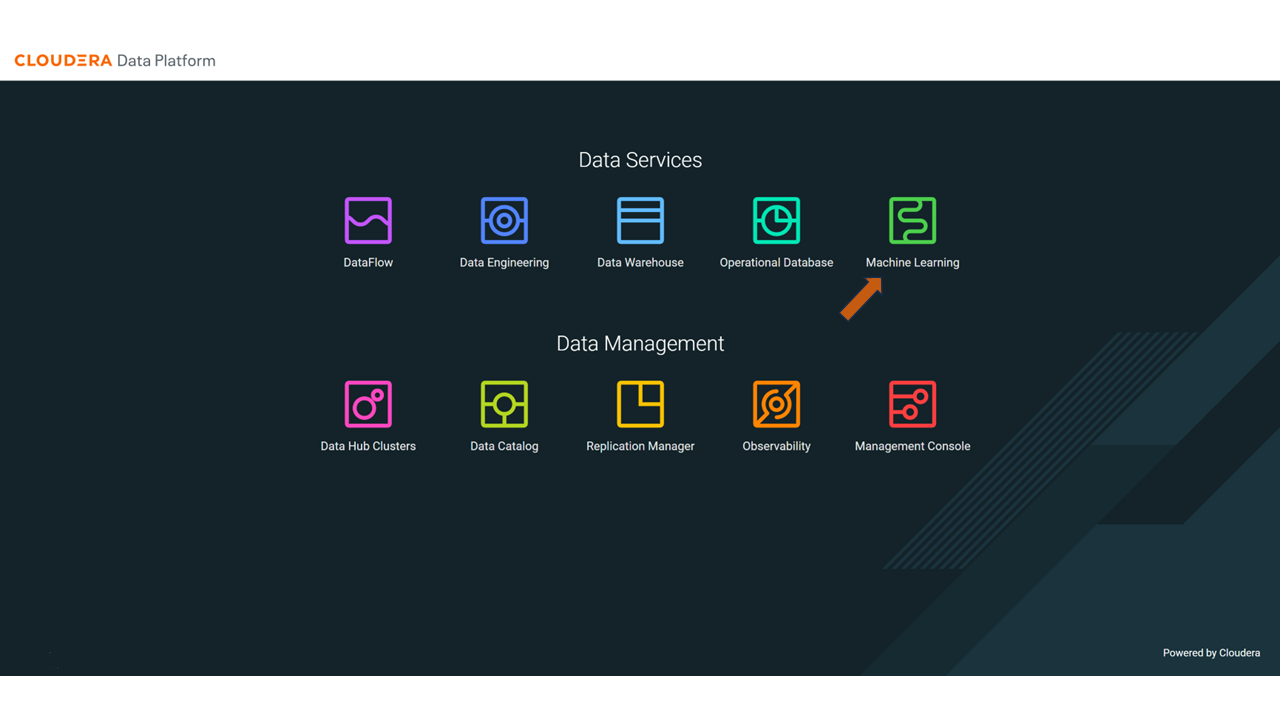
In the ML Workspaces section, select Provision Workspace.
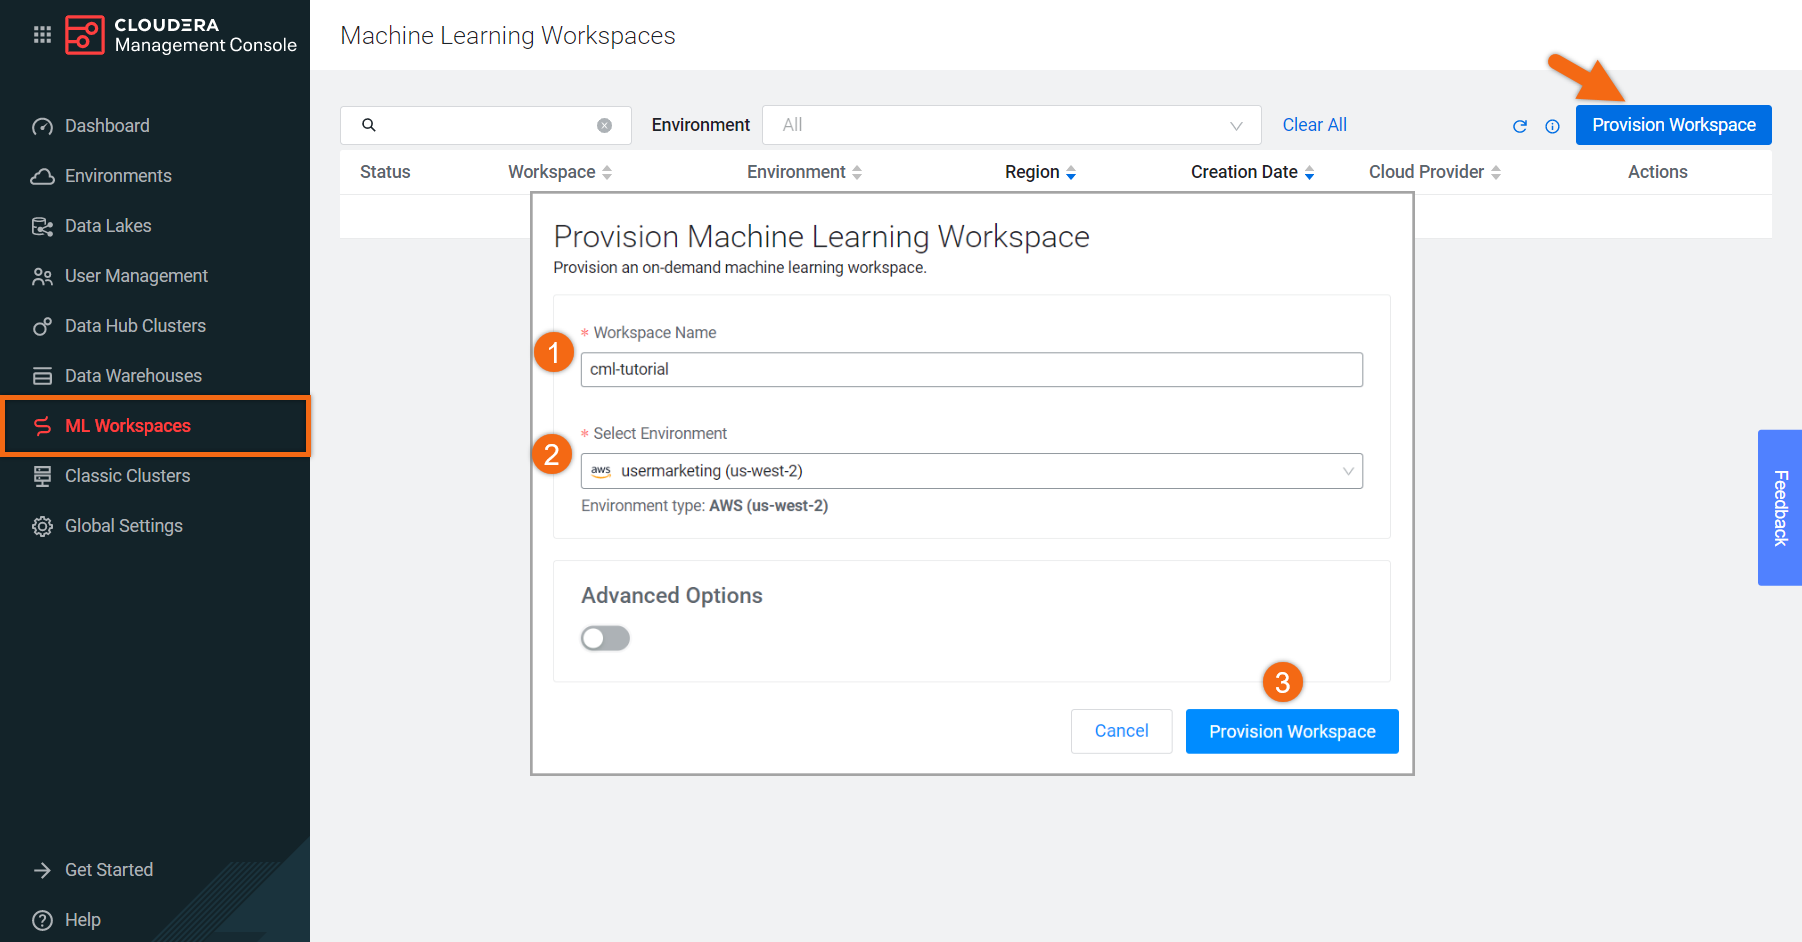
Two simple pieces of information are needed to provision an ML workspace - the Workspace name and the Environment name. For example:
- Workspace Name:
cml-tutorial - Environment: <your environment name>
- Select Provision Workspace
NOTE: You may need to activate GPU usage in Advanced Options
Create resource profile
Resource profiles define how many vCPUs and how much memory Cloudera AI will reserve for a particular workload (for example, session, job, model). You must have MLAdmin role access to create a new resource profile.
Let’s create a new resource profile.
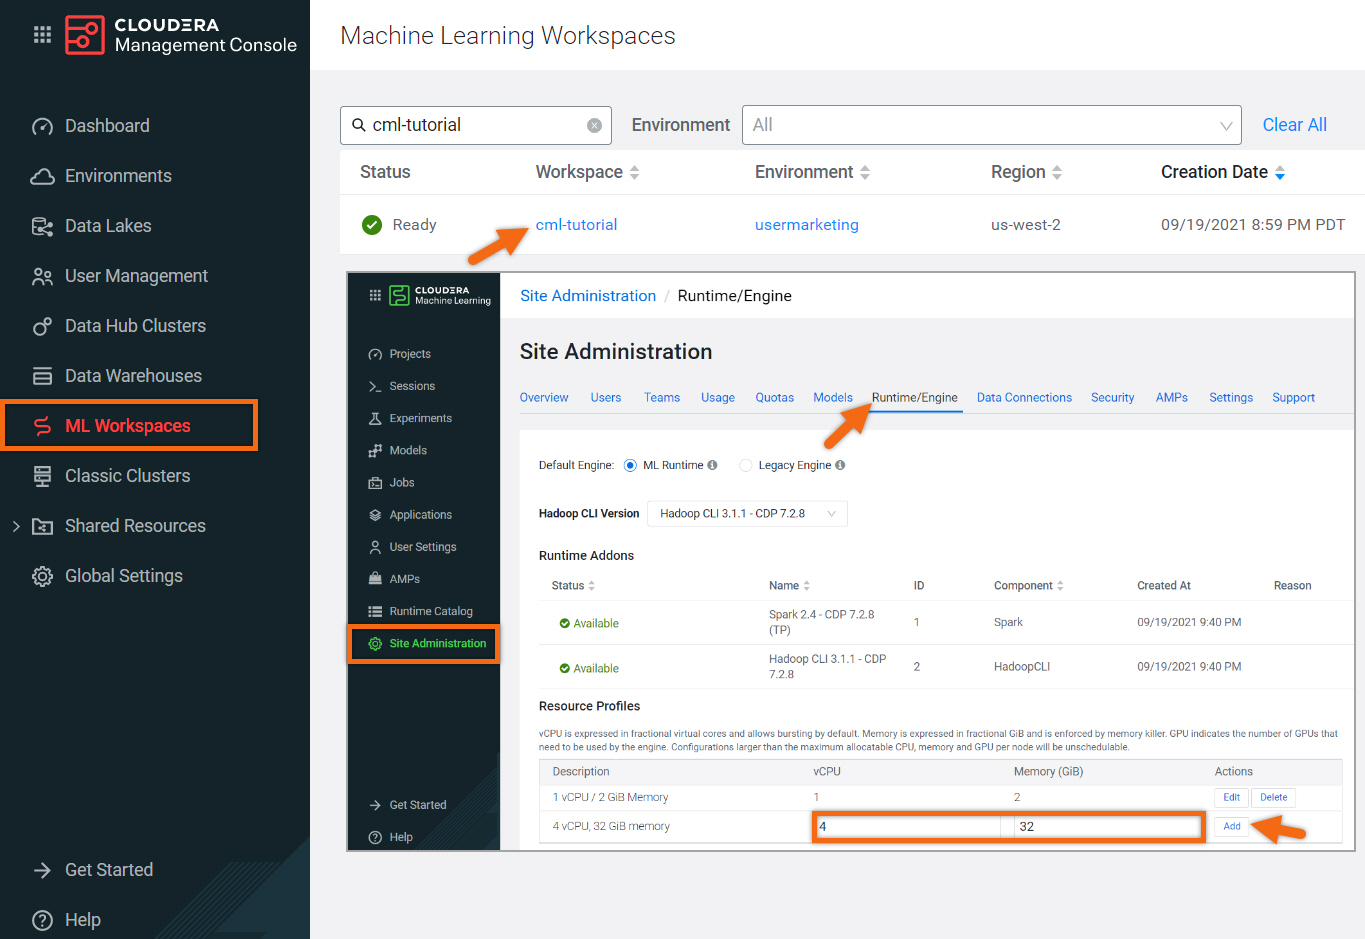
Beginning from the ML Workspaces section, open your workspace by selecting its name, cml-tutorial.
In the Site Administration section, select Runtime/Engine.
Create a new resource profile using the following information:
vCPU: 4
Memory (GiB): 32
Select Add
Create project
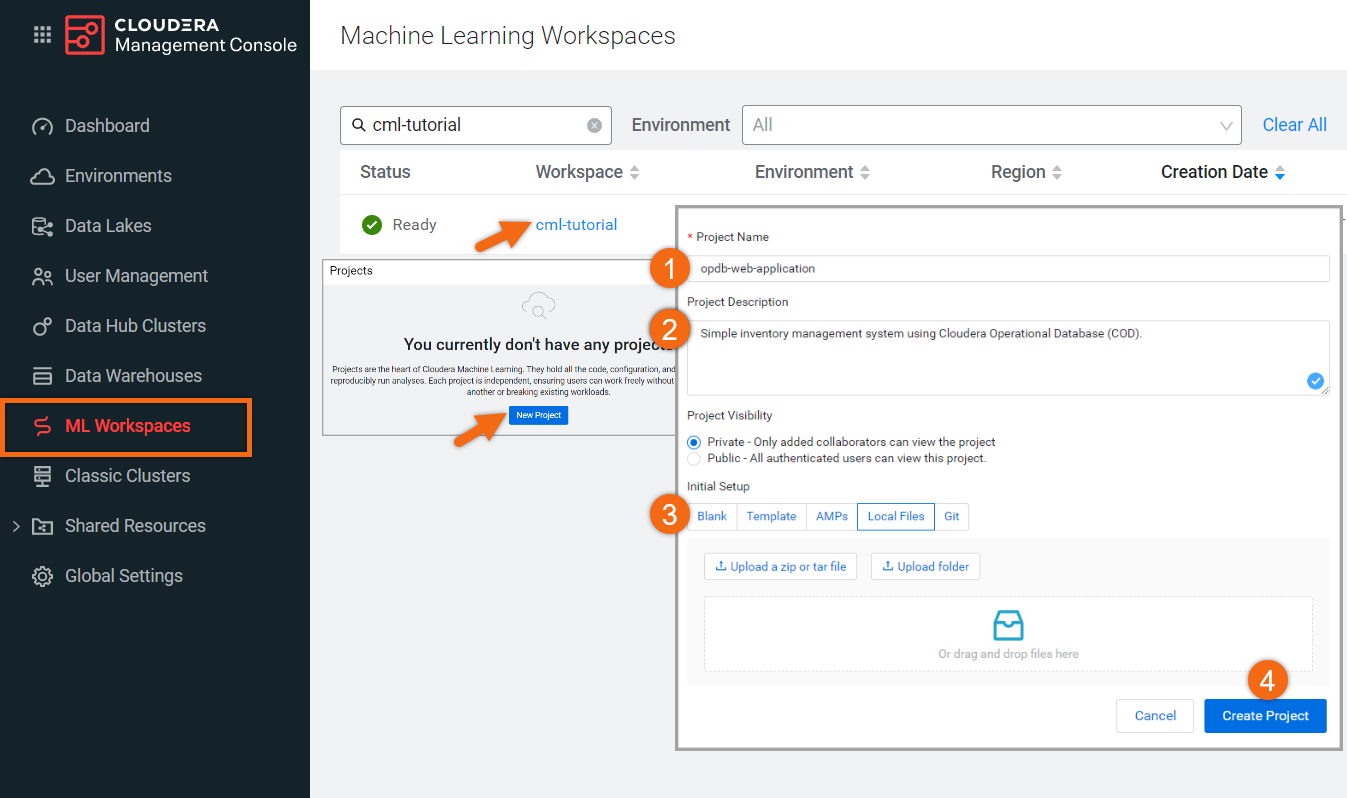
Beginning from the ML Workspaces section, open your workspace by selecting its name, cml-tutorial.
Select New Project.
Complete the New Project form using:
- Project Name:
Fare Prediction - Project Description:
A project showcasing speed improvements using RAPIDS framework. - Initial Setup: Local Files
Upload or Drag-Drop tutorial-files.zip file you downloaded earlier - Select Create Project
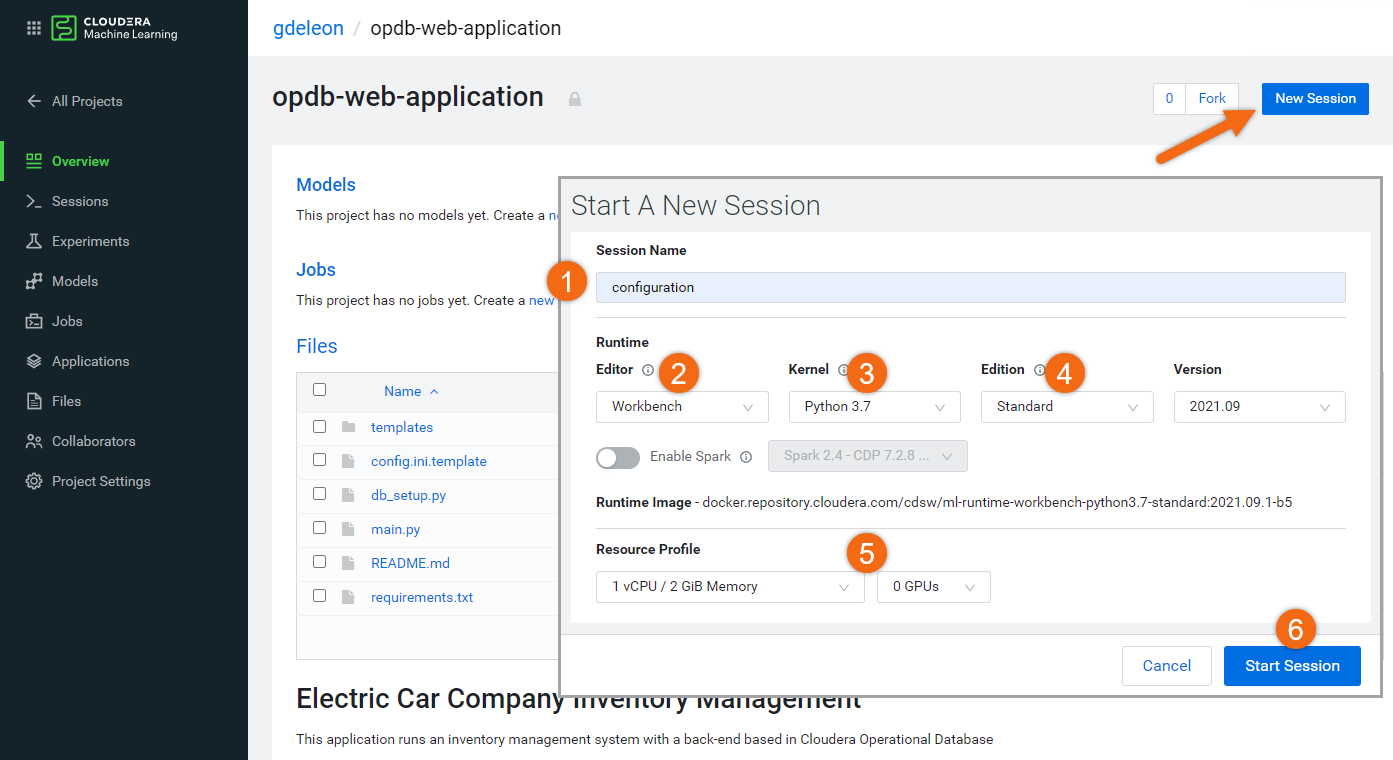
Run program in Jupyter Notebook
Let’s open the file gpu_fare_prediction.ipynb by double-clicking the filename.
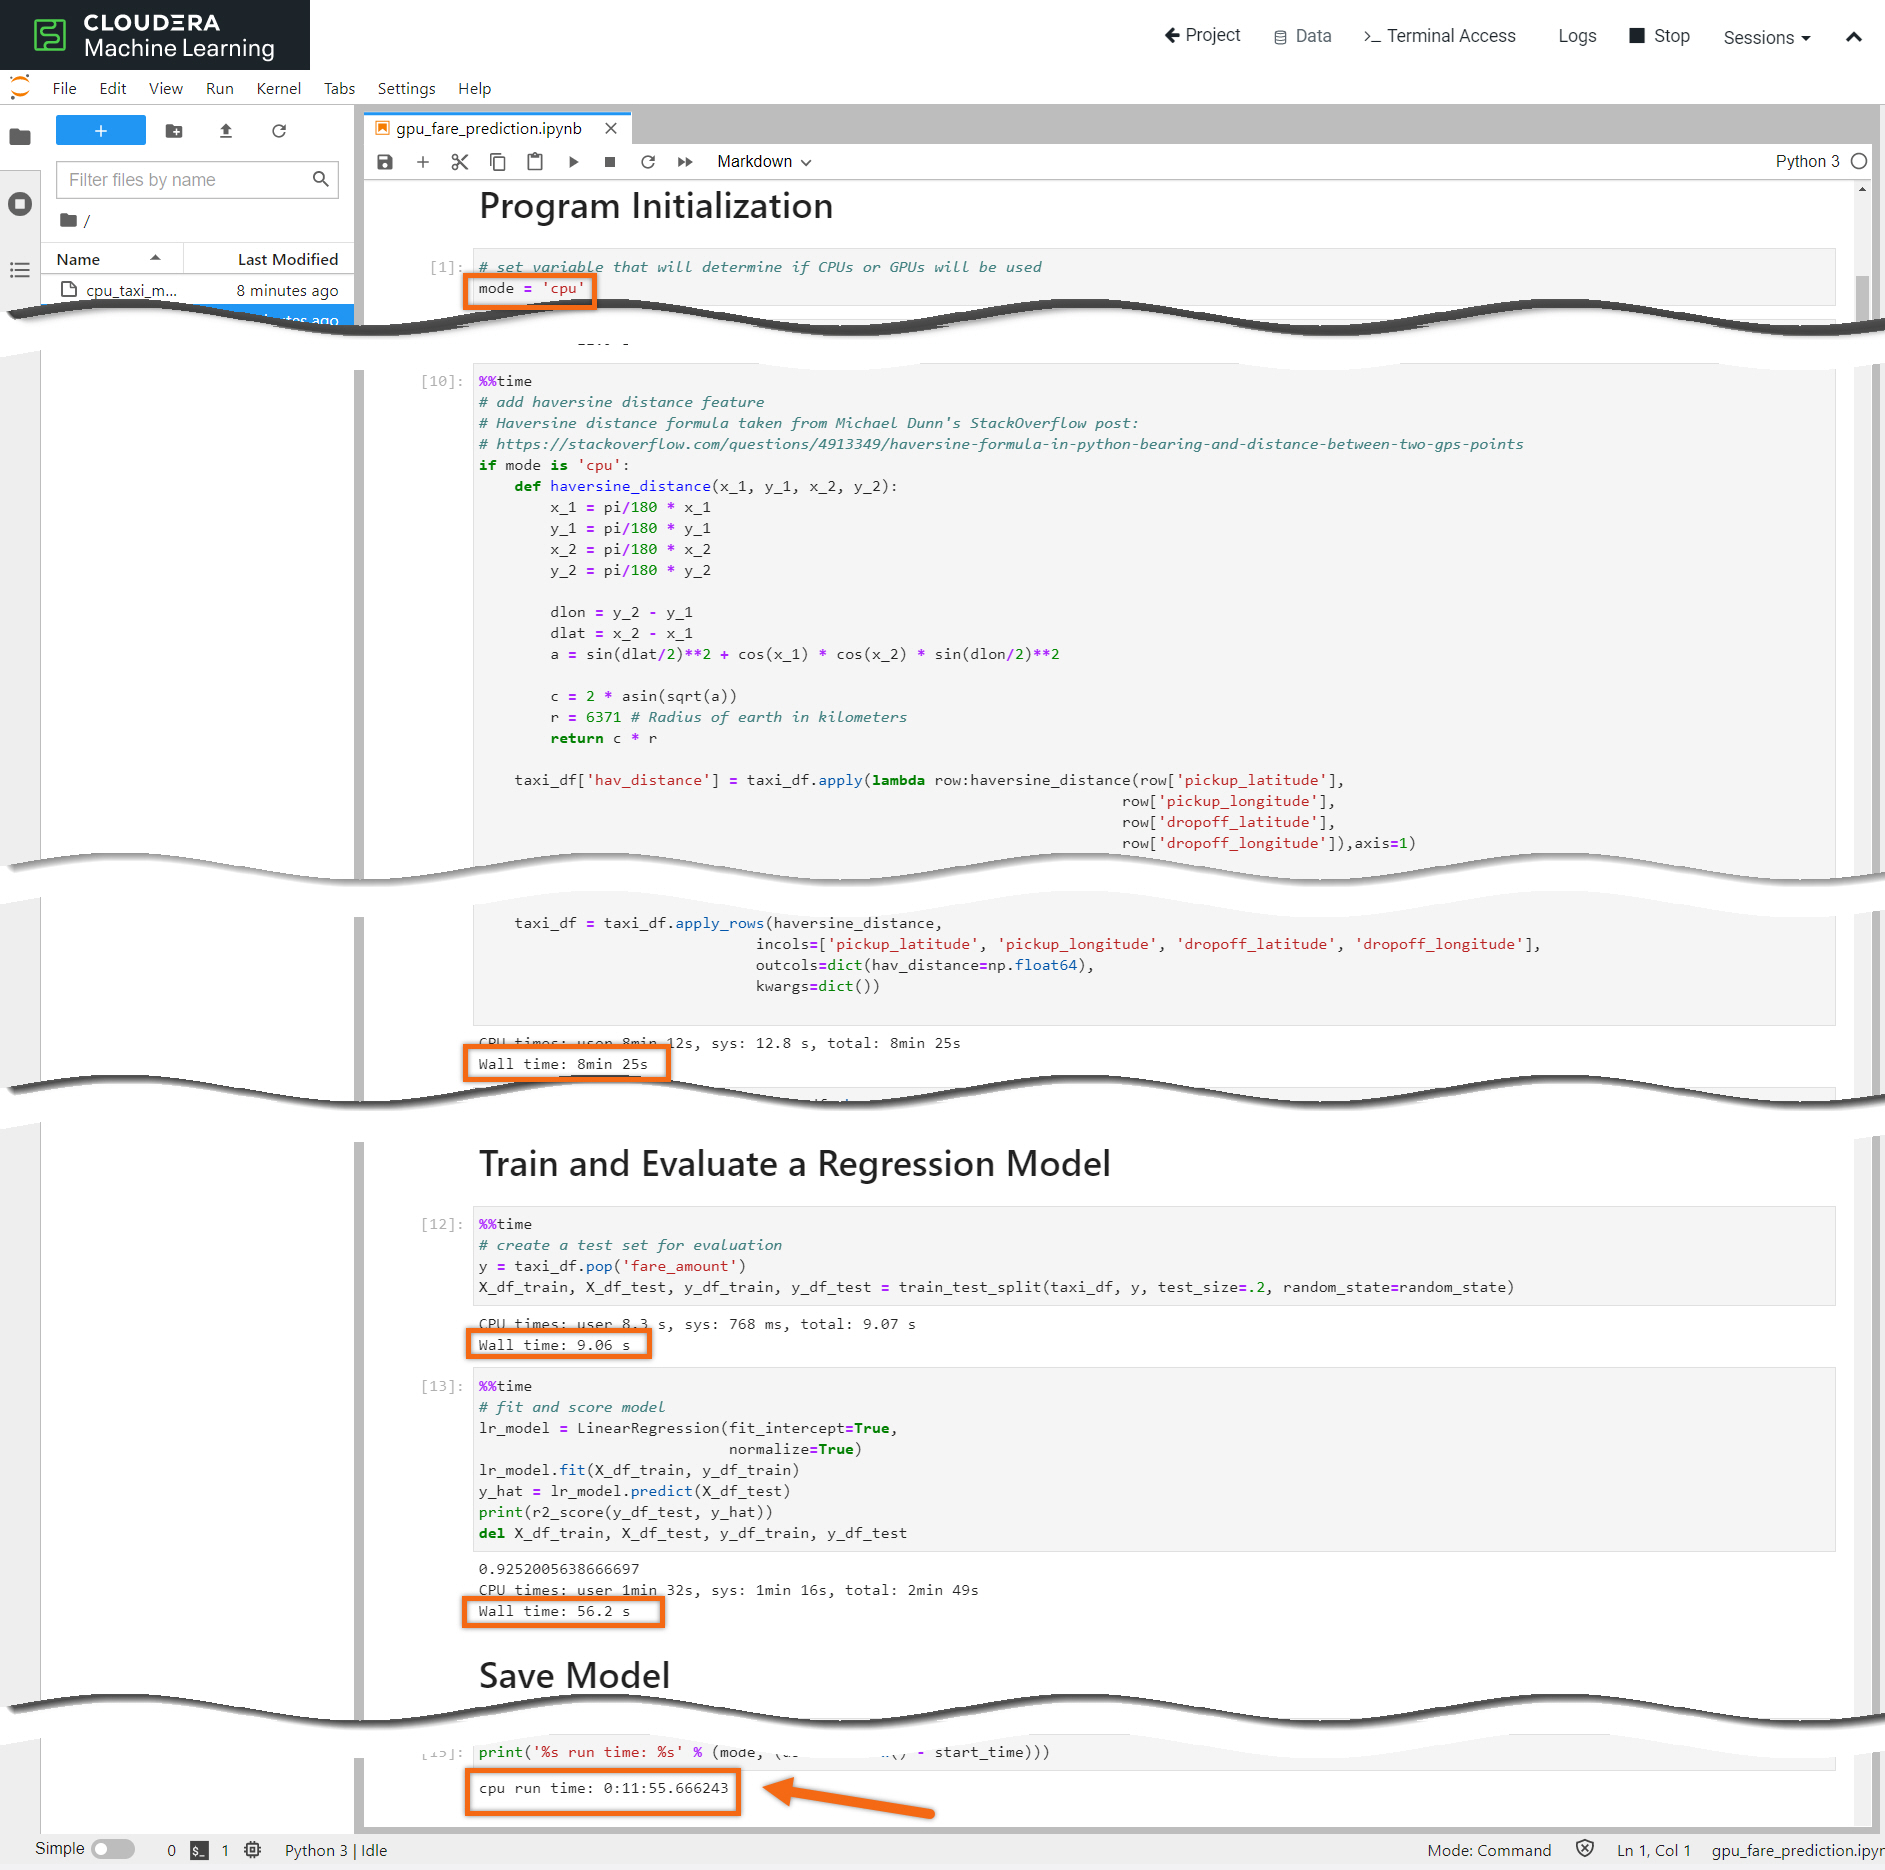
The default, mode = ‘cpu’, will run the program using only the CPU.
Without making any changes to the program, run all the cells by selecting Kernel > Restart Kernel and Run All Cells..., then click Restart.
The majority of the time is spent calculating the Haversine formula to determine the great-circle distance between pickup/drop-off locations.
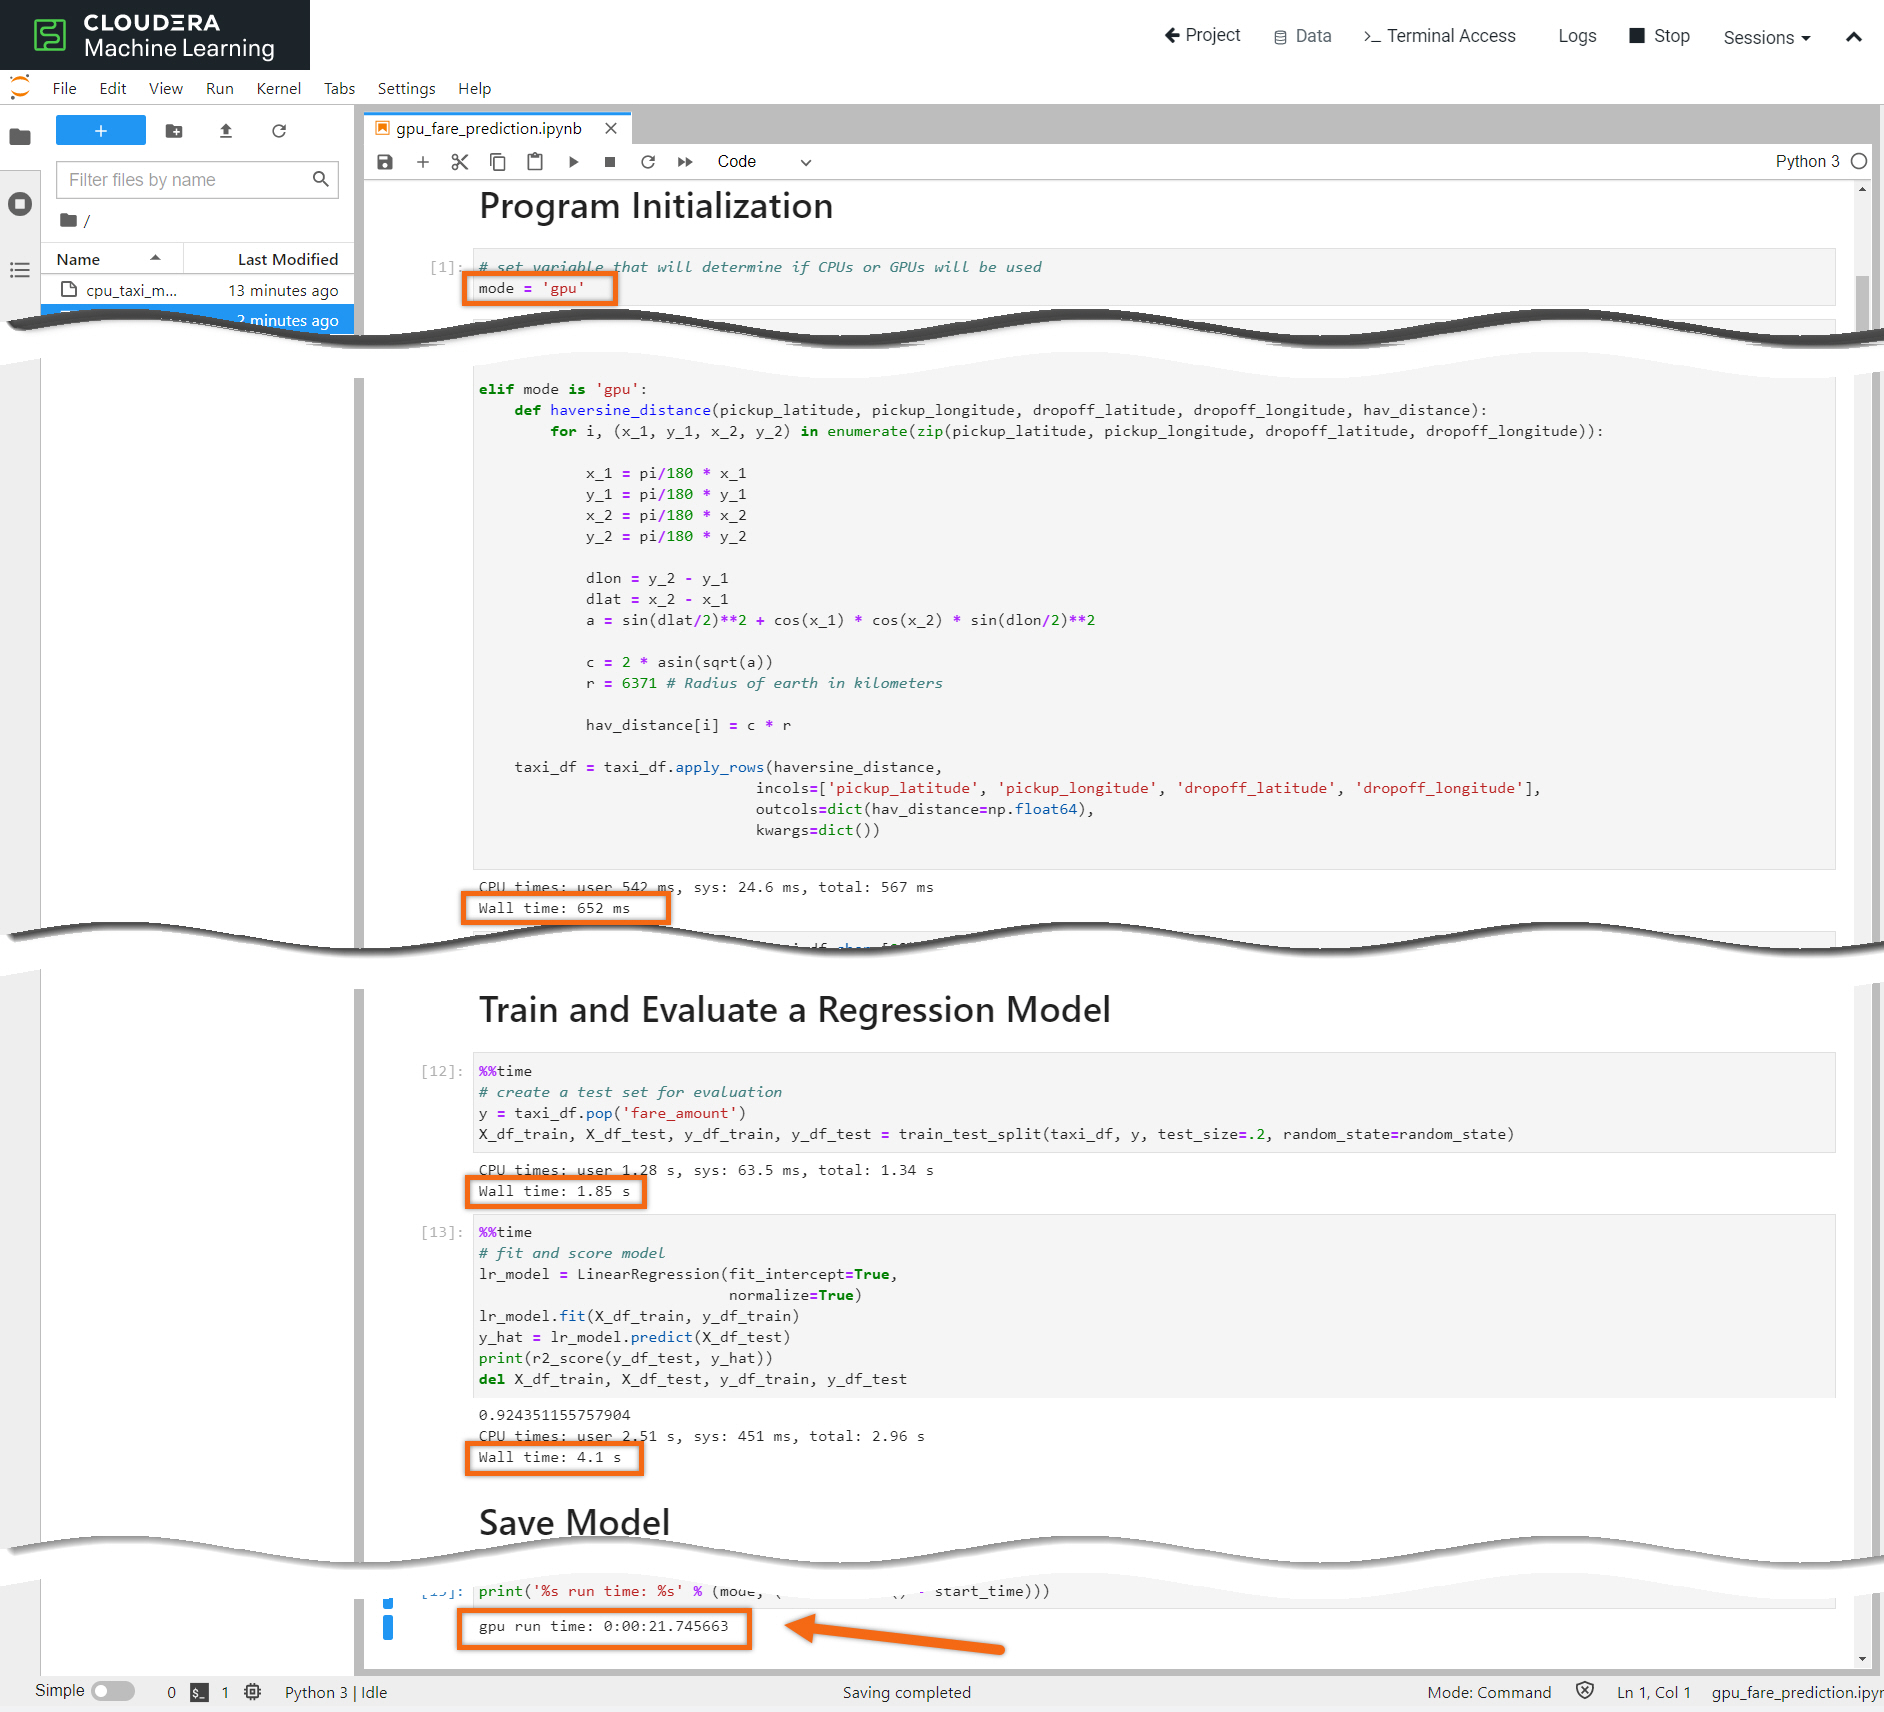
Let’s make a simple change to run the program and run it using GPUs - change mode = ‘gpu’. Run all the cells by selecting Kernel > Restart Kernel and Run All Cells..., then click Restart.
Notice the time spent calculating the Haversine formula is now insignificant due to the multi-threaded functionality of the Rapids framework.
What changed? If you look at the import statements, located in the Program Initialization section, you’ll notice that we bound GPU libraries to the same name as we bound the CPU libraries.
For example, instead of import pandas as pd we used import cudf as pd when mode = ‘gpu’.
The syntax between the two libraries are so similar, that in most cases you can simply switch out your common machine learning libraries and achieve up to 60x performance improvements.
The instances where the syntax is different between the CPU libraries and the RAPIDS GPU libraries can be found where there are if statements in the notebook. There are only two of them. The first is when importing date type columns from a CSV. The second is when applying a user-defined function.
Summary
Congratulations on completing the tutorial.
As you’ve now experienced, the NVIDIA’s RAPIDS framework has a familiar look and feel to other common machine learning libraries. This is great because no major code re-write is needed to obtain the benefits of the RAPIDS libraries. It allowed us to harness the GPU power and see significant speed improvements compared to other commonly used machine learning libraries.


