Introduction
Data Lifecycle - data enrichment. This tutorial will walk you through running a simple PySpark job to enrich your data using an existing data warehouse. We will use Cloudera Data Engineering on Cloudera on cloud.
Prerequisites
- Have access to Cloudera on cloud
- Have access to a virtual warehouse for your environment. If you need to create one, refer to From 0 to Query with Cloudera Data Warehouse
- Have created a Cloudera workload User
- Ensure proper Data Engineering role access
- DEAdmin: enable Data Engineering and create virtual clusters
- DEUser: access virtual cluster and run jobs
- Basic AWS CLI skills
Download assets
There are two (2) options in getting assets for this tutorial:
It contains only necessary files used in this tutorial. Unzip tutorial-files.zip and remember its location.
It provides assets used in this and other tutorials; organized by tutorial title.
Using AWS CLI, copy the following files to S3 bucket, defined by your environment’s storage.location.base attribute:
car_installs.csv
car_sales.csv
customer_data.csv
experimental_motors.csv
postal_codes.csv
Note: You may need to ask your environment's administrator to get property value for storage.location.base.
For example, property storage.location.base has value s3a://usermarketing-cdp-demo, therefore copy the files using the command:
aws s3 cp . s3://usermarketing-cdp-demo --recursive --exclude "*" --include "*.csv"

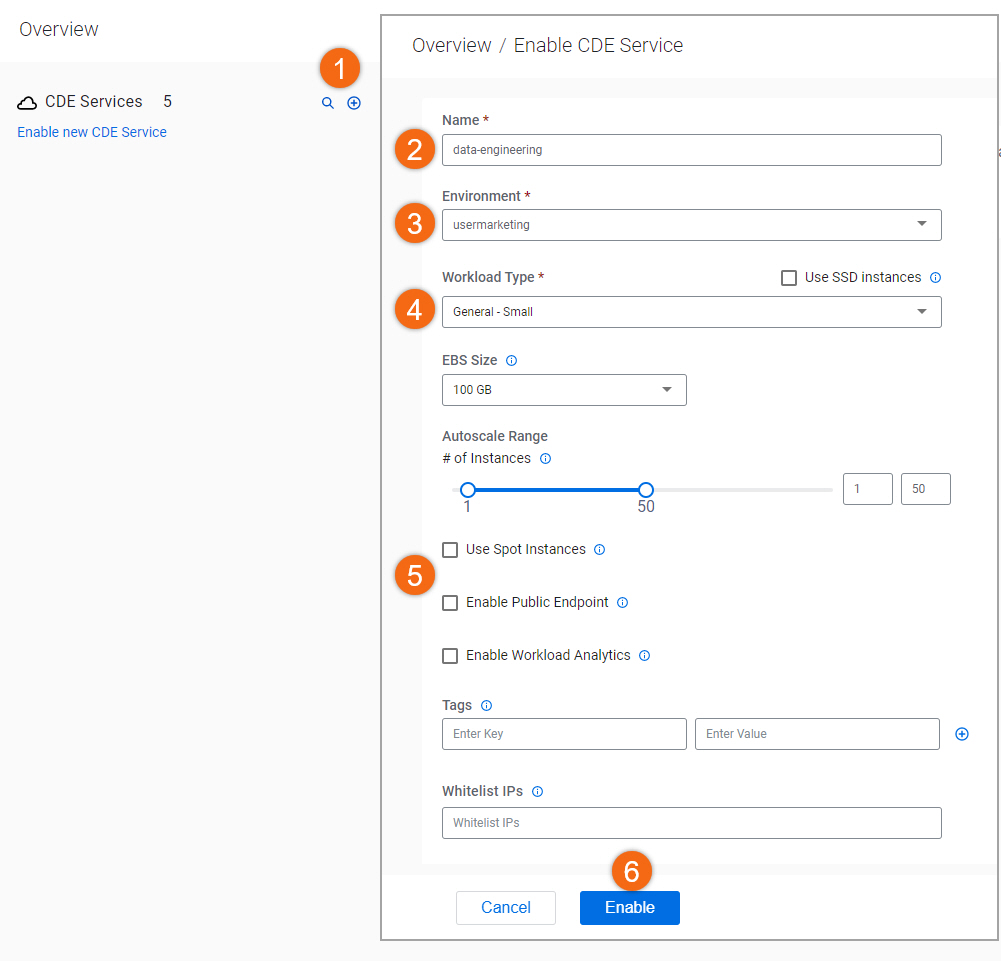
- Click on
 to enable new Cloudera Data Engineering service
 - Name:
data-engineering - Environment: <your environment name>
- Workload Type: General - Small
- Make other changes (optional)
- Enable
Create Data Engineering virtual cluster
If you don’t already have a Data Engineering virtual cluster created, let’s create one.
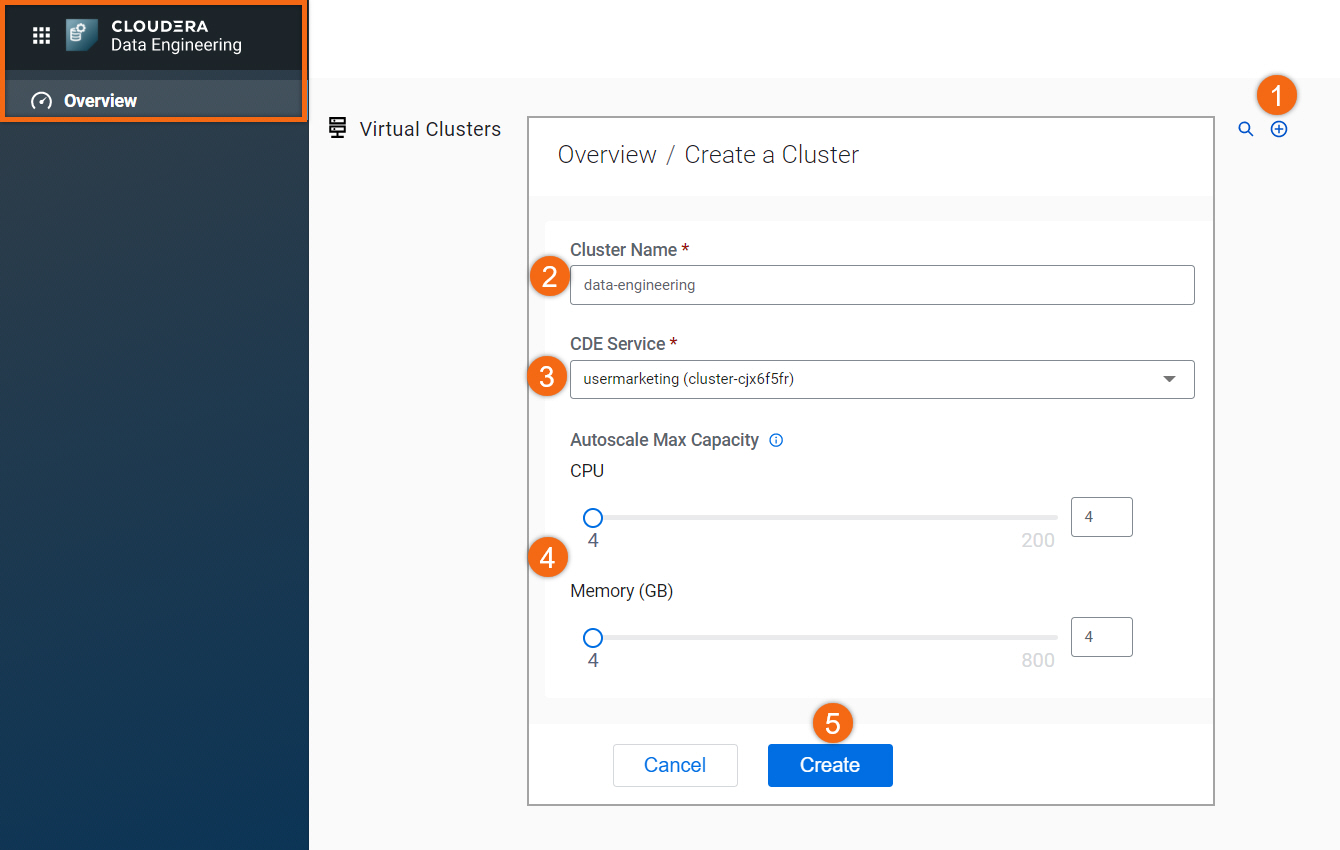
Starting from Cloudera Data Engineering > Overview:
- Click on
 to create cluster
 - Cluster Name:
data-engineering - CDE Service: <your environment name>
- Autoscale Max Capacity: CPU:
4, Memory4GB - Create
Create and run jobs
We will be using the GUI to run our jobs. If you would like to use the CLI, take a look at Using CLI-API to Automate Access to Cloudera Data Engineering.
In your virtual cluster, view jobs by selecting ![]() .
.

We will create and run two (2) jobs:
- Pre-SetupDW
As a prerequisite, this PySpark job creates a data warehouse with mock sales, factory and customer data.
IMPORTANT: Before running the job, you need to modify one (1) variable in Pre-SetupDW.py. Update variable s3BucketName definition using storage.location.base attribute; defined by your environment.
- EnrichData_ETL
Bring in data from Cloudera Data Warehouse (CDW), filter out non-representative data, and then join in sales, factory, and customer data together to create a new enriched table and store it back in CDW.
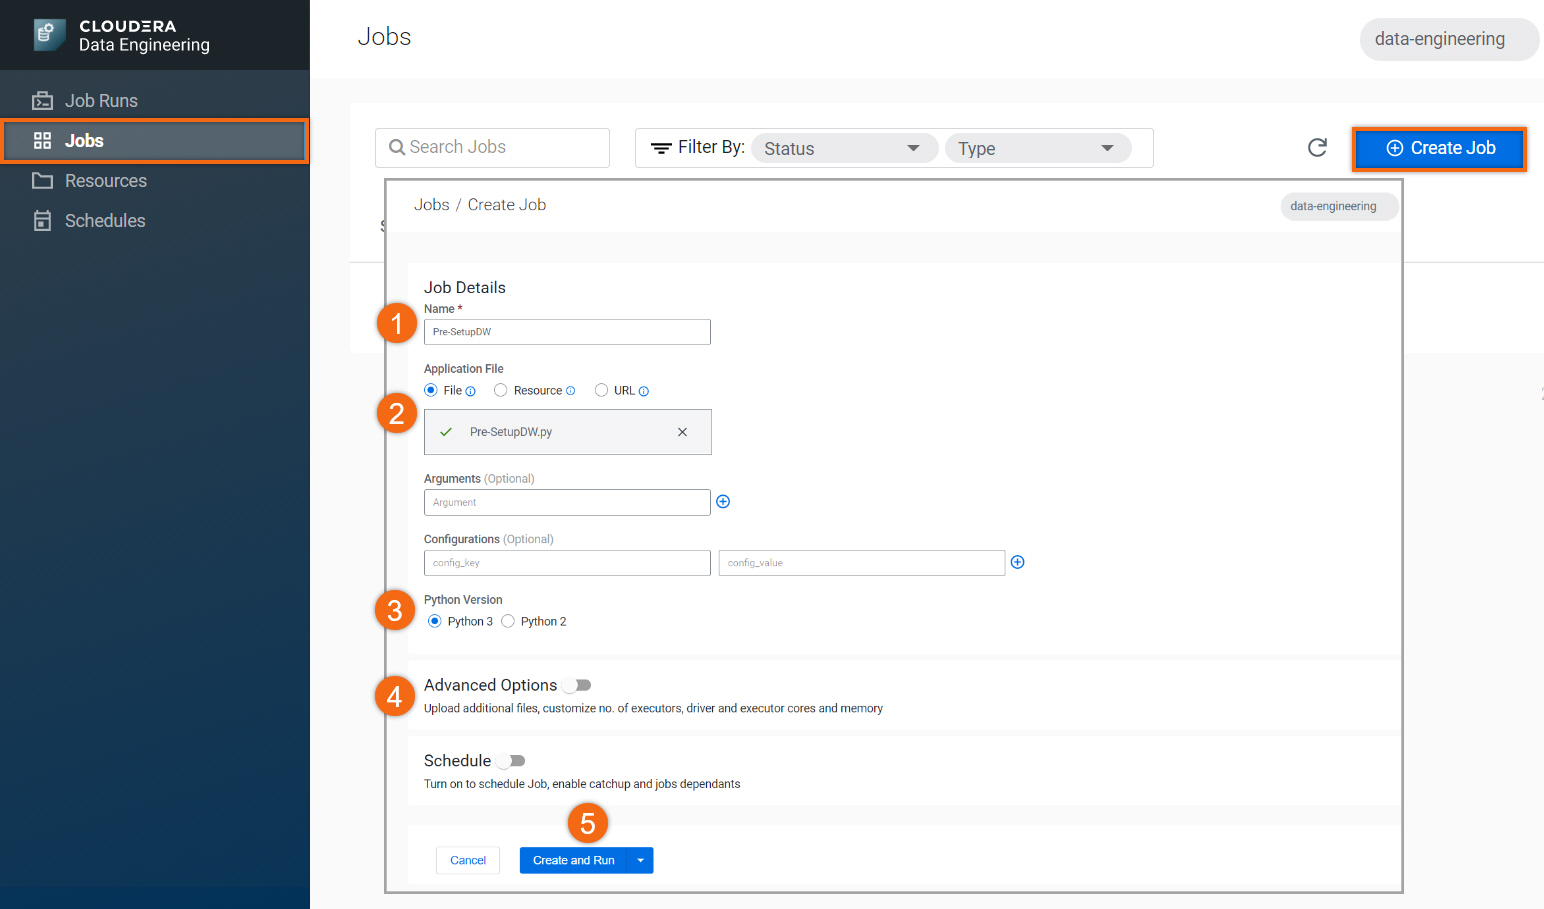
In the Jobs section, select Create Job to create a new job:
- Name:
Pre-SetupDW - Upload File: Pre-SetupDW.py (provided in download assets)
- Select Python 3
- Turn off Schedule
- Create and Run
Give it a minute for this job to complete and create the next job:
- Name:
EnrichData_ETL - Upload File: EnrichData_ETL.py (provided in download assets)
- Select Python 3
- Turn off Schedule
- Create and Run
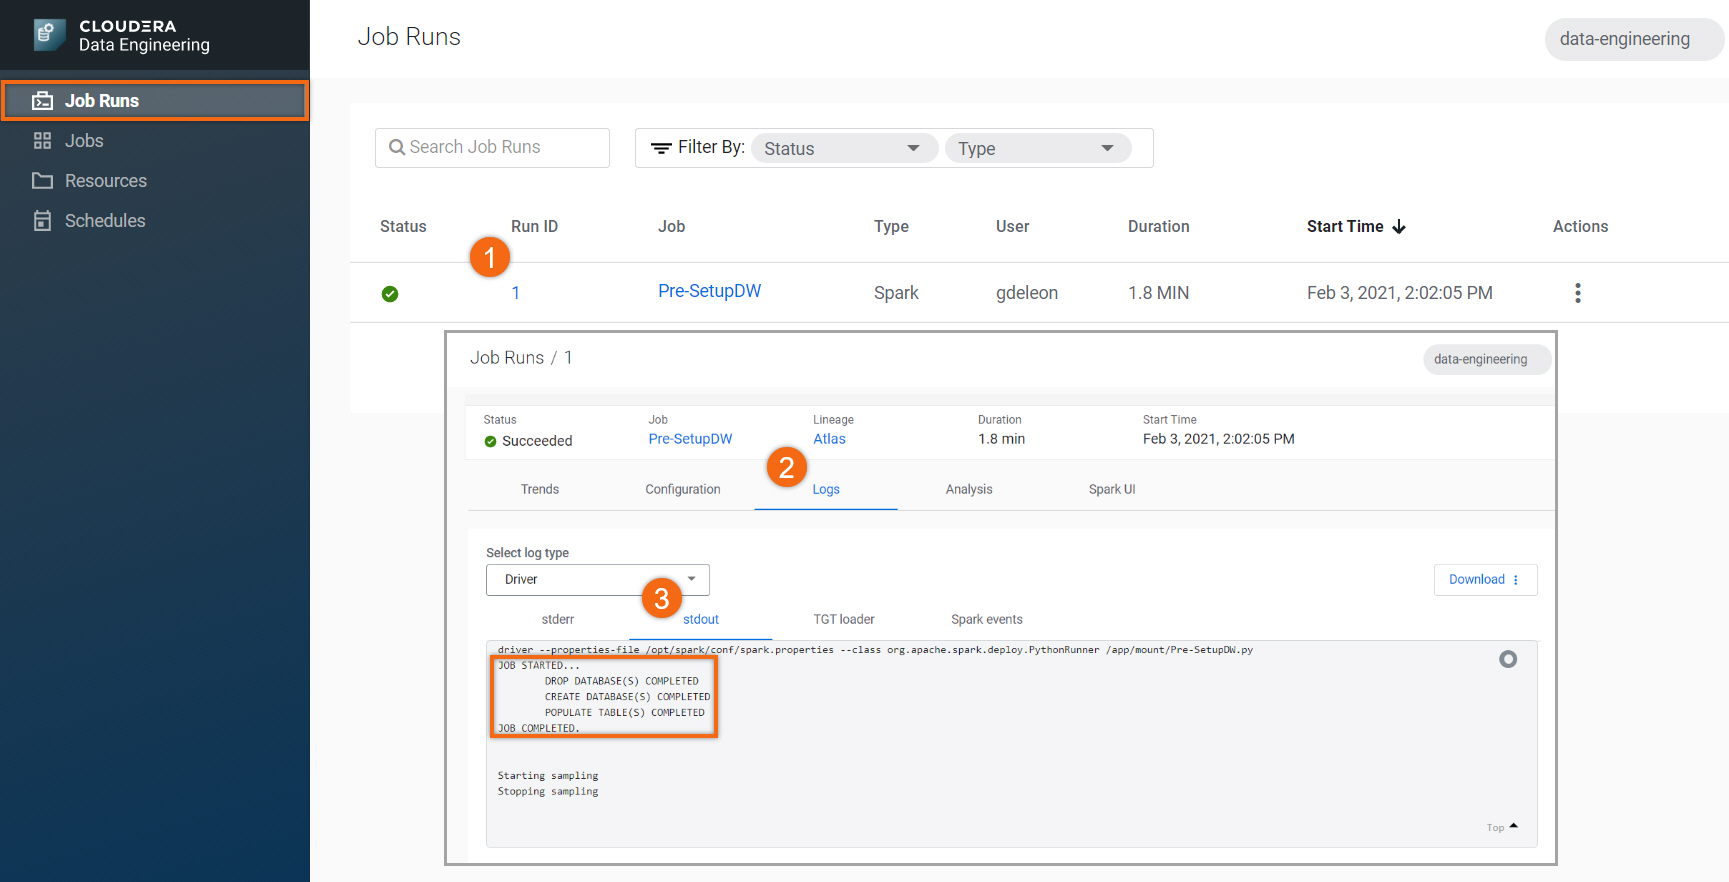
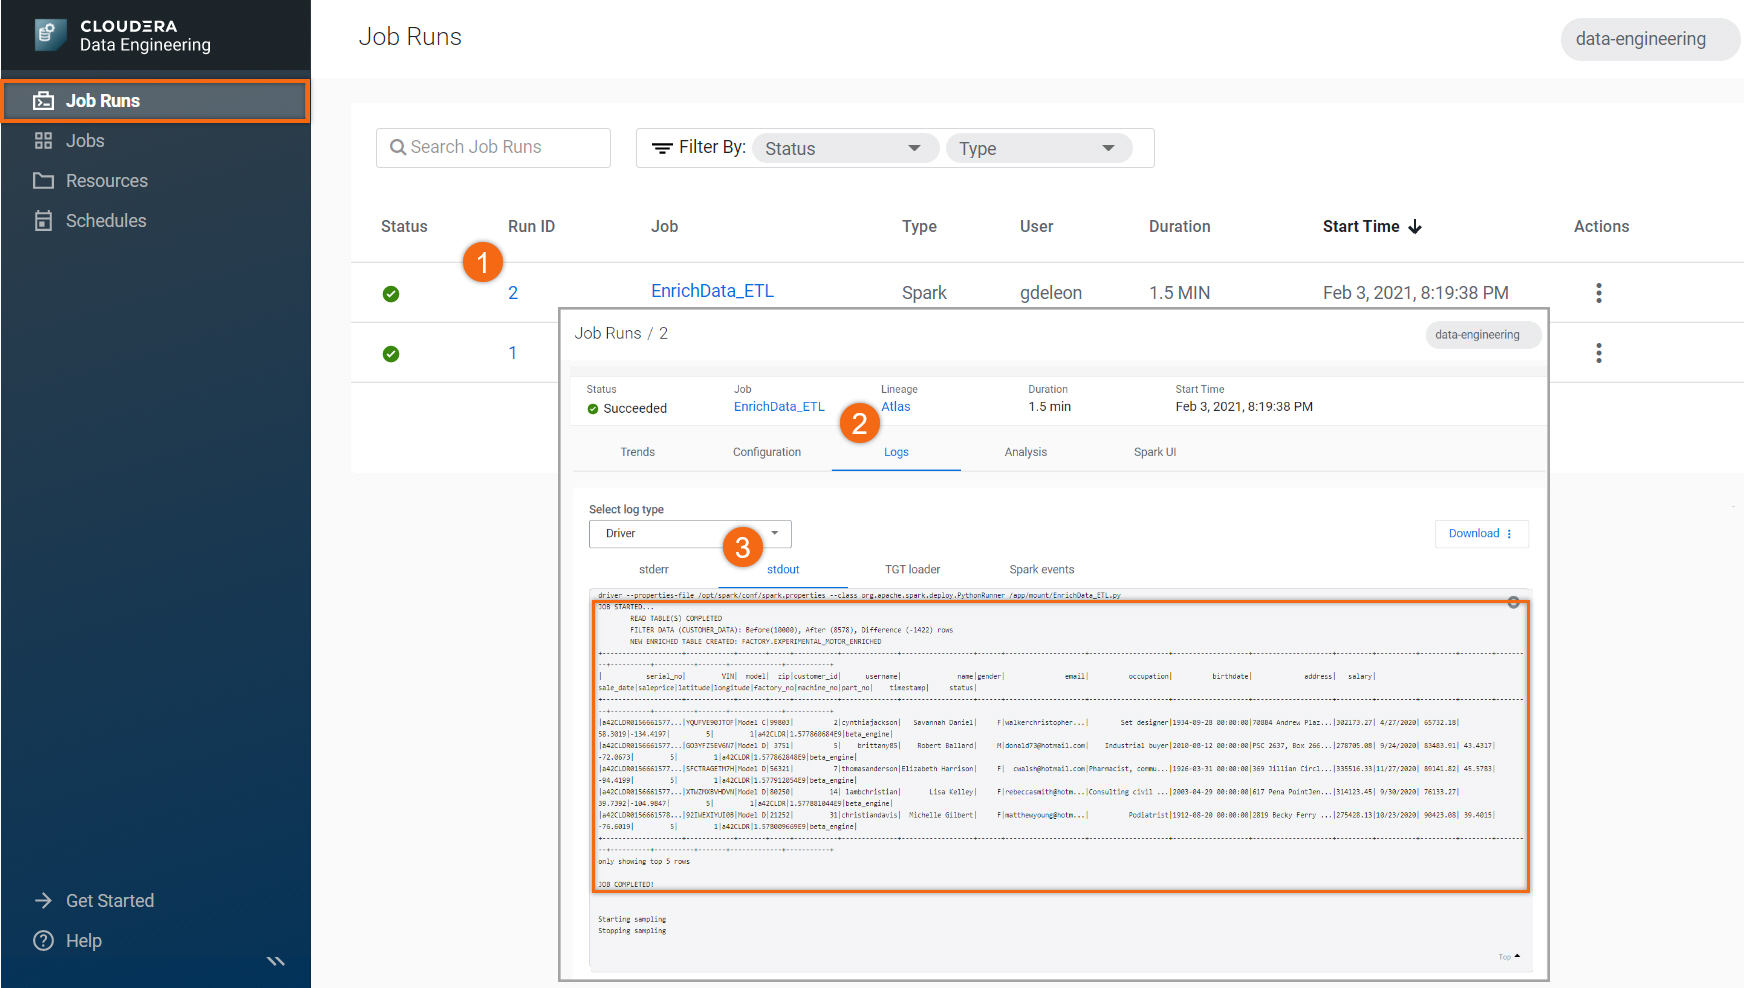
Next, let’s take a look at the job output for EnrichData_ETL:
Select Job Runs tab.
- Select the Run ID number for your Job name
- Select Logs
- Select stdout
The results should look like this:
Further reading
Tutorials
Other
- Have a question? Join Cloudera Community
- Cloudera Data Engineering documentation

