Cloudera
Unlock the potential of data on premises and in the cloud with the industry’s only true hybrid data, analytics, and AI platform.

The ultimate flexibility in hybrid data management and data analytics.
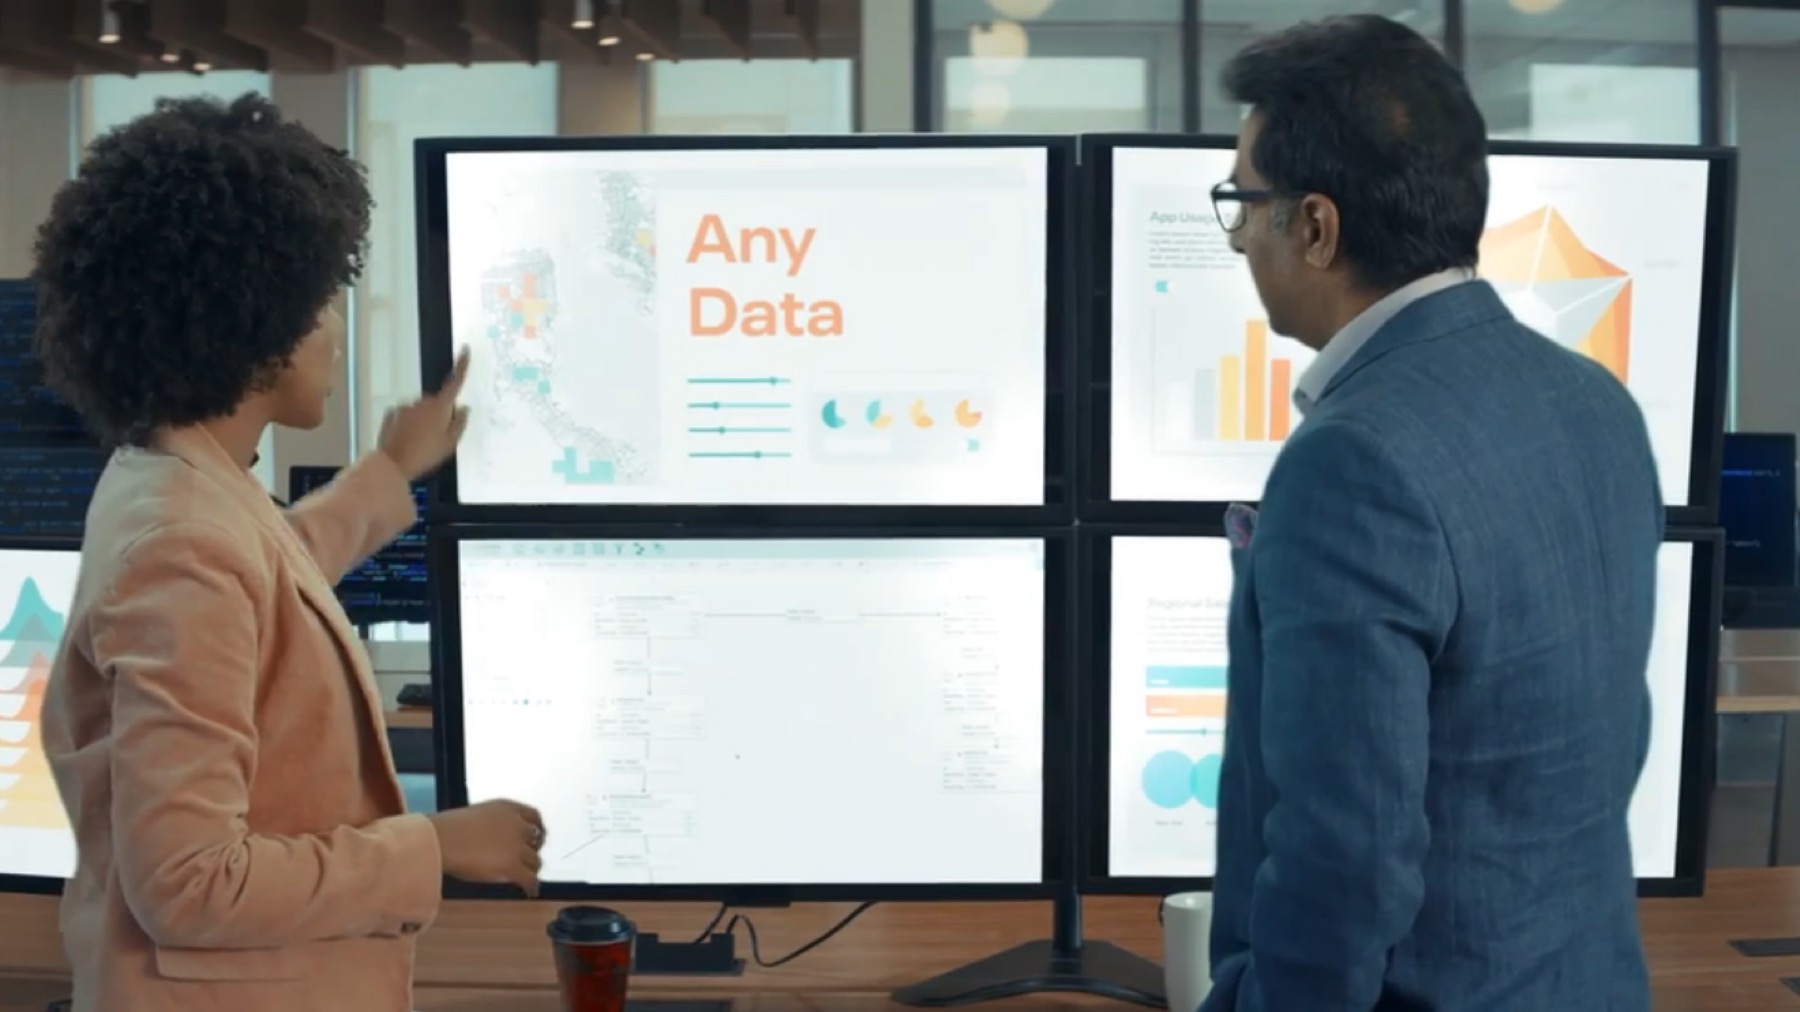
Cloudera is a hybrid data platform designed for unmatched freedom to choose—any cloud, any analytics, any data.
Cloudera delivers faster and easier data management and data analytics for data anywhere, with optimal performance, scalability, and security.
With Cloudera you get all the advantages of private cloud and public cloud for faster time to value and increased IT control.
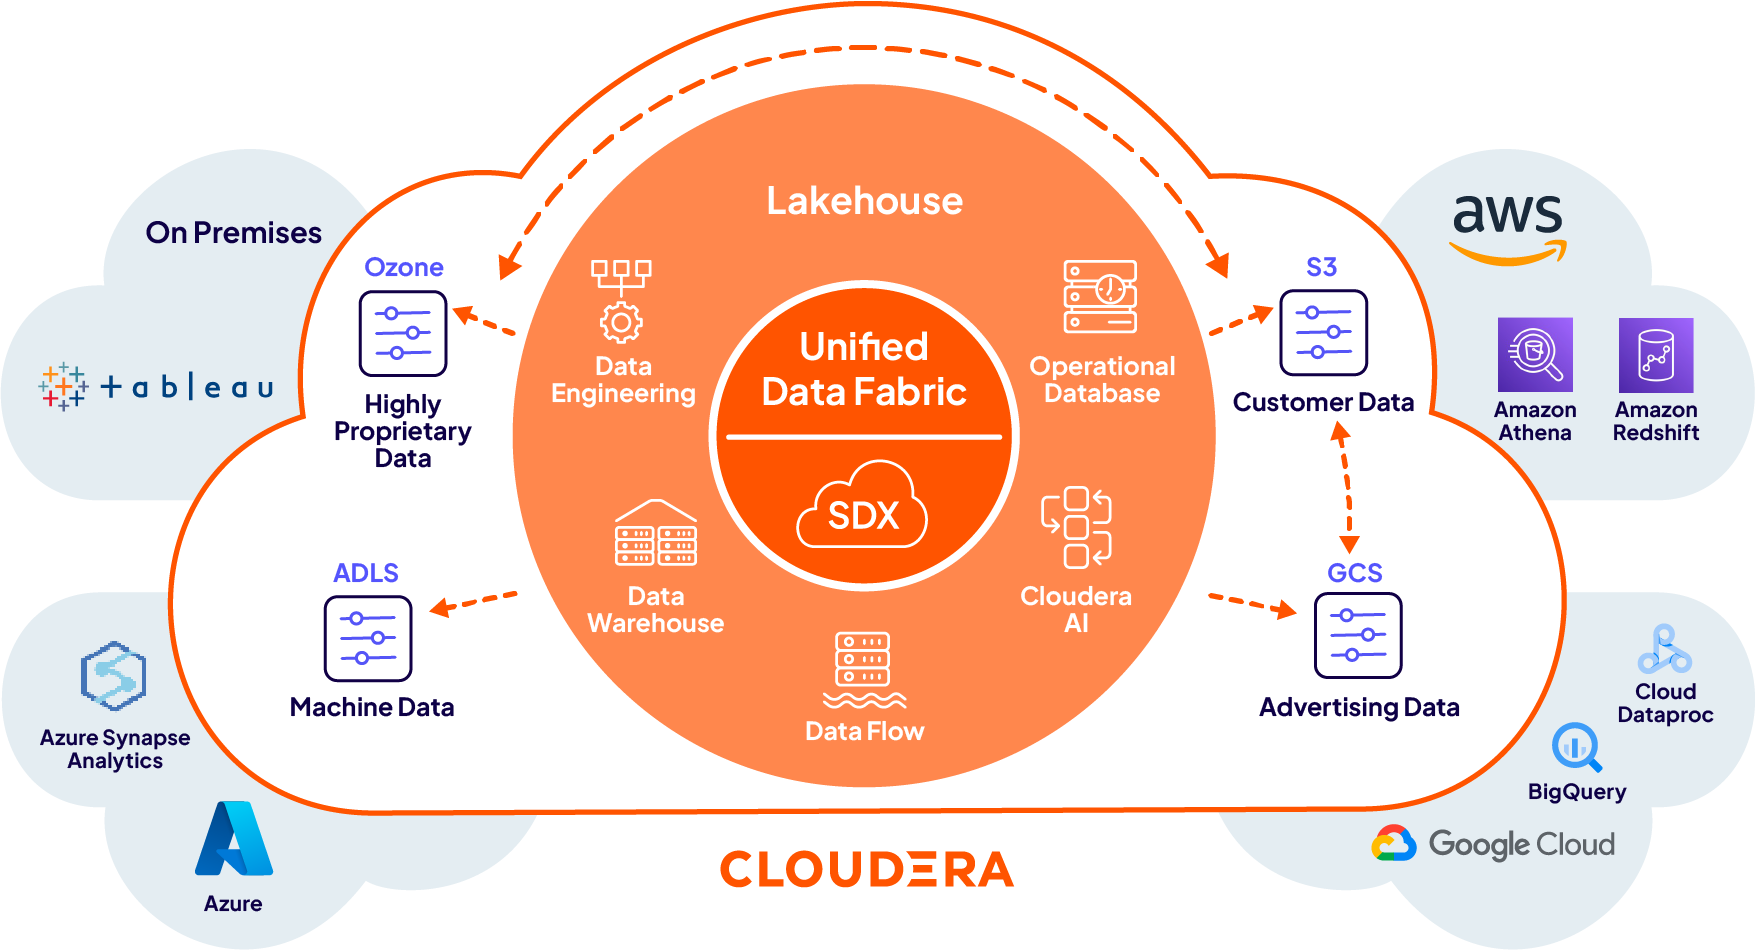
Get value from all your data with a unified data fabric, open data lakehouse, and scalable data mesh
Cloudera provides the freedom to securely move data, applications, and users bi-directionally between the data center and multiple data clouds, regardless of where your data lives.
Designed to handle complexity automatically—so you don't have to
- Open & Scalable
- Multi-Cloud & On Premises
- Portable Data Analytics
- Unified Security
Open & scalable
Open data fabrics, data lakehouses, and data meshes with data anywhere at scale.
Reap the rewards of Cloudera's open-source pedigree and interoperability to address existing critical issues and anticipate future needs. Turn any data into fuel for your digital transformation engine through modern data architectures for petabyte-scale data meshes, unified data fabrics, and the world’s only data lakehouses powered by Apache Iceberg.
Multi-cloud & on premises
Extend powerful AI-powered data applications across your business—faster, easier, and more reliably.
Only Cloudera has the power to span multi-cloud and on premises with a hybrid data platform that delivers cloud-native data analytics across the full data lifecycle—data distribution, data engineering, data warehousing, transactional and operational data, streaming data, and data science and machine learning—with a consistent experience that’s portable across infrastructures.
Portable data analytics
Moving data and applications among clouds or back on premises as business conditions change is an imperative.
Implementing a new use case requires more than a point solution that only runs in the cloud. Cloudera's unified platform enables portable, interoperable data analytics for the full data lifecycle and distributed, consistent data management running on public clouds, on premises, and at the edge. No more refactoring, no more redevelopment.

Unified security
Meet the compliance needs of even the most regulated industries with a unified data fabric.
Consistent policy-based controls across private and public clouds are required for both hybrid success and portable data and services. A unified data fabric, powered by Cloudera SDX, orchestrates disparate data sources intelligently and securely, maintaining lineage across all analytics. SDX facilitates self-service access to trusted data while maintaining accountability and ensuring regulatory compliance.
Deploy on any cloud instantly
Leverage easy and automated onboarding for Cloudera on cloud deployments to more quickly enable your IT, analytic, and data science teams to deliver business impact.
Boost decision making and growth by adopting a true hybrid platform
Learn how this strategy reduces costs, complexity, and risks to compliance.
Cloudera is the only vendor for a truly hybrid data platform
| Cloudera | Point data solutions Snowflake, Databricks, Confluent, etc. |
Hyperscale data solutions Redshift, EMR, Synapse, BigQuery, etc. |
|
Open & scalable |
Some | ||
Multi-cloud & on premises |
Some | ||
Portable data analytics |
|||
Unified security |
Must integrate | Some |
Flexibility, performance, and compliance drive customer hybrid cloud adoption
Experian
Using commercial data to assign credit scores to tens of millions of U.S. businesses

Use AI Via an End-to-End Data Lakehouse to Increase Data Lifecycle Efficiency
The future is hybrid. So is Cloudera.
Finally, a hybrid data platform that delivers the data services your business needs, no matter where your data is. Cloudera delivers the best of public and private clouds. No more sacrificing the needs of the business due to the constraints of IT.
- Faster time to business insights and increased IT controls
- High performance and low cost
- Petabyte data scale and bursty data jobs
- Purpose-built for data engineers and data scientists
- Easy-to-build complex applications and simple dashboards

Enterprise-grade security and governance
Cloudera SDX combines enterprise-grade centralized security, governance, and management capabilities with shared metadata and a data catalog, eliminating costly data silos, preventing lock-in to proprietary formats, and eradicating resource contention. Now all users and administrators can enjoy the advantages of a shared data experience.
Cloudera is available in form factors across hybrid cloud
-
Cloudera on cloud
-
Cloudera on premises
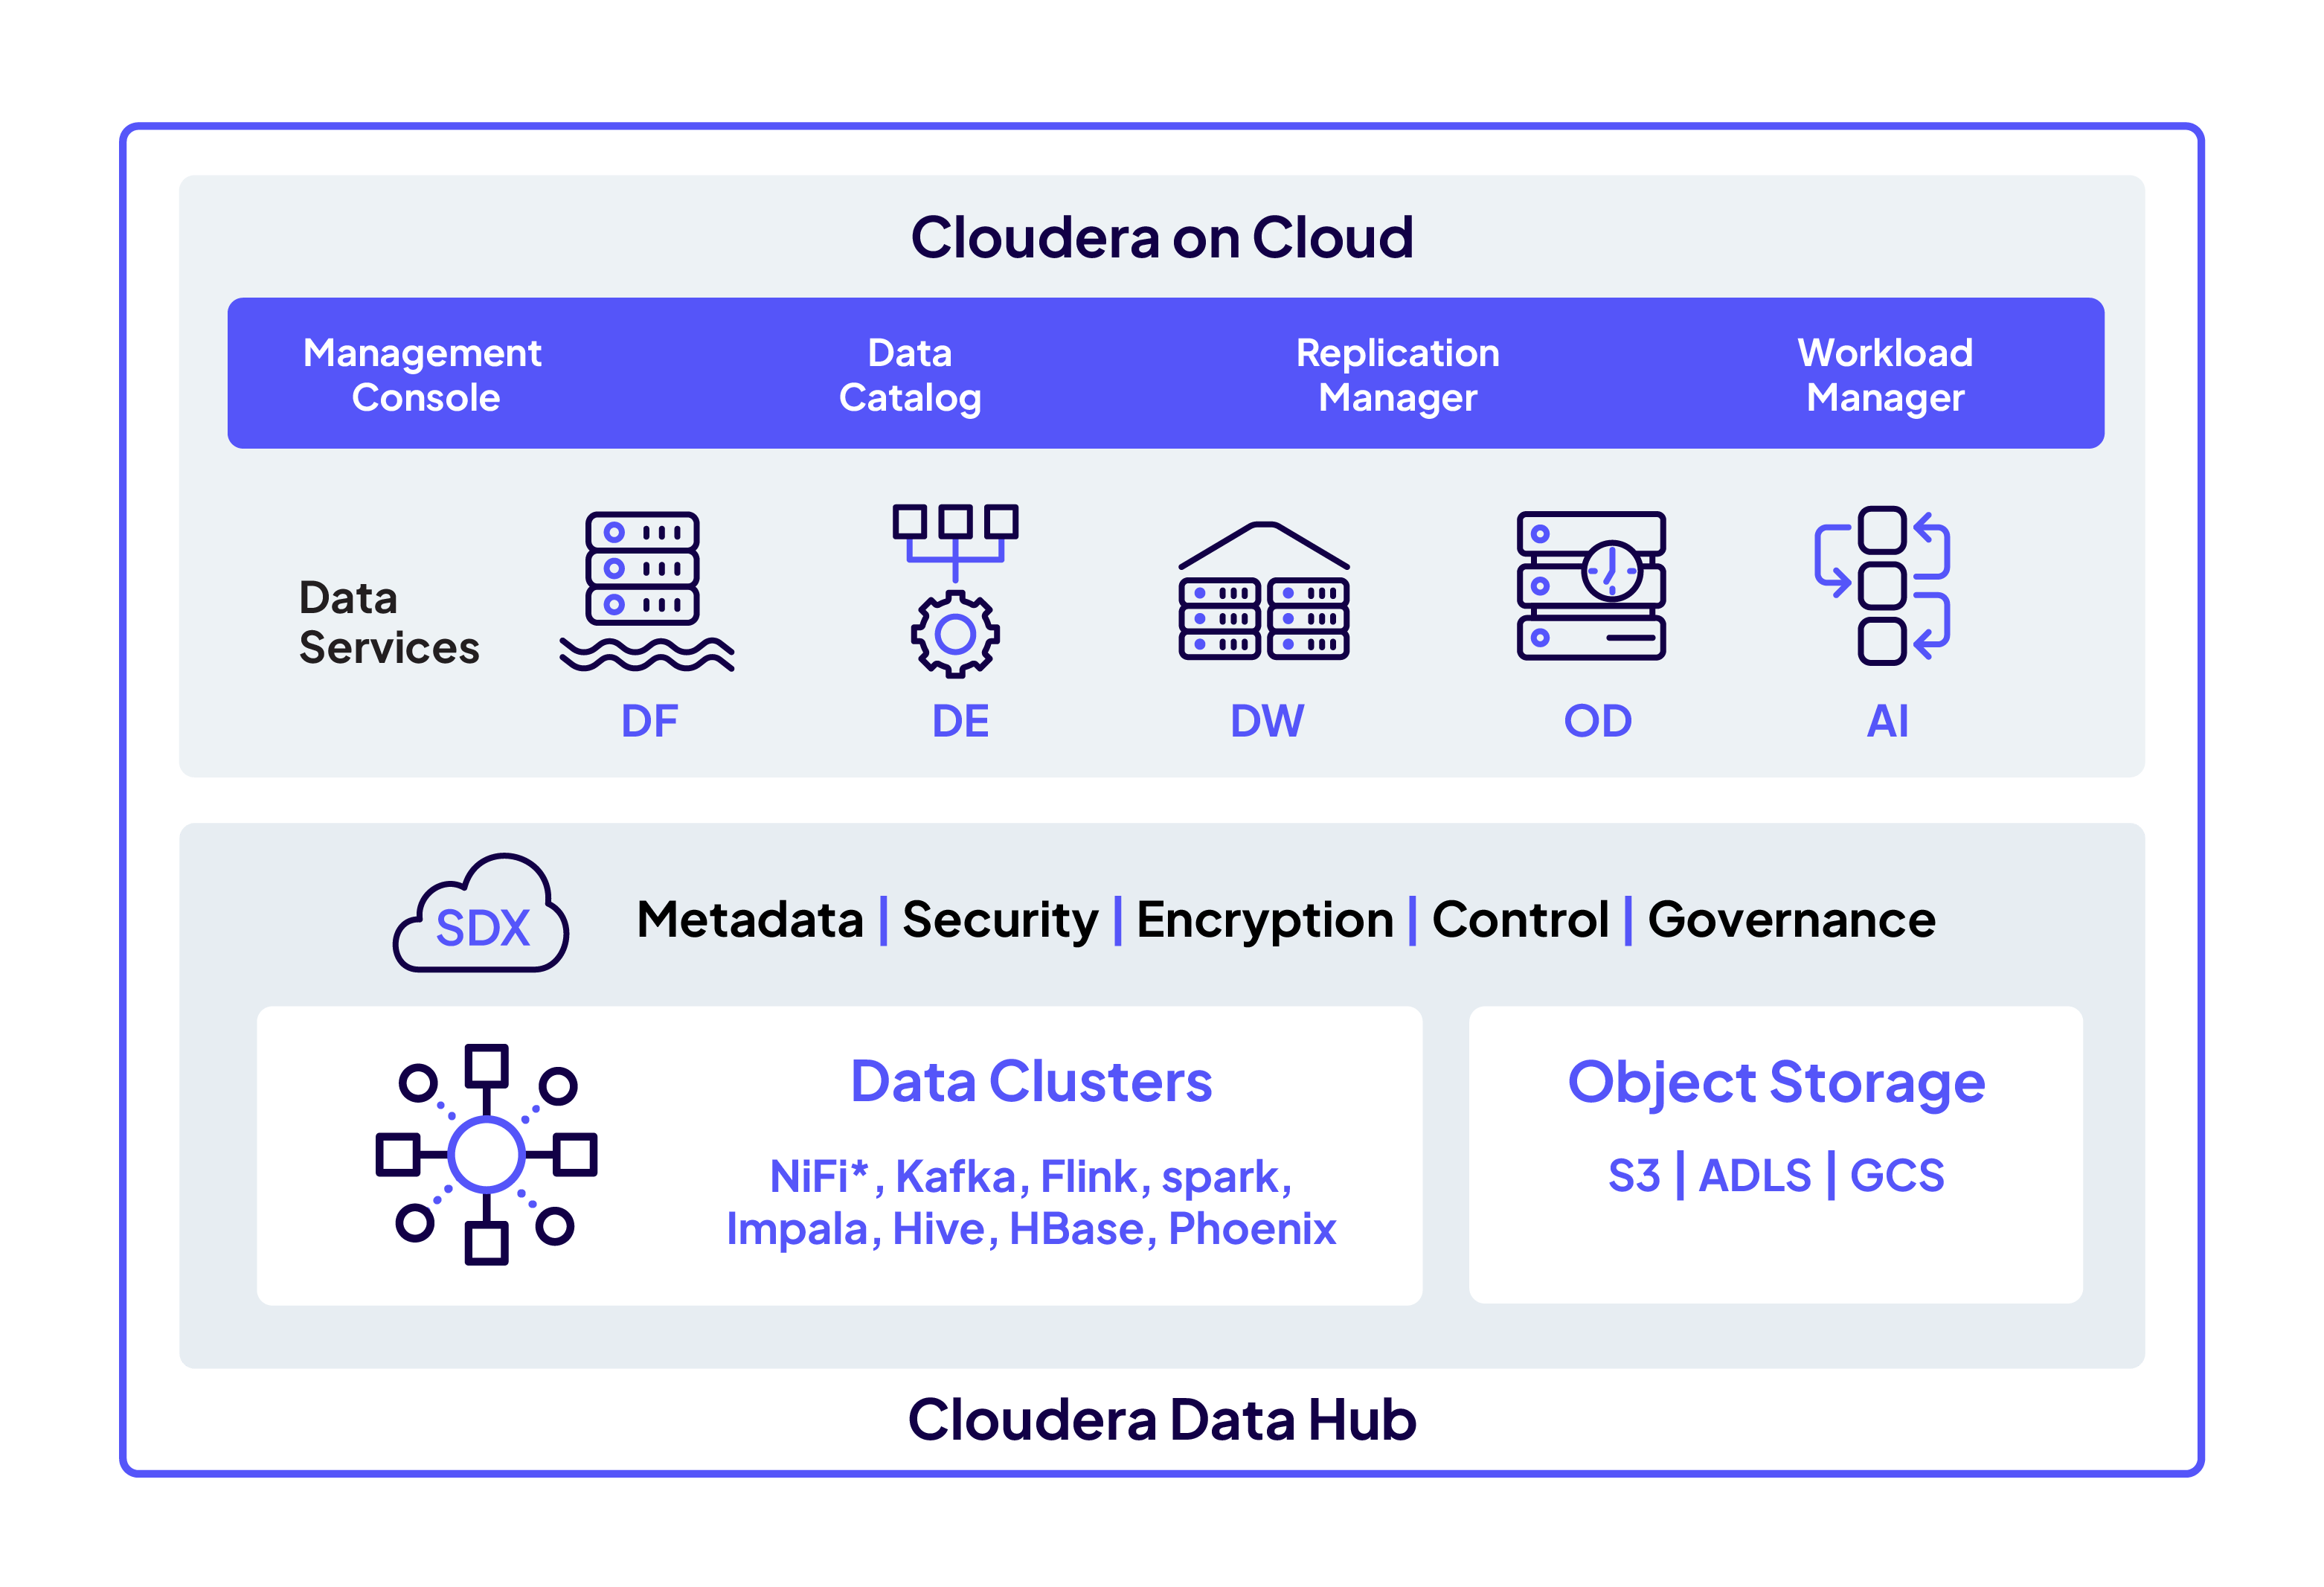
Cloudera on cloud
Create and manage secure data lakes, self-service analytics, and machine learning services without installing and managing the data platform software. Cloudera on cloud data services are managed by Cloudera, but unlike other public cloud services, your data will always remain under your control in your VPC. Cloudera runs on AWS, Azure, and Google Cloud.
Cloudera on cloud lets you:
- Control cloud costs by automatically spinning up workloads when needed and suspending their operation when complete
- Isolate and control workloads based on user type, workload type, and workload priority
- Combat proliferating silos and centrally control customer and operational data across multi-cloud and hybrid environments
(Formerly known as Cloudera Machine Learning) Accelerate AI innovation and development for data science teams.
Cloudera Data Engineering
Orchestrate, operationalize, and automate complex data pipelines to increase efficiency and accelerate time to value.
Cloudera Data Flow
Collect & move your data from any source to any destination in a simple, secure, scalable and cost-effective way.
Cloudera Data Hub
Simplify building modern, mission-critical data-driven applications with enterprise-grade security, governance, scale, and control.
Cloudera Data Warehouse
Simplify analytics on massive amounts of data to thousands of concurrent users without compromising speed, cost, & security.
Cloudera Operational DB
Bring unparalleled scale and performance to your mission-critical applications while securing future readiness for evolving data models.
Cloudera Streaming
Create real-time streaming analytics applications to gain actionable insights and respond to critical business events.
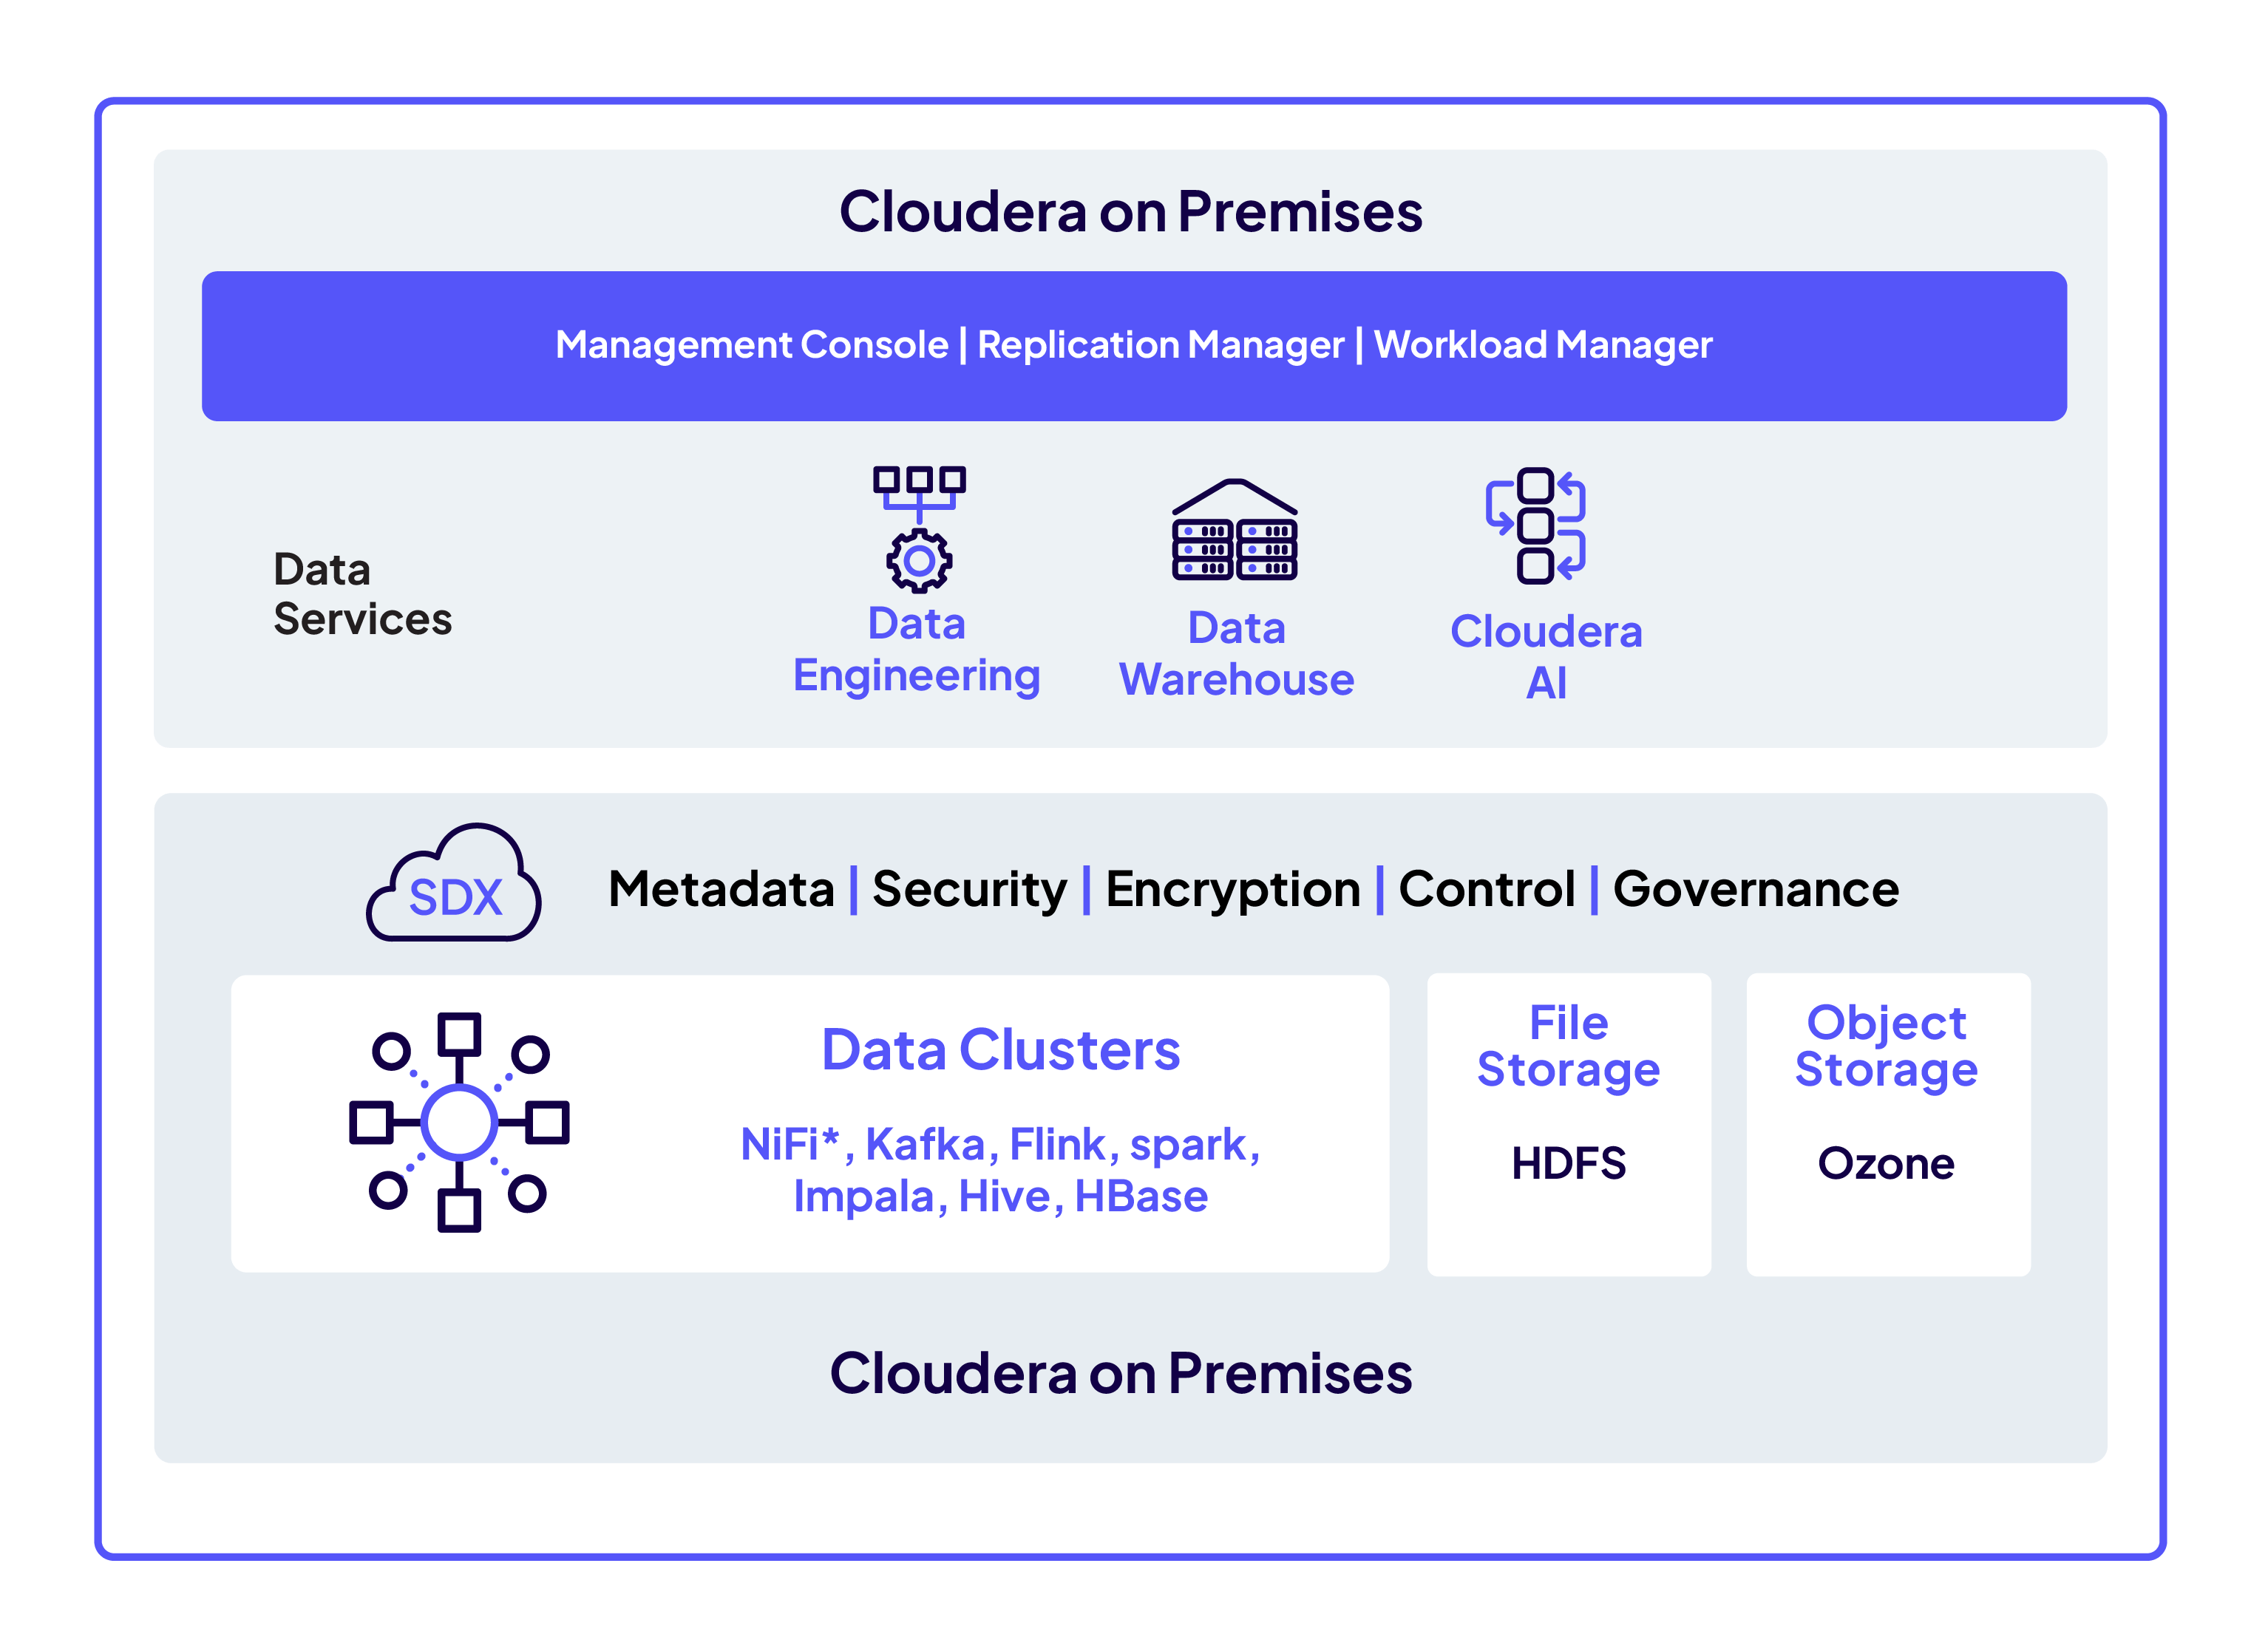
Cloudera on premises
Cloudera on premises delivers powerful analytic, transactional, and machine learning workloads in a hybrid data platform. With a choice of traditional as well as elastic analytics and scalable object storage, Cloudera on premises modernizes traditional monolithic cluster deployments in a powerful and efficient platform.
Cloudera on premises provides the first step for data center customers toward true data and workload mobility, managed from a single pane of glass with consistent data security and governance.
With Cloudera on premises, organizations benefit from:
- Rapid time to value through simplified provisioning of easy-to-use, self-service analytics in minutes rather than days
- Improved cost efficiency with optimized resource utilization and the decoupling of compute and storage
- Predictable performance thanks to workload isolation and perfectly managed multi-tenancy
Cloudera on premises
Cloudera AI
(Formerly known as Cloudera Machine Learning) Accelerate AI innovation from research to production.
Cloudera Data engineering
Orchestrate, operationalize, and automate complex data pipelines to increase efficiency and accelerate time to value.
Cloudera Data Warehouse
Unleash a data warehouse service for all modern, self-service, and advanced analytics use cases at scale.